
webAI: Intro to Building Custom Elements

Note: This article covers the older ElementSDK 0.9.x. The newer webAI ElementSDK is 0.10.x and recommended which is documented here
Overview
webAI is an on-device AI platform that enables organizations to build and deploy AI models in a distributed fashion using commodity hardware. Its key benefits are privacy, time-to-market, cost-efficiency, and accuracy. I previously wrote a blog that explores the platform in more depth.
In this article, we focus on integrating external tools, services, and APIs into webAI Navigator by creating custom elements.
Custom Element
An element is a building block used to create workflows in Navigator. There are many pre-packaged elements (with more added regularly), but the true power comes from customizing or even building your own.
Elements are Python packages that define the following:
- Inputs
- Outputs
- Settings
- Decorators
An element can have an input, an output, both, or neither.
| I/O | Example |
|---|---|
| Input | Element that inspects or otherwise processes incoming data |
| Output | Element that ingests data and forwards it to another element |
| Input & Output | Element that processes input, performs a transformation, and passes the result to another element |
| None | Stand-alone element (e.g., for model training or dataset generation) |
Element Inputs and Outputs
Data is passed between elements in what is called a Frame.
Frame(
      ndframe=None,
      rois=[],
      frame_id=None,
      headers=None,
      other_data={"message": "Hello"},
)
Depending on an element’s purpose, different parts of the Frame matter most:
ndframefor tabular data or pre-processingroisfor regions of interest in vision use casesother_datafor miscellaneous payloads
Element Definition
An element definition specifies its ID, metadata, settings, and I/O:
element: Element = Element(
    id=UUID("c382bdae-6680-4c64-a647-4b89fcba860b"),
    name="helloworld",
    display_name="helloworld",
    description="",
    version="0.1.0",
    settings=Settings(),
    inputs=Inputs(),
)
Element Settings
Element settings enable dynamic user interaction. Three setting types are available: TextSetting, BoolSetting, and NumberSetting.
TextSetting
The TextSetting enables a input text-box in the Element UI:
text_setting = TextSetting(
   name="hellowolrd",
   display_name="HelloWorld",
   default="HelloWorld",
)
BoolSetting
bool_setting = BoolSetting(
   name="bool_setting",
   display_name="A Dropdown Toggle",
   default=True,
   description="Whether Dropdown should be displayed",
   required=False,
)
NumberSetting
number_setting = NumberSetting[int](
   name="number",
   display_name="A Number",
   description="This is a number",
   default=10,
   min_value=1,
   step=1,
)
Hints
Some settings support hints that modify their rendered appearance:
| Class | Hint | Description |
|---|---|---|
TextSetting |
"dropdown" |
Renders a select box populated with valid_values |
TextSetting |
"folder_path" |
Renders a folder picker |
dropdown_setting = TextSetting(
   name="dropdown_setting",
   display_name="Dropdown Setting",
   default="item1",
   description="An Item",
   valid_values=[
      "item1",
      "item2",
      "item3",
   ],
   hints=["dropdown"],
   required=False,
)
Element Decorators
Elements have three decorators which need to be implemented: startup, shutdown, and run.
Startup Decorator
Instructs what should occur when the element is started.
@element.startup
async def startup(ctx: Context[Inputs, None, Settings]):
    print("***** HelloWorld Element Startup *****")
Shutdown Decorator
Instructs what should occur when the element is shutdown.
@element.shutdown
async def shutdown(ctx: Context[Inputs, None, Settings]):
    print("***** HelloWorld Element Shutdown *****")
Run Decorator
Instructs what should occur when the element is run (most code goes here).
@element.executor
async def run(ctx: Context[Inputs, None, Settings]):
   input_frame = ctx.inputs.input.value

    print(f"Frame: {input_frame.frame_id} {input_frame.headers} {input_frame.content_type} {input_frame.as_text} {input_frame.ndframe} {input_frame.other_data}")
Create Element
The WebAI CLI can scaffold, version, and manage your elements.
Install latest cli
$ brew tap thewebAI/webai
$ brew install webai
Initialize element
$ webai element init

✔ Enter a display name for the new element: … helloworld
✔ Select boilerplate verbosity level: › Guided - Step-by-step examples with detailed explanations (recommended for first time users)
✔ Directory structure created
✔ Python files generated
✔ Dependencies installed successfully

✨ Success! Created new element at ./helloworld

Next steps:
━━━━━━━━━━━━━━━━━━━━━━━━━━━━━━━━━━━━━━━━
1. Navigate to the project directory:
   cd helloworld

2. Activate the virtual environment:
   source venv/bin/activate

3. Add dependencies to requirements.txt
   pip install -r requirements.txt

4. Start developing your element in __init__.py
━━━━━━━━━━━━━━━━━━━━━━━━━━━━━━━━━━━━━━━━
Validate python:
$cd hellowolrd
python -c "import sys; print(sys.executable)"
/Users/ktenzer/python/webai-element-helloworld/helloworld/venv/bin/python
Set Interpreter in VS Code:
{
  "python.analysis.extraPaths": [
    "/Users/ktenzer/python/webai-element-helloworld/helloworld/venv/lib/python3.12/site-packages"
  ]
}
Import Element
Once we have put together our element, we can import it into Navigator.
$ cd helloworld
$ webai element import .

✔ Element directory found
⚠ Notice: An element with version 0.1.3 has already been imported.
✔ What would you like to do? › Bump version and retry
✔ Current version: 0.1.3
✔ Which part of the version would you like to increment? › Patch (0.1.4) - Bug fixes (recommended)
✔ Updated version in setup.py
✔ Updated version in __init__.py
ℹ publish.json not found, generating it...
✔ Element directory found
✔ Element packaged successfully

✨ Success! Packaged element is 2fa338eb-6e3d-5706-8627-95ced48a03c8.zip

Next step: Import your element with webai element import helloworld
✔ Generated publish.json with new version
✔ Successfully bumped version from 0.1.3 to 0.1.4
✔ Element directory found
✔ Element imported successfully

✨ Success! Imported element "." successfully.
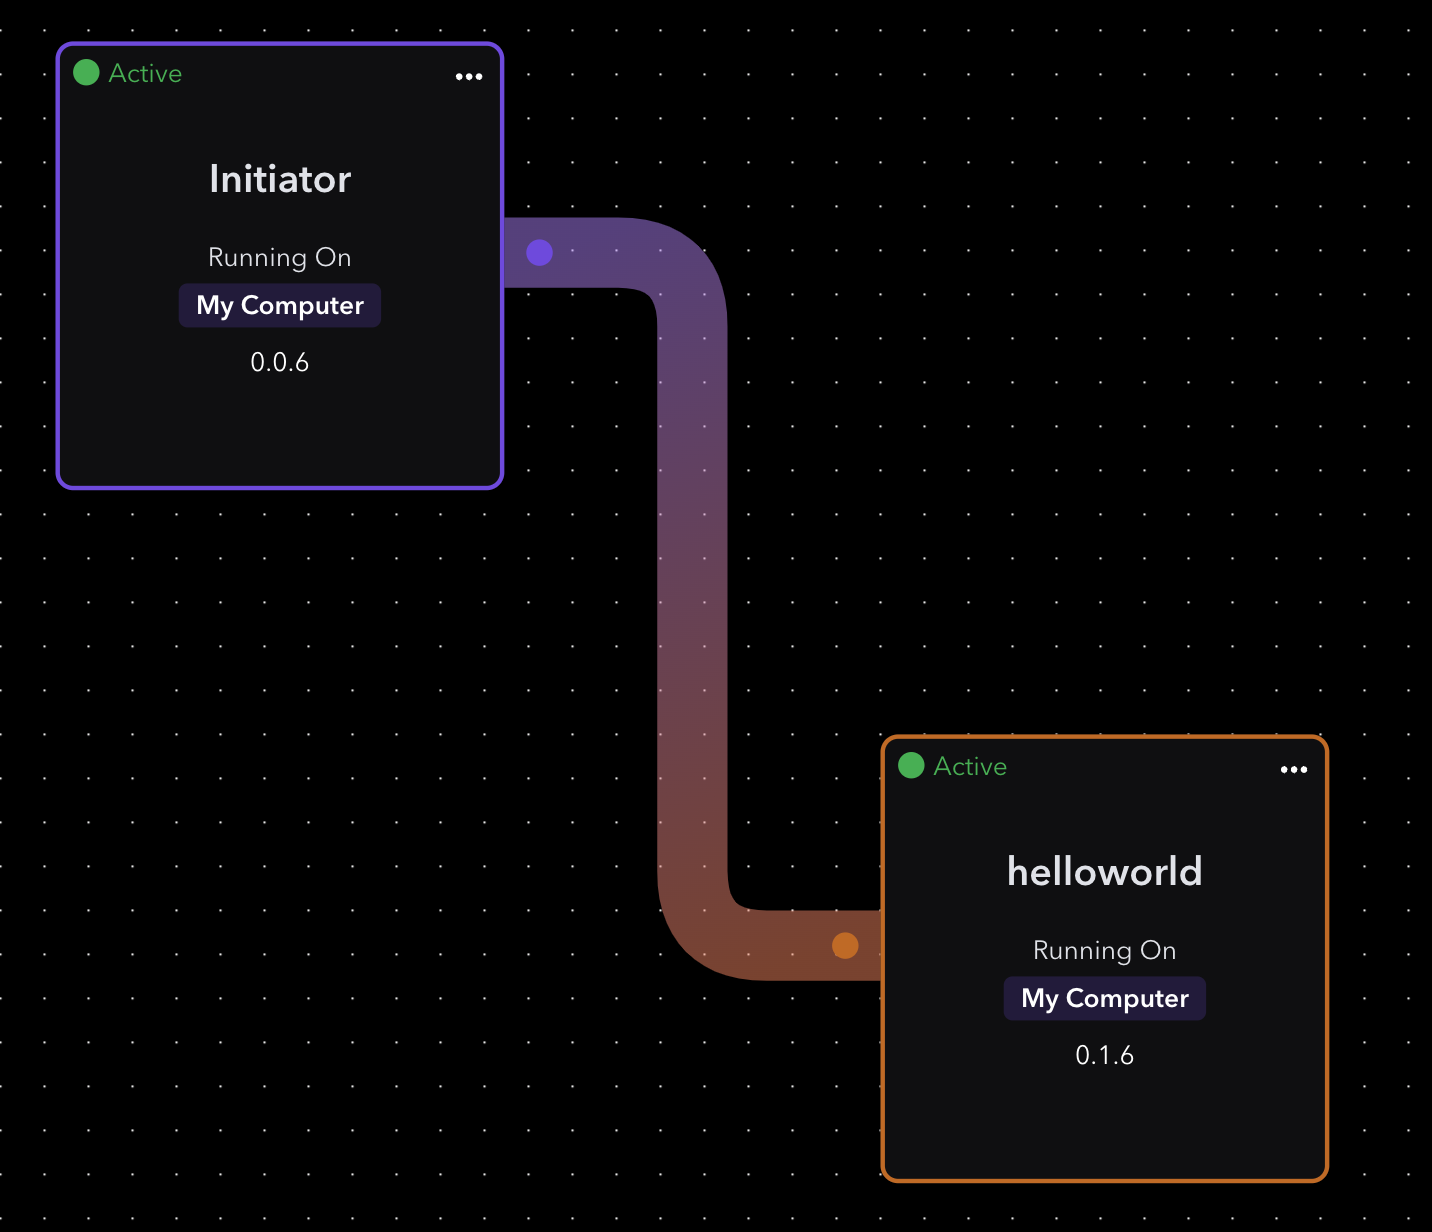
Configure Element
Once element is imported, drop element into a canvas in Navigator.
Pro tip: Use the Initiator element to create test frames and validate your element.
Once an element is added to the canvas in Navigator it will show up as a package under ~/.webai/elements/packages folder.
Pro tip: It can be helpful to debug and test directly inside the deployed package.
Testing
Using the webAI CLI tail log for debugging and testing elements.
$ webai tail
13:40:44 INFO Frame: d4be9a4b-6276-4cd2-832a-37148aa8bd42 {'baggage': 'baggage=baggage'} cv2-frame <function Frame.as_text at 0x104296a70> [[[0 0 0]]] {'message': 'start'} commandLabel=helloworld-0.1.6
Summary
We explored how to extend WebAI by creating custom elements. An element is simply a Python class that defines inputs, outputs, settings, and decorators (startup, shutdown, run). With the WebAI CLI, you can scaffold, version, and import elements into Navigator, then deploy them onto a canvas for seamless testing and debugging.
© 2025 Keith Tenzer
(c) 2025 Keith Tenzer