
webAI: Guide to Building Custom Elements

Overview
In the webAI platform, an Element is the basic building block of an AI pipeline. Think of it as a modular unit that either generates data, transforms it, or routes it further down the workflow. Elements can emit frames, process text, run models, or even orchestrate I/O across multiple data streams. They enable organizations to solve real business problems such as automating customer support, enriching knowledge management systems, accelerating content generation, or integrating AI-driven insights directly into business applications. For example, an Element might connect to a CRM to streamline sales workflows, ingest enterprise documents for retrieval-augmented generation, or process video feeds in real time for compliance and monitoring.
To standardize how developers create, configure, and connect these elements, the Element SDK provides a lightweight but powerful scaffolding layer. The ElementSDK provides the necessary boilerplate for making your custom code usable in the webAI platform.
What is an Element?
An Element is a building block used to create workflows or Flows in Navigator. There are two types of Elements: Built-in and Custom. Built-in Elements are provided through the official Element Registry and are part of the webAI platform. Custom elements are built using python and the ElementSDK.
Elements are Python packages that define the following: Inputs Outputs Settings Requirements Run Function
An Element can have an input, an output, both, or neither. I/O Example Input Receives data from another element Output Sends data to another element Input & Output Processes input, performs a transformation, and passes the result to another element None Stand-alone element (e.g., for model training or dataset generation)
Element Scaffolding
Every element follows a predictable project structure:
root-folder/
├── element_name/
│   ├── __init__.py
│   ├── element.py
├── setup.py
└── requirements.txt
Element Settings
Element settings are configurable parameters users can adjust at runtime in Navigator. The SDK supports a variety of settings: NumberSetting, TextSetting, BoolSetting.
Example:
class Settings(ElementSettings):
    color = TextSetting(...)
    delay = NumberSetting[int](...)
BoolSetting
bool_setting = BoolSetting(
   name="bool_setting",
   display_name="A Dropdown Toggle",
   default=True,
   description="Whether Dropdown should be displayed",
   required=False,
)
NumberSetting
number_setting = NumberSetting[int](
   name="number",
   display_name="A Number",
   description="This is a number",
   default=10,
   min_value=1,
   step=1,
)
Dropdown TextSetting
dropdown_setting = TextSetting(
   name="dropdown_setting",
   display_name="Dropdown Setting",
   default="item1",
   description="An Item",
   valid_values=[
      "item1",
      "item2",
      "item3",
   ],
   hints=["dropdown"],
   required=False,
)
Hints
Some settings support hints that modify their rendered appearance in Navigator:
| Class | Hint | Description |
|---|---|---|
| TextSetting | dropdown | Renders a select box populated with valid_values |
| TextSetting | folder_path | Renders a folder picker |
Element Inputs and Outputs
Elements communicate through strongly-typed slots. Types include Frame, TextFrame, ImageFrame, MLXFrame, and Preview.
Example:
class Inputs(ElementInputs):
    default = Input[Frame]()

class Outputs(ElementOutputs):
    default = Output[Frame]()
Element Run Function
At the core of every element lies its run function, an asynchronous coroutine that drives the element’s execution. The Element SDK is designed around a continuous streaming model, meaning elements remain active and process data in real time. If your workflow requires batching or sequential execution, the recommended approach is to keep all elements running until the final element completes its task. Once any element terminates, the WebAI Runtime will automatically shut down the remaining connected elements to ensure a clean and consistent pipeline state.
Example:
async def run(self, process: Process):
    settings, outputs = process.settings, process.outputs
    self.reset_frame(settings.color.value)
    self.delay = settings.delay.value

    while True:
        await outputs.default.send(self.frame)
        await asyncio.sleep(self.delay / 1000)
Input Handling
When your element consumes data, you need a frame receiver function. Example relay:
async def frame_receiver(self, _: str, frame: Frame):
    await self.frame_queue.put(frame)

async def run(self, process: Process):
    outputs = process.outputs
    while True:
        frame = await self.frame_queue.get()
        await outputs.default.send(frame)
        self.frame_queue.task_done()
Create Helloworld Element
hello-world/
├── hello_world/
│   ├── __init__.py
│   └── element.py
├── requirements.txt
└── setup.py
Directory Structure
webAI elements require a defined directory structure.
$ mkdir -p helloworld/helloworld
Element Definition
Elements are defined by creating a setup.py under the element director where both element name and version are required. Optionally, if you are using poetry you can create a pyproject.toml.
$ vi helloworld/setup.py
from setuptools import find_packages, setup

setup(
    name="hello_world",
    version="0.1.0",
    packages=find_packages(),
)
Element Dependencies
Dependencies can be managed using a requirements.txt file.
$ vi helloworld/requirements.txt
--extra-index-url https://gitlab.com/api/v4/projects/49121232/packages/pypi/simple
webai_element_sdk==0.10.*
Element Boilerplate
Element settings goes in the element/element/element.py.
$ vi helloworld/helloworld/element.py

from webai_element_sdk.element.settings import ElementSettings, TextSetting

class Settings(ElementSettings):
    greeting = TextSetting(
        name="greeting",
        display_name="Greeting",
        default="Hello, World!",
        character_limit=100,
    )
Element code goes in the element/element/init.py.
$ vi helloworld/helloworld/__init__.py

import asyncio
from webai_element_sdk.element import CreateElement
from webai_element_sdk.process import Process, ProcessMetadata

from .element import Settings

class HelloWorld:
    async def run(self, process: Process):
        settings = process.settings
        await process.agent_comms.log("HelloWorld element started")

        try:
            while True:
                await process.agent_comms.log(settings.greeting.value)
                await asyncio.sleep(1)
        except asyncio.CancelledError:
            await process.agent_comms.log("HelloWorld element shutting down")
            raise


hello_world = HelloWorld()

process = CreateElement(
    Process(
        settings=Settings(),
        metadata=ProcessMetadata(
            id="helloworld-0001",
            name="hello_world",
            displayName="Hello World",
            version="0.1.0",
            description="Simplest element: logs a configurable greeting every second.",
        ),
        run_func=hello_world.run,
    )
)
Validate Python Environment
$ cd helloworld
python -c "import sys; print(sys.executable)"
/Users/ktenzer/python/webai-element-helloworld/helloworld/venv/bin/python
Set Interpreter in Visual Studio Code
{
  "python.analysis.extraPaths": [
    "/Users/ktenzer/python/helloworld/helloworld/venv/lib/python3.12/site-packages"
  ]
}
Import Custom Element
Once we have put together our custom element, we can import it into Navigator.
$ /Applications/Navigator.app/Contents/Resources/support/builder import helloworld

Jul 31 01:02:50.206 INF Using data directory path=/Users/keith.tenzer/.webai
Jul 31 01:02:50.206 INF Packaging source folder into .zip...
Jul 31 01:02:50.206 INF Generating publish.json file for element...
Jul 31 01:02:50.477 INF Python setup status=success
Jul 31 01:02:50.565 INF running command commandLabel=generate command="[/Users/keith.tenzer/.webai/elements/generator/.venv/bin/python3 -um webai_element_sdk generate --path /Users/keith.tenzer/python/elements/helloworld]"
Jul 31 01:02:50.735 INF Generated publish.json successfully.
Jul 31 01:02:50.745 INF Importing element .zip package...
Jul 31 01:02:50.751 INF Successfully imported element variant id=de8288be-f0bb-563d-a299-1e81d329744a
Jul 31 01:02:50.751 INF Cleaning up .zip package...
Jul 31 01:02:50.751 INF Element imported successfully.
Element Versioning
Elements are versioned by bumping the version in the __init__.py and setup.py followed by side-loading using the import command.
process = CreateElement(
    Process(
        settings=Settings(),
        metadata=ProcessMetadata(
            id="helloworld-0001",
            name="hello_world",
            displayName="Hello World",
            version="0.1.1",
            description="Simplest element: logs a configurable greeting every second.",
        ),
        run_func=hello_world.run,
    )
)
/Applications/Navigator.app/Contents/Resources/support/builder import helloworld
Configure Custom Element
Drop element into a Canvas in Navigator.
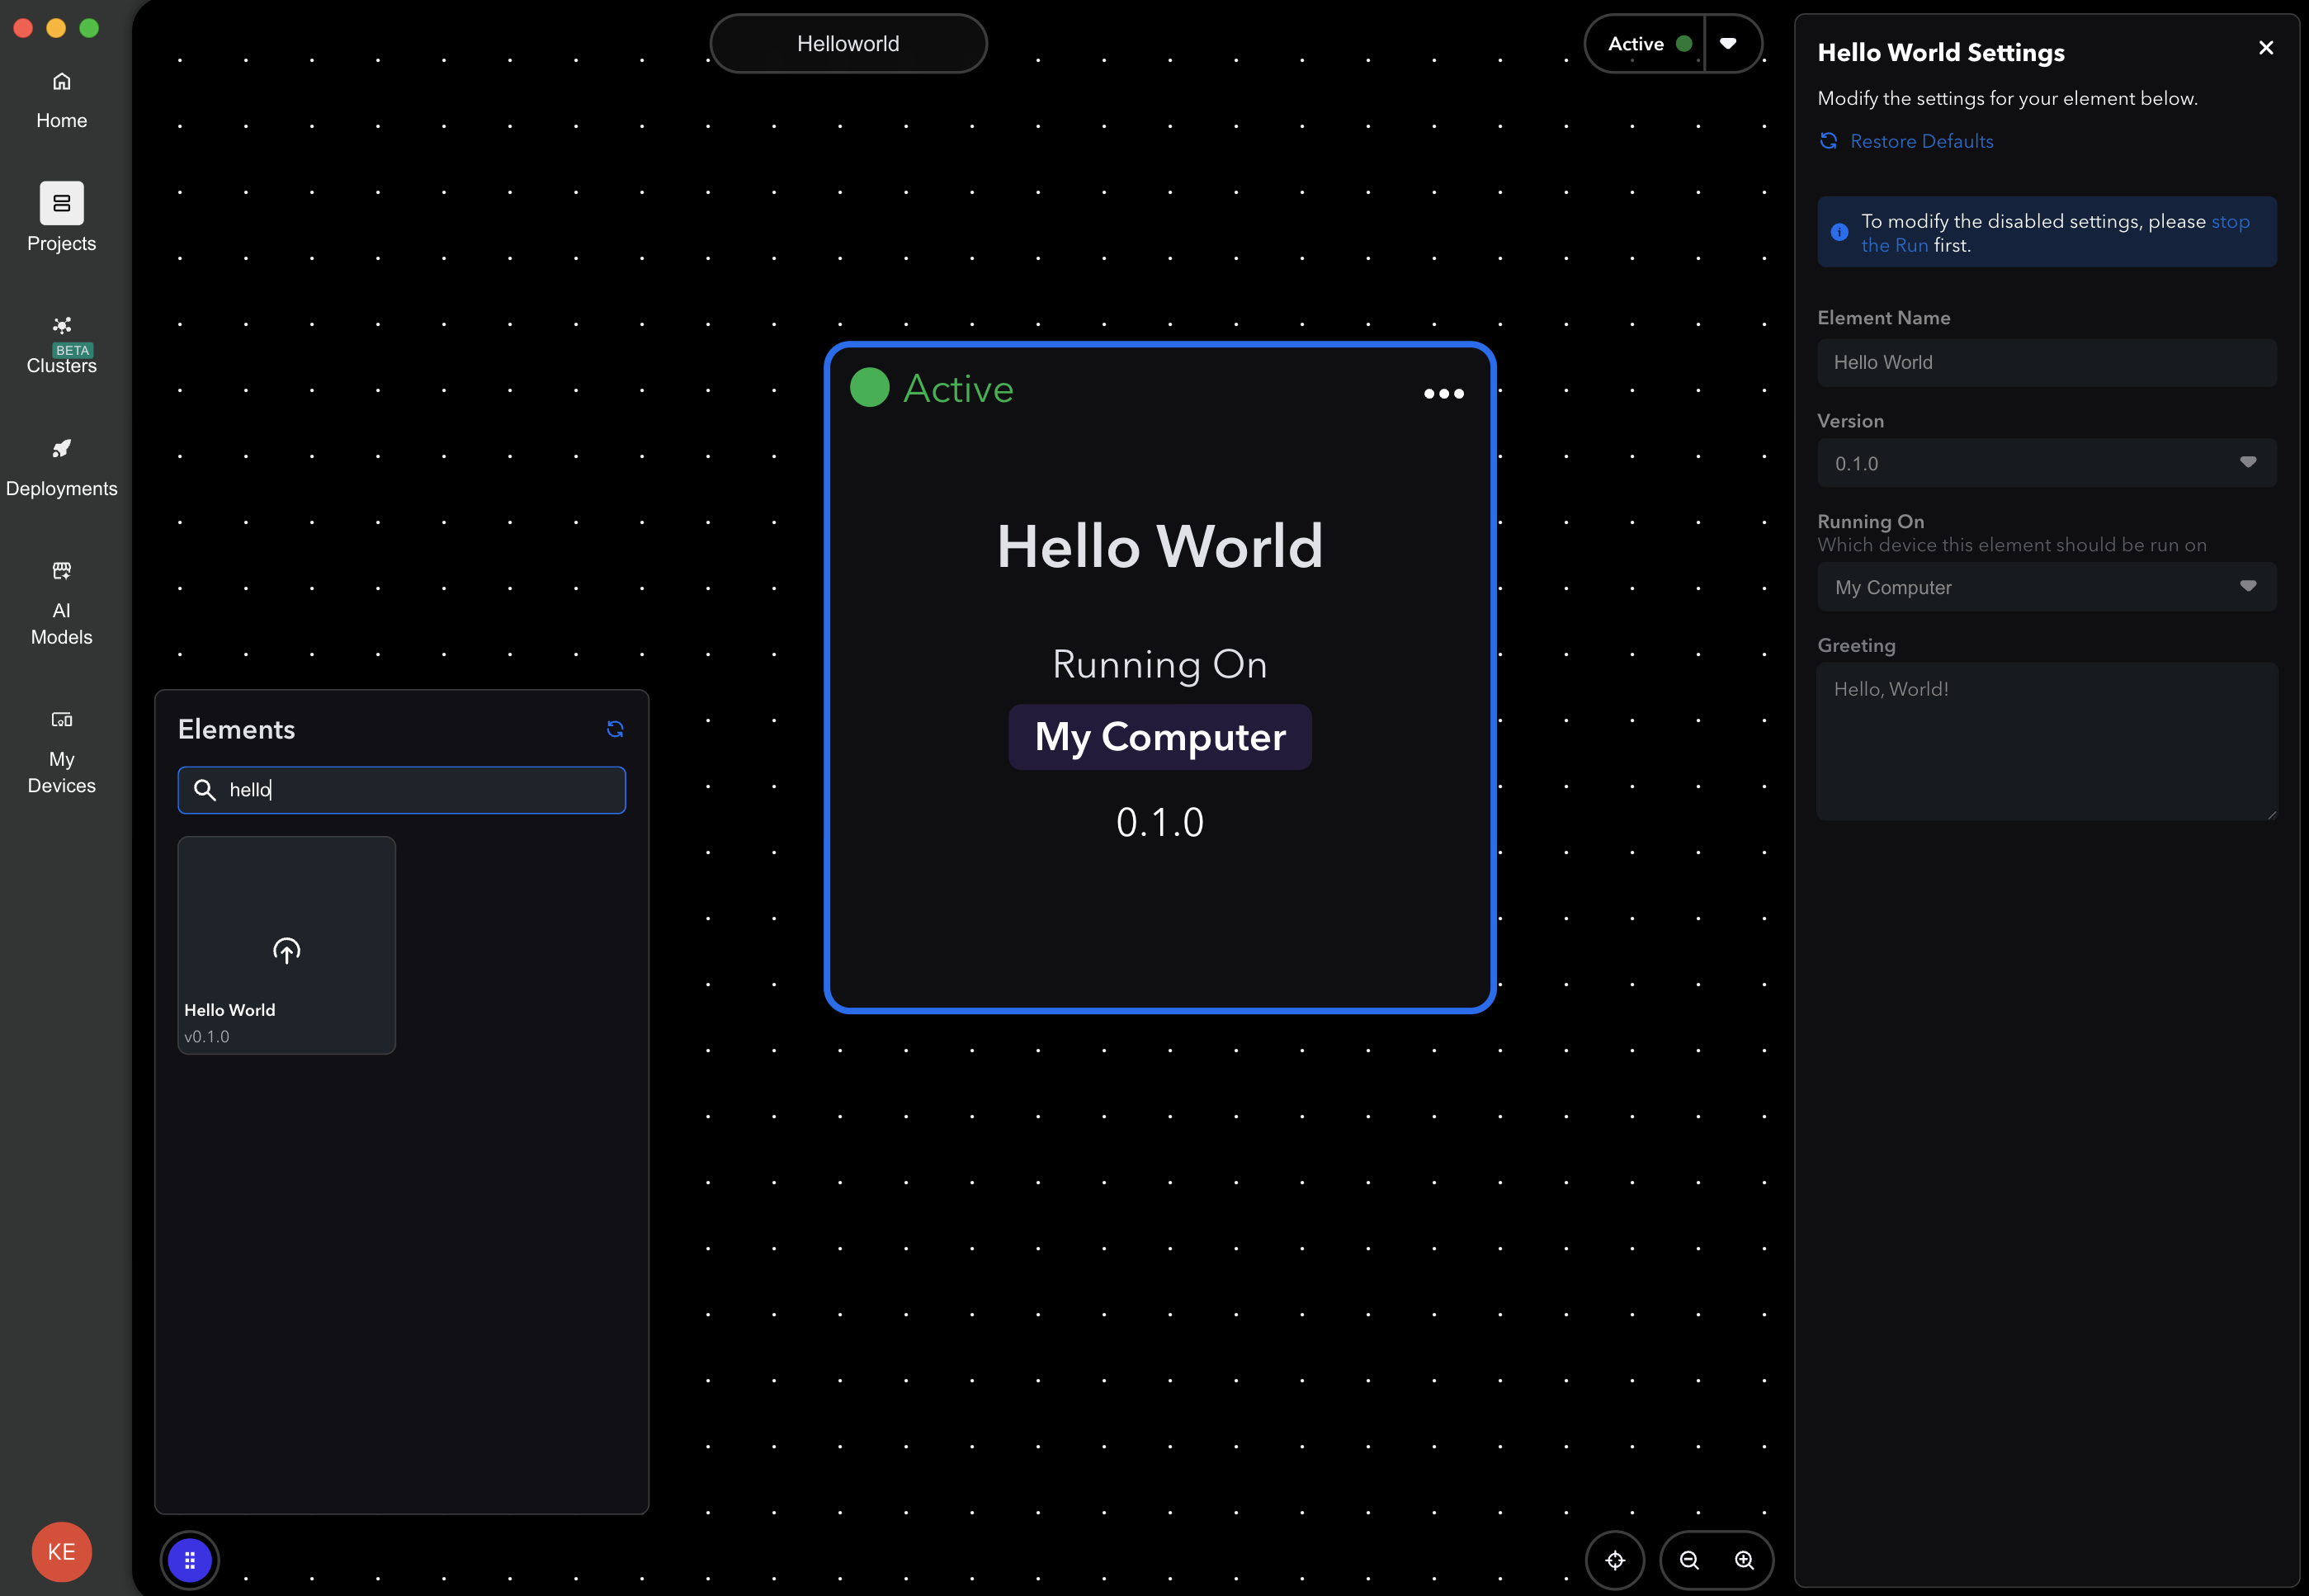
Tip: Use the Initiator element to create test frames and validate your element.
Once a Custom Element is added to the canvas in Navigator it will show up as a package under ~/.webai/elements/elements folder.
Tip: It can be helpful to debug and test your Custom Elements directly inside the deployed package.
Testing
Using the webAI CLI tail log for debugging and testing elements.
$ tail -f ~/.webai/logs/runtime.log
Aug 21 11:13:51.381 INF installer/environment.go:157 Installing element dependencies label=helloworld:0.1.0 variantID=7cf75c48-3475-5fc6-b89c-837b5c9a986e
Aug 21 11:13:55.003 INF installer/environment.go:176 Installing element label=helloworld:0.1.0 variantID=7cf75c48-3475-5fc6-b89c-837b5c9a986e
Tip: To explore deployed WebAI elements, import your ~/.webai folder into VS Code. Inside elements/elements, you’ll find the source code for any element you’ve deployed to a Navigator Canvas. Just deploy an element, open its __init__.py, and you’ll have example code ready to use.
Next Steps
Now that you have completed helloworld see if you can integrate a Custom Element into a webAI Flow it is time to connect multiple Elements and build AI pipelines. In the below example Github repo, you will see how to create a MultiModal RAG inference and ingest pipeline using the Element SDK and webAI platform. Simply follow the steps outlined in the repo and explore the code.
https://github.com/ktenzer/webai-multimodal-rag
(c) 2025 Keith Tenzer