Red Hat Ceph Storage 2.0 Lab + Object Storage Configuration Guide
Overview
Ceph has become the defacto standard for software-defined storage. Ceph is 100% opensource, built on open standards and as such is offered by many vendors not just Red Hat. If you are new to Ceph or software-defined storage, I would recommend the following article before proceeding to understand some high-level concepts:
In this article we will configure a Red Hat Ceph 2.0 cluster and set it up for object storage. We will configure RADOS Gateway (RGW), Red Hat Storage Console (RHCS) and show how to configure the S3 and Swift interfaces of the RGW. Using python we will access both the S3 and Swift interfaces.
If you are interested in configuring Ceph for OpenStack see the following article:
OpenStack - Integrating Ceph as Storage Backend
Prerequisites
Ceph has a few different components to be aware of: monitors (mons), storage or osd nodes (osds), Red Hat Storage Console (RHSC), RHSC agents, Calamari, clients and gateways.
Monitors - maintain maps (crush, pg, osd, etc) and cluster state. Monitors use Paxos to establish consensus.
Storage or OSD Node - Provides one or more OSDs. Each OSD represents a disk and has a running daemon process controlled by systemctl. There are two types of disks in Ceph: data and journal. The journal enable Ceph to commit small writes quickly and guarantees atomic compound operations. Journals can be collocated with data on same disks or separate. Splitting journals out to SSDs provides higher performance for certain use cases such as block.
Red Hat Storage Console (optional) - UI and dashboard that can monitor multiple clusters and monitor not only Ceph but Gluster as well.
RHSC Agents (optional) - Each monitor and osd node runs an agent that reports to the RHSC.
Calamari (optional) - Runs on one of the monitors to get statistics on ceph cluster and provides rest endpoint. RHSC talks to calamari.
Clients - Ceph provides an RBD (RADOS Block Device) client for block storage, CephFS for file storage and a fuse client as well. The RADOS GW itself can be viewed as a Ceph client. Each client requires authentication if cephx is enabled. Cephx is based on kerberos.
Gateways (optional) - Ceph is based on RADOS (Reliable Atomic Distributed Object Store). The RADOS Gateway is a web server that provides s3 and swift endpoints and sends those requests to Ceph via RADOS. Similarily there is an ISCSI Gateway that provides ISCSI target to clients and talks to Ceph via RADOS. Ceph itself is of course an object store that supports not only object but file and block clients as well.
Red Hat recommends at minimum three monitors and 10 storage nodes. All of which should be physical not virtual machines. For the gateways and RHSC, VMs can be used. Since the purpose of this article is about building a lab environment we are doing everything on just three VMs. The VMs should be configured as follows with Red Hat Enterprise Linux (7.2 or 7.3):
- ceph1: 4096 MB RAM, 2 Cores, 30GB root disk, 2 X 100 GB data disk, 192.168.122.81/24.
- ceph2: 4096 MB RAM, 2 Cores, 30GB root disk , 2 X 100 GB data disk, 192.168.122.82/24.
- ceph3: 4096 MB RAM, 2 Cores, 30GB root disk, 2 X 100 GB data disk, 192.168.122.83/24.
Note: this entire environment runs on my 12GB thinkpad laptop. If memory is tight you can cut ceph2 down to 2048MB RAM.
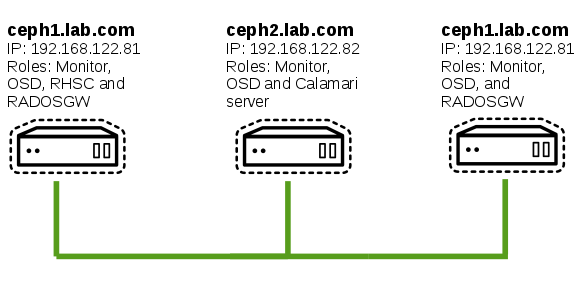
The roles will be devided across the nodes as follows:
- Ceph1: RHSC, Rados Gateway, Monitor and OSD
- Ceph2: Calamari, Monitor and OSD
- Ceph3: Monitor and OSD

Install Ceph Cluster
Register subscription and enable repositories.
# subscription-manager register
# subscription-manager list --available
# subscription-manager attach --pool=8a85f981weuweu63628333293829
# subscription-manager repos --disable=*
# subscription-manager repos --enable=rhel-7-server-rpms
# subscription-manager repos --enable=rhel-7-server-rhceph-2-mon-rpms
# subscription-manager repos --enable=rhel-7-server-rhceph-2-osd-rpms
# subscription-manager repos --enable=rhel-7-server-rhscon-2-agent-rpms
Note: If you are using centos you will need to install ansible and get the ceph-ansible playbooks from github.
Disable firewall
Since this is a lab environment we can make life a bit easier. If you are interested in enabling firewall then follow official documentation here.
#systemctl stop firewalld
#systemctl disable firewalld
Configure NTP
Time synchronization is absolutely critical for Ceph. Make sure it is reliable.
# yum install -y ntp
# systemctl enable ntpd
# systemctl start ntpd
Test to ensure ntp is working properly.
# ntpq -p
Update hosts file
If dns is working you can skip this step.
#vi /etc/hosts
192.168.122.81 ceph1.lab.com ceph1
192.168.122.82 ceph2.lab.com ceph2
192.168.122.83 ceph3.lab.com ceph3
Create Ansible User
Ceph 2.0 now uses ansible to deploy, configure and update. A user is required that has sudo permissions.
# useradd ansible
# passwd ansible
#cat << EOF > /etc/sudoers.d/ansible
ansible ALL = (root) NOPASSWD:ALL
Defaults:ansible !requiretty
EOF
Enable repositories for RHSC
# subscription-manager repos --enable=rhel-7-server-rhscon-2-installer-rpms
# subscription-manager repos --enable=rhel-7-server-rhscon-2-main-rpms
Install Ceph-Ansible
# yum install -y ceph-ansible
Setup ssh keys for ansible user
# su - ansible
$ ssh-keygen
$ ssh-copy-id ceph1
$ ssh-copy-id ceph2
$ ssh-copy-id ceph3
$ mkdir ~/ceph-ansible-keys
Update Ansible Hosts file
$ sudo vi /etc/ansible/hosts

[mons]
ceph1
ceph2
ceph3

[osds]
ceph1
ceph2
ceph3

[rgws]
ceph1
ceph3
Update Ansible Group Vars
The ceph configuration is maintained by group vars. By default samples are provided. We need to copy these and then update them. For this deployment we need to update group vars for all, mons and osds.
You can find these group var files in github.
$ cd /usr/share/ceph-ansible/group_vars
Update general group vars
$ cp all.sample all
$ vi all
fetch_directory: /home/ansible/ceph-ansible-keys
cluster: ceph
ceph_stable_rh_storage: true
ceph_stable_rh_storage_cdn_install: true
generate_fsid: true
cephx: true
monitor_interface: eth0
journal_size: 1024
public_network: 192.168.122.0/24
cluster_network: ""
osd_mkfs_type: xfs
osd_mkfs_options_xfs: -f -i size=2048
radosgw_frontend: civetweb
radosgw_civetweb_port: 8080
radosgw_keystone: false
Update monitor group vars
$ cp mons.sample mons
Update osd group vars
$ cp osds.sample osds
$ vi osds
osd_auto_discovery: true
journal_collocation: true
Update rados gateway group vars
We are just going with defaults here so no changes.
$ cp rgws.sample rgws
Run Ansible playbook
$ cd /usr/share/ceph-ansible
$ sudo cp site.yml.sample site.yml
$ ansible-playbook site.yml -vvvv
If everything is successful you should see message similar to below. If something fails simple fix problem and re-run playbook till it succeeds.
PLAY RECAP ********************************************************************
 ceph1 : ok=370 changed=17 unreachable=0 failed=0
 ceph2 : ok=286 changed=14 unreachable=0 failed=0
 ceph3 : ok=286 changed=13 unreachable=0 failed=0
Check Ceph Health
You should see HEALTH_OK. If it is not ok then you can run "ceph health detail" to get more information.
$ sudo ceph -s
cluster 1e0c9c34-901d-4b46-8001-0d1f93ca5f4d
health HEALTH_OK
monmap e1: 3 mons at {ceph1=192.168.122.81:6789/0,ceph2=192.168.122.82:6789/0,ceph3=192.168.122.83:6789/0}
election epoch 6, quorum 0,1,2 ceph1,ceph2,ceph3
osdmap e14: 3 osds: 3 up, 3 in
flags sortbitwise
pgmap v26: 104 pgs, 6 pools, 1636 bytes data, 171 objects
103 MB used, 296 GB / 296 GB avail
104 active+clean
Configure erasure coded pool for RADOSGW
By default the pool default.rgw.data.root contains data for a RADOSGW and it is configured for replication not erasure coding. In order to change to erasure coding you need to delete the pool and re-create it. For object storage we usually recommend erasure coding as it is much more efficient and brings down costs.
# ceph osd pool delete default.rgw.data.root default.rgw.data.root --yes-i-really-really-mean-it
Ceph supports many different erasure coding schemes.
# ceph osd erasure-code-profile ls
default
k4m2
k6m3
k8m4
The default profile is 2+1. Since we only have three nodes this is the only profile that could actually work so we will use that.
# ceph osd erasure-code-profile get default
k=2
m=1
plugin=jerasure
technique=reed_sol_van
Create new erasure coded pool using 2+1.
# ceph osd pool create default.rgw.data.root 128 128 erasure default
Here we are creating 128 placement groups for the pool. This was calculated using the pg calculation tool: https://access.redhat.com/labs/cephpgc/
Configure rados gateway s3 user
The rados gateway was installed and configured on ceph1 per ansible however a user needs to be created for s3. This is not part of Ansible installation by default.
#radosgw-admin user create --uid="s3user" --display-name="S3user"
 {
 "user_id": "s3user",
 "display_name": "S3user",
 "email": "",
 "suspended": 0,
 "max_buckets": 1000,
 "auid": 0,
 "subusers": [],
 "keys": [
 {
 "user": "s3user",
 "access_key": "PYVPOGO2ODDQU24NXPXZ",
 "secret_key": "pM1QULv2YgAEbvzFr9zHRwdQwpQiT9uJ8hG6JUZK"
 }
 ],
 "swift_keys": [],
 "caps": [],
 "op_mask": "read, write, delete",
 "default_placement": "",
 "placement_tags": [],
 "bucket_quota": {
 "enabled": false,
 "max_size_kb": -1,
 "max_objects": -1
 },
 "user_quota": {
 "enabled": false,
 "max_size_kb": -1,
 "max_objects": -1
 },
 "temp_url_keys": []
 }
Test S3 Access
In order to test s3 access we will use a basic python script that uses the boto library.
# pip install boto
Create script and update with information from above. The script is located in github.
# cd /root
# vi s3upload.py
#!/usr/bin/python

import sys

import boto
import boto.s3.connection
from boto.s3.key import Key

access_key = 'PYVPOGO2ODDQU24NXPXZ'
secret_key = 'pM1QULv2YgAEbvzFr9zHRwdQwpQiT9uJ8hG6JUZK'
rgw_hostname = 'ceph1'
rgw_port = 8080
local_testfile = '/tmp/testfile'
bucketname = 'mybucket'


conn = boto.connect_s3(
	aws_access_key_id = access_key,
	aws_secret_access_key = secret_key,
	host = rgw_hostname,
	port = rgw_port,
	is_secure=False,
	calling_format = boto.s3.connection.OrdinaryCallingFormat(),
	)

def printProgressBar (iteration, total, prefix = '', suffix = '', decimals = 1, length = 100, fill = '#'):
    percent = ("{0:." + str(decimals) + "f}").format(100 * (iteration / float(total)))
    filledLength = int(length * iteration // total)
    bar = fill * filledLength + '-' * (length - filledLength)
    print('\r%s |%s| %s%% %s' % (prefix, bar, percent, suffix))
    if iteration == total:
        print()

def percent_cb(complete, total):
    printProgressBar(complete, total)

bucket = conn.create_bucket('mybucket')
for bucket in conn.get_all_buckets():
	print "{name}\t{created}".format( name = bucket.name, created = bucket.creation_date,)

bucket = conn.get_bucket(bucketname)

k = Key(bucket)
k.key = 'my test file'
k.set_contents_from_filename(local_testfile, cb=percent_cb, num_cb=20)
Change permissions and run script
# chmod 755 s3upload.py
#./s3upload.py
Watch the 'ceph -s' command.
# watch ceph -s
Every 2.0s: ceph -s Thu Feb 2 19:09:58 2017

cluster 1e0c9c34-901d-4b46-8001-0d1f93ca5f4d
 health HEALTH_OK
 monmap e1: 3 mons at {ceph1=192.168.122.81:6789/0,ceph2=192.168.122.82:6789/0,ceph3=192.168.122.83:6789/0}
 election epoch 36, quorum 0,1,2 ceph1,ceph2,ceph3
 osdmap e102: 3 osds: 3 up, 3 in
 flags sortbitwise
 pgmap v1543: 272 pgs, 12 pools, 2707 MB data, 871 objects
 9102 MB used, 287 GB / 296 GB avail
 272 active+clean
 client io 14706 kB/s wr, 0 op/s rd, 32 op/s wr
Configure rados gateway swift user
In order to enable access to object store using swift you need to create a sub-user or nested user for swift access. This user is created under already existing user. We will use the s3user already created. From outside the swift user is it's own user.
# radosgw-admin subuser create --uid=s3user --subuser=s3user:swift --access=full
{
"user_id": "s3user",
"display_name": "S3user",
"email": "",
"suspended": 0,
"max_buckets": 1000,
"auid": 0,
"subusers": [
{
"id": "s3user:swift",
"permissions": "full-control"
}
],
"keys": [
{
"user": "s3user",
"access_key": "PYVPOGO2ODDQU24NXPXZ",
"secret_key": "pM1QULv2YgAEbvzFr9zHRwdQwpQiT9uJ8hG6JUZK"
}
],
"swift_keys": [
{
"user": "s3user:swift",
"secret_key": "vzo0KErmx5I9zaE3Y7bIOGGbJaECpJmNtNikFEYh"
}
],
"caps": [],
"op_mask": "read, write, delete",
"default_placement": "",
"placement_tags": [],
"bucket_quota": {
"enabled": false,
"max_size_kb": -1,
"max_objects": -1
},
"user_quota": {
"enabled": false,
"max_size_kb": -1,
"max_objects": -1
},
"temp_url_keys": []
}
Generate keys
This is done by default but in case you want to generate keys you can do so at anytime.
# radosgw-admin key create --subuser=s3user:swift --key-type=swift --gen-secret
Test swift access
We will use python again but this time for swift cli which is written in python.
# pip install --upgrade setuptools
# pip install python-swiftclient
List buckets using swift
# swift -A http://192.168.122.81:8080/auth/1.0 -U s3user:swift -K 'DvvYI2uzd9phjHNTa4gag6VkWCrX29M17A0mATRg' list
If things worked then you should see bucket called 'mybucket'.
Configure Red Hat Storage Console (RHSC)
Next we will configure the storage console and import the existing cluster. Ansible does not take care of setting up RHSC.
Install RHSC
# yum install -y rhscon-core rhscon-ceph rhscon-ui
Configure RHSC
# skyring-setup
Would you like to create one now? (yes/no): yes
 Username (leave blank to use 'root'):
 Email address:
 Password:
 Password (again):
 Superuser created successfully.
 Installing custom SQL ...
 Installing indexes ...
 Installed 0 object(s) from 0 fixture(s)
 ValueError: Type carbon_var_lib_t is invalid, must be a file or device type
 Created symlink from /etc/systemd/system/multi-user.target.wants/carbon-cache.service to /usr/lib/systemd/system/carbon-cache.service.
 Job for httpd.service failed because the control process exited with error code. See "systemctl status httpd.service" and "journalctl -xe" for details.
 Please enter the FQDN of server [ceph1.lab.com]:
 Skyring uses HTTPS to secure the web interface.
 Do you wish to generate and use a self-signed certificate? (Y/N): y

-------------------------------------------------------
 Now the skyring setup is ready!
 You can start/stop/restart the server by executing the command
 systemctl start/stop/restart skyring
 Skyring log directory: /var/log/skyring
 URLs to access skyring services
 - http://ceph1.lab.com/skyring
 - http://ceph1.lab.com/graphite-web
 -------------------------------------------------------
 Done!
Once installation is complete you can access RHSC via web browser.
https://192.168.122.81
user: admin password: admin
Configure RHSC Agent
Each ceph monitor and osd node requires an RHSC agent.
Install agent
Likely ansible took care of this but doesn't hurt to check.
# yum install -y rhscon-agent
# curl 192.168.122.81:8181/setup/agent/ | bash
Setup calamari server
The calamari server runs on one of the monitor nodes. It's purpose is to collect cluster health, events and statistics. In this case we will run the calamari server on ceph2.
# yum install calamari-server
# calamari-ctl clear --yes-i-am-sure
Gotta love the --yes-i-am-sure flags.
# calamari-ctl initialize --admin-username admin --admin-password admin --admin-email ktenzer@redhat.com
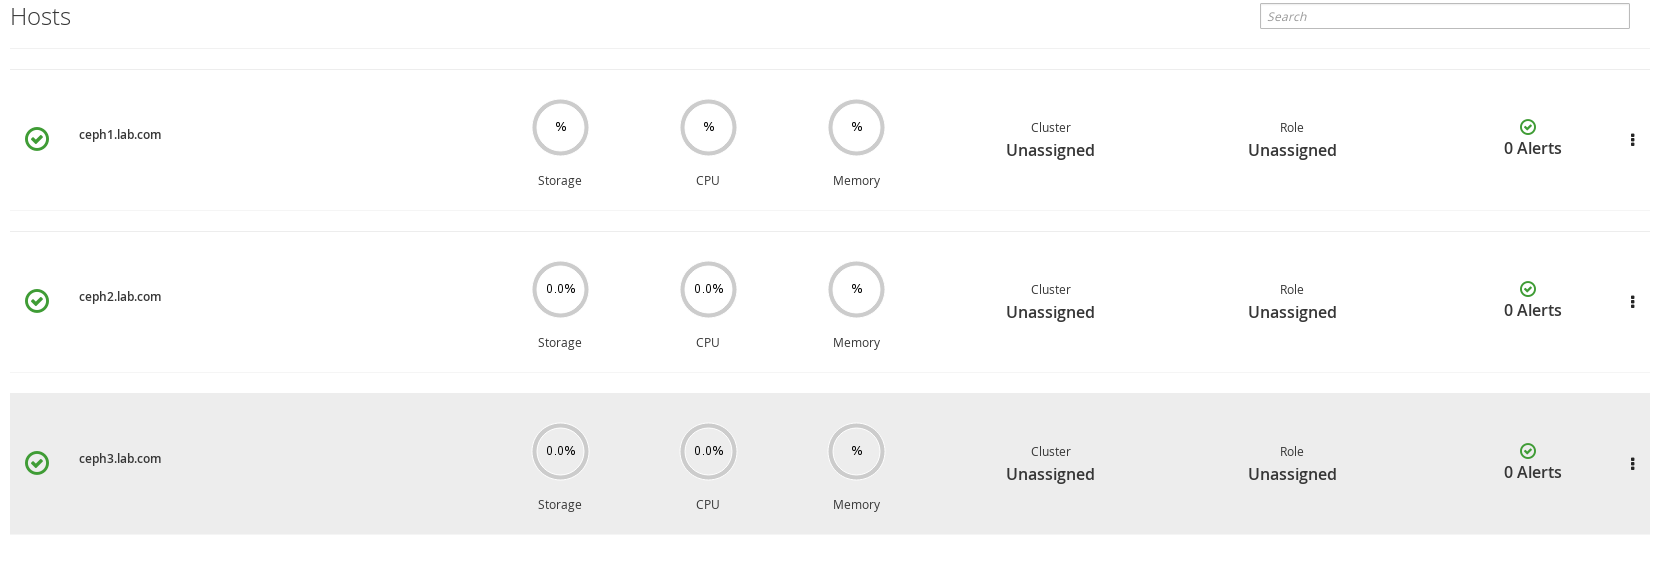
Accept nodes in RHSC
https://
Click on tasks icon at top right and accept all hosts.

Once accepting hosts you should see them available.

Import cluster in RHSC
Go to cluster and import a cluster, ensure to select the monitor node running the calamari server. In this case ceph 2.
Note: we could have also deployed Ceph using RHSC that is what new cluster does but that is no fun,

Click import to start the import process.

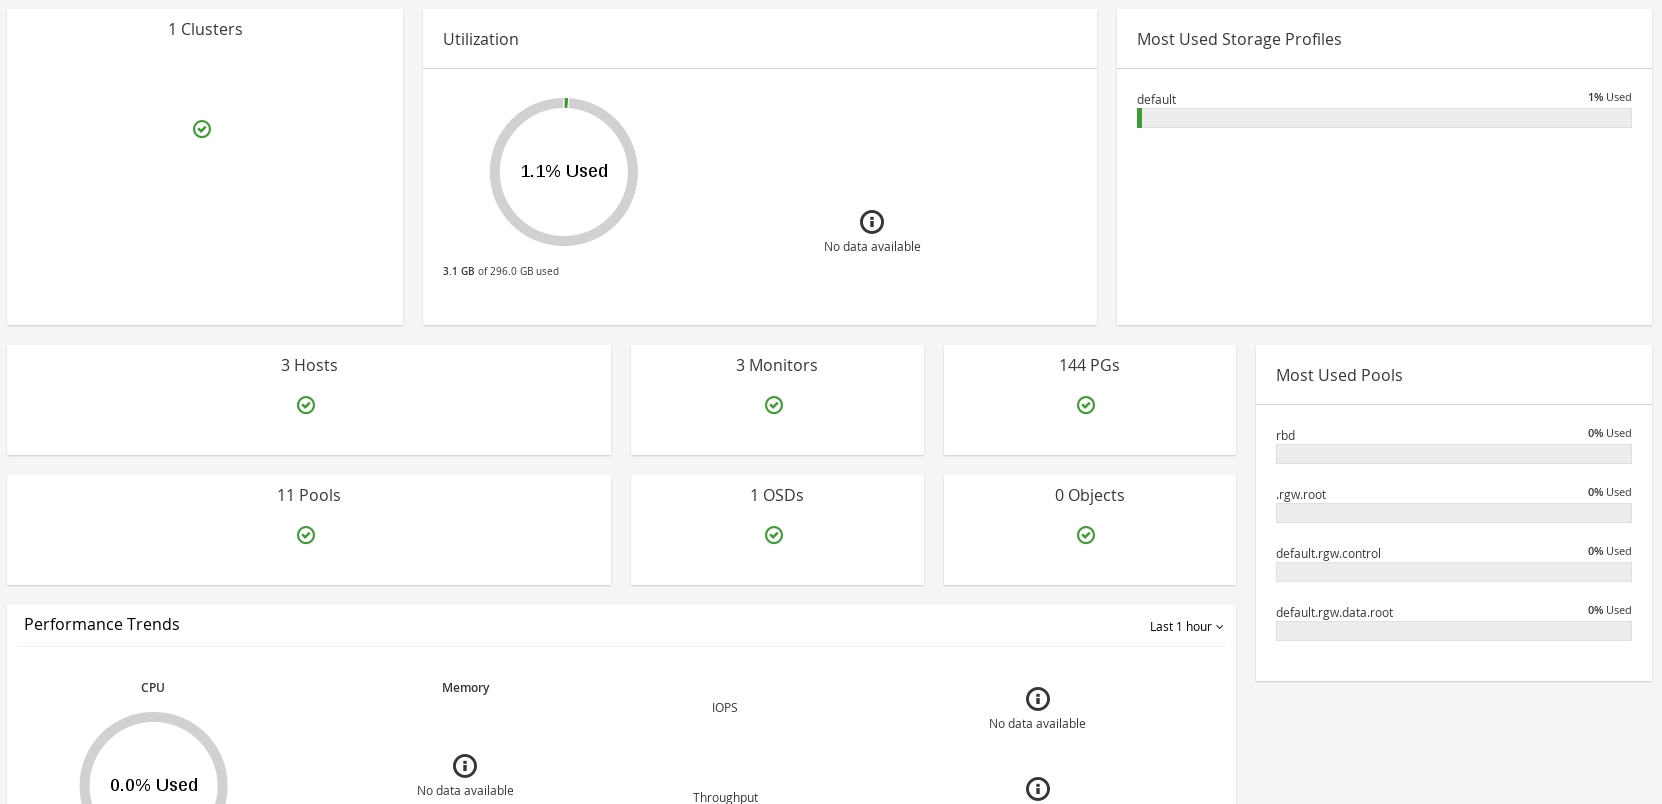
Cluster now should be visible in RHSC.

RHSC dashboard shows a high-level glimpse of ceph cluster.

Summary
In this article we saw how to deploy a ceph 2.0 cluster from scratch using VMs that can run on your laptop. We enabled object storage through ragosgw and configured both s3 as well as swift access. Finally we setup the Red Hat Storage Console (RHSC) to provide insight into our ceph cluster. This article provides you a good starting point for your journey into ceph and the future of storage which is software-defined as well as object based. Unlike all other storage systems ceph is the only one that is opensource, built on open standards and truly unified (object, block, file). Ceph is supported by many vendors and can run on any x86 hardware, even commodity. What else is the more to say?
Happy Cephing!
(c) 2017 Keith Tenzer

