
Blog with Gitops Practices and GitHub
Overview
Want to build your brand, while living the gitops revolution and not paying anything for it? That is exactly what this article will walk you through. I will show you how to setup your customized blog hosted in Github and create blog posts, doing it the way developers do it, one commit at a time.
Now most people go to wordpress or some blog platform and pay money for it. I think that is a shame because it is a missed opportunity to live gitops which is at the center of automating everything. Github has long provided the ability to create a basic blogs using gh-pages. Github uses a framework written in ruby called Jekyll which is available outside of Github, it’s opensource. Jekyll provides a templating framework and handles all the html, css stuff, allowing you to just write your blog in markdown (which anyone can do). The Jekyll themes Github provides are seriously limited and no fun. Most people don’t know this but with a little extra effort you can actually use any Jekyll themes and there are 100’s if not 1000’s so you can create your brand just the way you like it.
Setup Github Repository
First if you don’t have a github account get one. Next once you have an account create a new repository. This should be the name of the blog. In my case my blog is keithtenzer.com so that is also the name of the repository. Next decide if you are okay with a github domain name or if you want your own custom domain. I strongly recommend you pay the $10 a year and get your name. It is your brand after all and using your name makes it that way and also allows you to blog about anything.
Create Your Domain (optional)
If you aren’t interested in your own domain you can skip this part.
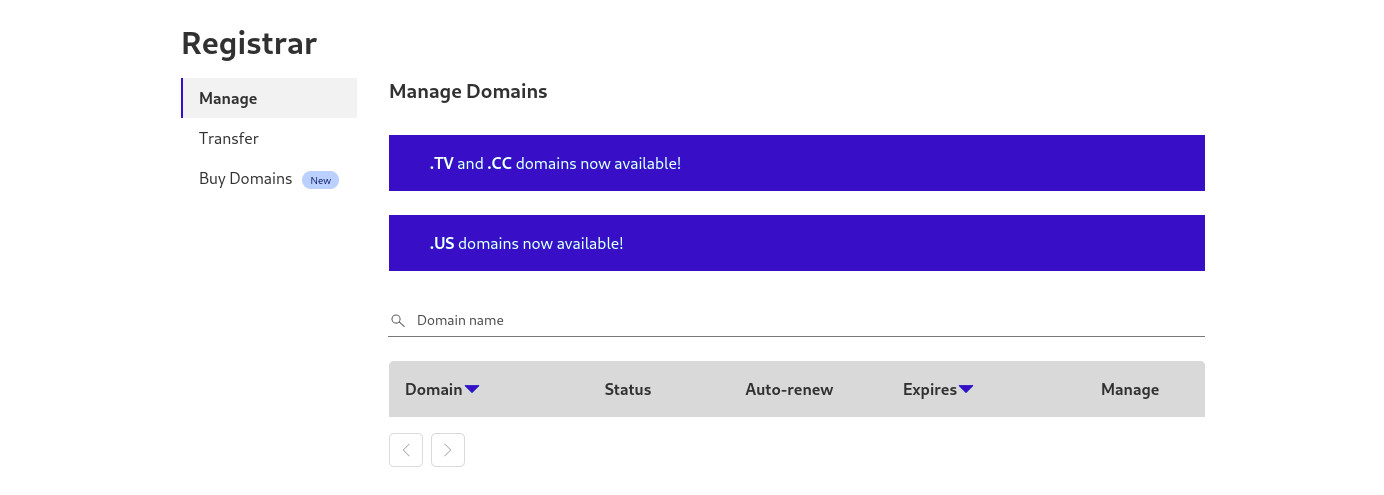
Decide where you want your domain to be hosted. I strongly recommend cloudflare. Purchase your domain by selecting buy domain.
 Once you have a domain you need to point it at Github. Under websites, click DNS and configure DNS as follows. Simply replace
 keithtenzer.com with your domain. Also make sure you add a CNAME for www to <pre>username.github.io</pre>.
Once DNS changes are done it can take 24 hours to propagate so I recommend waiting. You can check by querying DNS using nslookup or dig and seeing when your domain shows the IPs you entered for Github.
Initialize Blog in Github
Log in to Github and under repositories and create a new one.
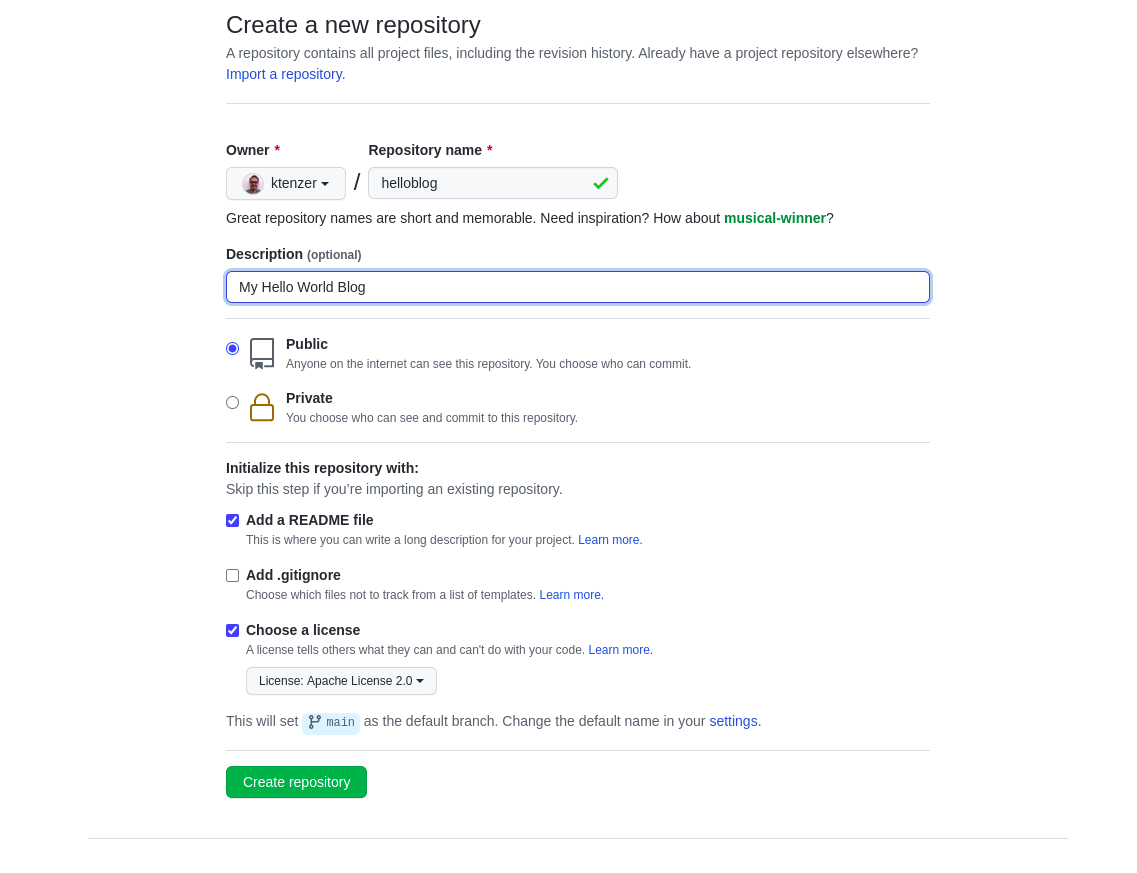 Clone your repository by copying the code link and running it in a CLI terminal.
$ git clone https://github.com/ktenzer/helloblog.git
You may need to install git.
Enable Blog
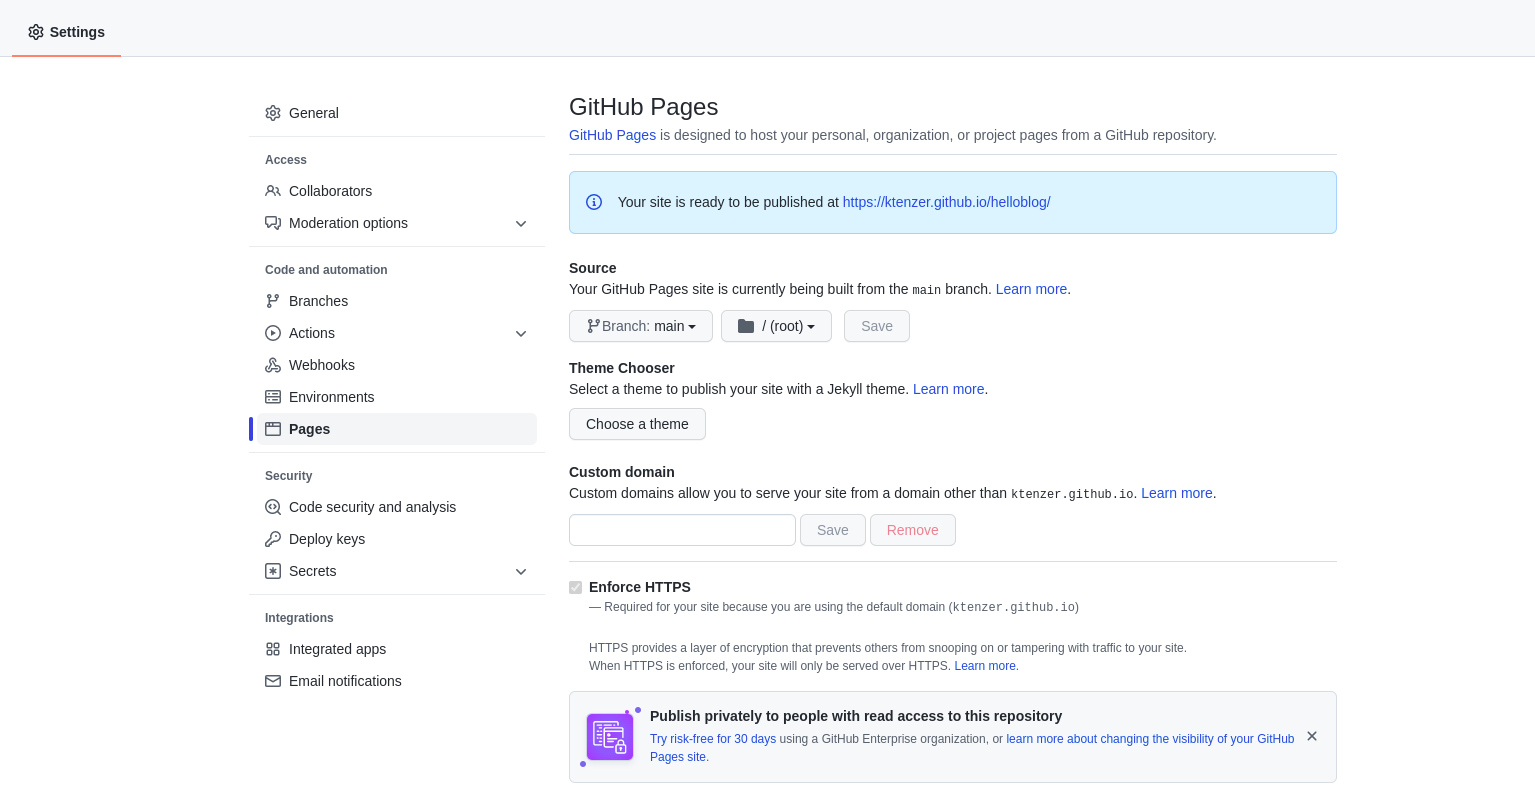
Once the repository is initialized we can enable the blog by going to settings. Under pages you simply need to select the branch (main) and fill out your custom domain if you have one.
Select a Jekyll Themes
As I mentioned there are many Jekyll themes. You can search for curated ones here. For my blog I use minimal-mistakes. Once you have chosen a theme simply clone it from Github in a separate directory from where you cloned your blog following same steps as above.
$ git clone https://github.com/mmistakes/minimal-mistakes.git
Next copy the contents into your blog repository.
cp -r minimal-mistakes/* helloblog/
Customize Blog
Now that you have a theme it is time to customize. Under your blog directory edit the _config.yml. You need to uncomment the remote_theme. In addition you can add title, author information and whatever else.
$ vi _config.yml
remote_theme           : "mmistakes/minimal-mistakes"
Setup Jekyll
Now that you have a blog, you are dying to publish it right? Not so fast, now it is time to test it locally. After all you wouldn’t want to publish anything you didn’t review first, right? In order to test locally you need to install and setup jekyll. This part is much easier if you are running Linux like me. If not maybe you should also consider switching to Linux, your Macbook is holding you back from greatness (trust me). You could also run Fedora as a virtual machine, well as long as you don’t have one of those shiny M1 Macbook’s (maybe someone will make that work in future though). Either way below are the steps for Fedora Linux.
$ cd helloblog
$ sudo dnf install ruby
$ sudo dnf install -y ruby-devel
$ sudo dnf install -y g++
$ bundler install
$ gem install eventmachine -v '1.2.7' -- --with-cppflags=-I/usr/local/opt/openssl/include
$ gem install jekyll bundler
$ sudo gem update --system 3.2.30 --install-dir=/usr/share/gems --bindir /usr/local/bin
$ sudo gem pristine ffi --version 1.15.4
$ sudo gem pristine http_parser.rb --version 0.8.0
$ sudo gem pristine sassc --version 2.4.0
$ bundle install
$ bundle add webrick
It may want you to pristine different version of gems. If that is the case just change the version to what it wants.
Test Blog
Now that Jekyll is setup we can test our new blog.
$ bundle exec jekyll serve

Configuration file: /home/ktenzer/helloblog/_config.yml
            Source: /home/ktenzer/helloblog
       Destination: /home/ktenzer/helloblog/_site
 Incremental build: disabled. Enable with --incremental
      Generating...
       Jekyll Feed: Generating feed for posts
                    done in 0.192 seconds.
 Auto-regeneration: enabled for '/home/ktenzer/helloblog'
    Server address: http://127.0.0.1:4000
  Server running... press ctrl-c to stop.
Once Jekyll is running simply open your web browser of choice and go to the server address link.
Push Blog to Github
Now that we have tested our blog and are happy lets commit the code! If you want to brush up on Github I recommend the tutorials. First lets add our files locally from within our blog directory.
$ git add .
To see the files that will be commited (optional).
$ git status -s
Commit files locally.
$ git commit -a -m "first blog entry"
Push changes into Github.
$ git push origin
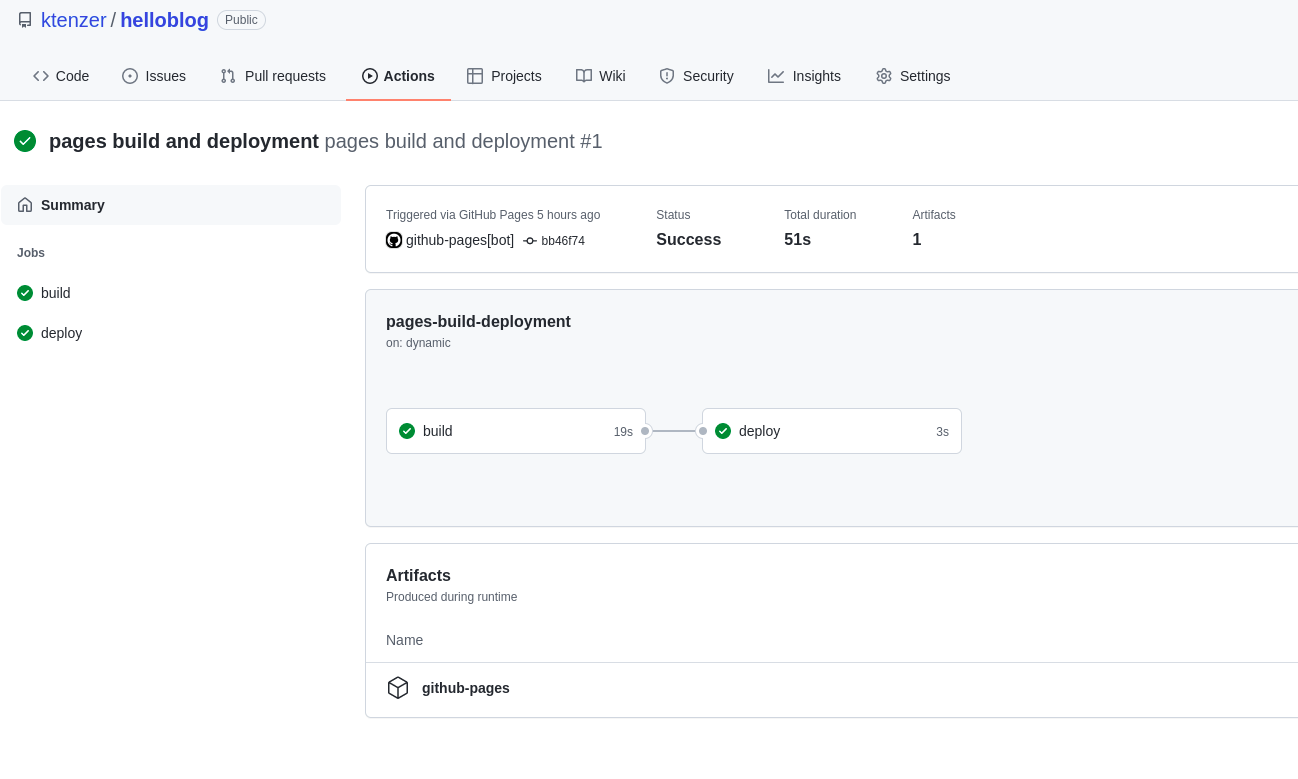
In order to push changes you will need a token. You can create a token under account settings->developer settings->personal access tokens in Github. Once changes are pushed it goes through CI/CD (Github Actions) and then is published. It usually takes just few minutes. You can check the status by looking at workflows under actions. Once the action which does CI/CD is complete check out your blog in production hello blog.
Add Post to Blog
Now that the blog is up and running let’s create a blog entry. Create the _posts directory and then create a new file with the format YYYY-MM-DD-post-name.md. Add the header information that defines title, layout, categories and tags. Layouts are located in the _layouts directory and provided by the Jekyll theme.
$ mkdir _posts
$ vi _posts/2022-02-10-hello-world.md
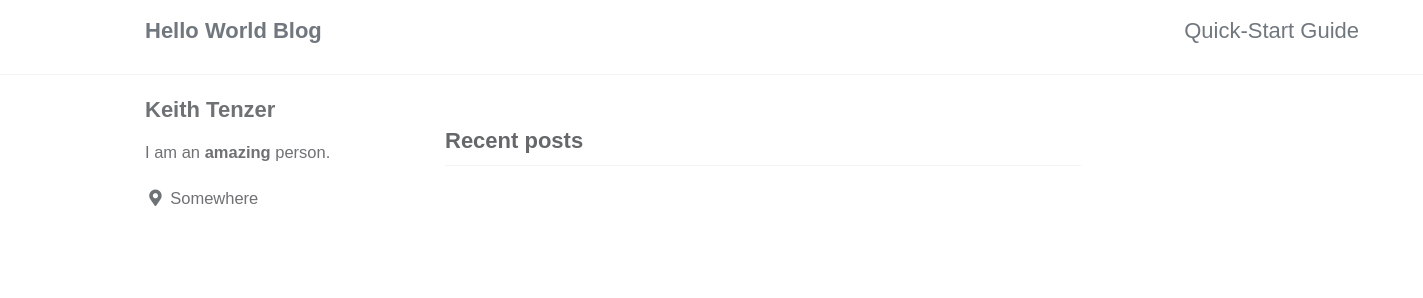
--- layout: single title: "Hello World" categories: - Linux tags: - Linux - Fedora - Opensource --- 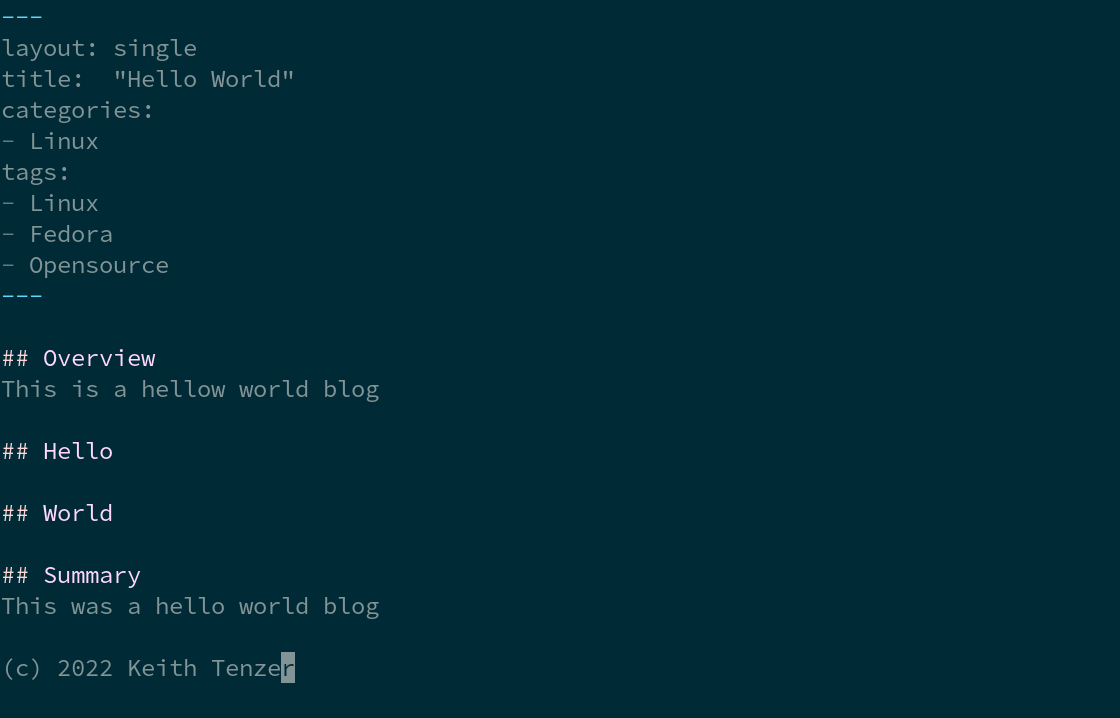 ## Overview This is a hellow world blog ## Hello ## World ## Summary This was a hello world blog (c) 2022 Keith Tenzer
Add Image to Post
Images, videos and other artifacts go in the assets directory. It is best to organize under the date of your post so you can find stuff. First create a directory.
$ mkdir assets/2022-02-10
Next copy image to that directory and then you can link it in your post using the /assets/2022-02-10 path.
$ cp /home/ktenzer/Pictures/hello_world_md.png assets/2022-02-10/
Test Post
Simply run Jekyll again to test locally.
$ bundle exec jekyll serve
Push Blog Post to Github
Repeat same steps above when we originally pushed our first commit. First lets add our files locally from without our blog directory.
$ git add .
To see the files that will be commited (optional).
$ git status -s
Commit files locally.
$ git commit -a -m "first blog entry"
Push changes into Github.
$ git push origin
Summary
Blogging is a great way to build your own brand and be an ambassador for what is important to you. It allows you to share your experiences and knowledge with the rest of the world. In this article we went through the steps to create your own unique blog platform using Jekyll and hosting it in Github (for free). One thing I learned that I will always take with me, sharing is caring.
(c) 2022 Keith Tenzer