
Demystify the Temporal Data Converter and Codec Server
![]()
Overview
In this article we will provide a step-by-step guide for successfully configuring the Temporal Data Converter and Codec Server. Many Temporal Cloud users need to send sensitive data into their workflow payloads. While the Temporal Cloud provides encryption in transit via mTLS by default, many users also need to encrypt at rest. They need flexibility, choosing their own encryption algorithms, managing encryption keys and even restricting Temporal users from viewing sensitive data. The solution for all this is the Data Converter and Codec Server.
Data Converter
The Data Converter is a component of the Temporal SDK. It is responsible for encoding/decoding of workflows, signals as well as query payloads between the client, Temporal Cloud and worker. Essentially workflows, signals and queries sent to Temporal Cloud are encoded while on the worker side, they are decoded. The Data Converter allows the flexibility to choose your own encryption algorithm and how to deal with encryption keys. You simply need to implement encode and decode functions.
The Data Converter is set in the client options of your worker or application.
c, err := client.Dial(client.Options{
	HostPort:  os.Getenv("TEMPORAL_HOST_URL"),
	Namespace: os.Getenv("TEMPORAL_NAMESPACE"),
	ConnectionOptions: client.ConnectionOptions{
		TLS: &tls.Config{Certificates: []tls.Certificate{cert}},
	},
	DataConverter: codecserver.DataConverter,
})
Search Attributes are not encoded via the Data Converter, as such you should not store sensitive information there. More details on the Data Converter can be found here.
Codec Server
Now that we have encrypted our data at rest, we may actually want to be able to view it from the UI or CLI. This is exactly where the Codec Server comes into play. The Codec Server provides an HTTP endpoint that can be used by the UI or CLI to decode sensitive data. It can be run behind a firewall, on a laptop or anywhere that can communicate with your web browser/CLI.
The Codec Server allows for implementing different codecs on a namespace level. Each namespace can have it’s own codec. The sample provided below shows how to map a namespace to a specific codec.
In addition to supporting codec at namespace level, you can also provide user level access by passing the access token from Temporal Cloud to Codec Server and then handling user level authorization based on the access token.
Once the Codec Server is running you will need to configure the UI or CLI to use it. When a user views a workflow through the UI (browser) or CLI, the encoded payload is passed to the Codec server and then decoded for display purposes (assuming user has access).
More information on the Codec Server can be found here.
Deploying Data Converter with the Codec Server
The provided example will work for the Temporal Cloud. First clone the repository.
$ git clone https://github.com/ktenzer/samples-go.git
Start Worker using Data Converter
Set the following environment parameters.
$ export TEMPORAL_HOST_URL=[Namespace].[AccountId].tmprl.cloud:7233
$ export TEMPORAL_NAMESPACE=[Namespace].[AccountId]
$ export TEMPORAL_TLS_CERT=/home/ktenzer/temporal/certs/ca.pem
$ export TEMPORAL_TLS_KEY=/home/ktenzer/temporal/certs/ca.key
Under the samples-go/codec-server directory start the worker.
$ go run worker/main.go
Note: your Temporal Cloud namespace is [Namespace].[AccountId]. It is visible in the UI when viewing namespaces.
Start Workflow using Data Converter
Set the following environment parameters.
$ export TEMPORAL_HOST_URL=[Namespace].[AccountId].tmprl.cloud:7233
$ export TEMPORAL_NAMESPACE=[Namespace].[AccountId]
$ export TEMPORAL_TLS_CERT=/home/ktenzer/temporal/certs/ca.pem
$ export TEMPORAL_TLS_KEY=/home/ktenzer/temporal/certs/ca.key
Under the samples-go/codec-server directory start the worker.
$ go run starter/main.go
2022/11/30 12:37:46 INFO  No logger configured for temporal client. Created default one.
2022/11/30 12:37:46 Started workflow WorkflowID codecserver_workflowID RunID b6137855-d043-46ba-8385-76617296e6ff
2022/11/30 12:37:47 Workflow result: Received Plain text input
Validate Workflow is Encoded
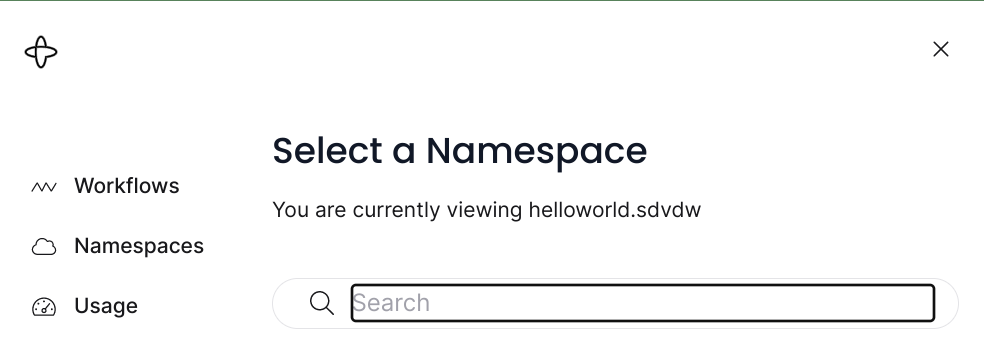
Connect to the Temporal Cloud UI. Under Workflows, select the appropriate namespace.
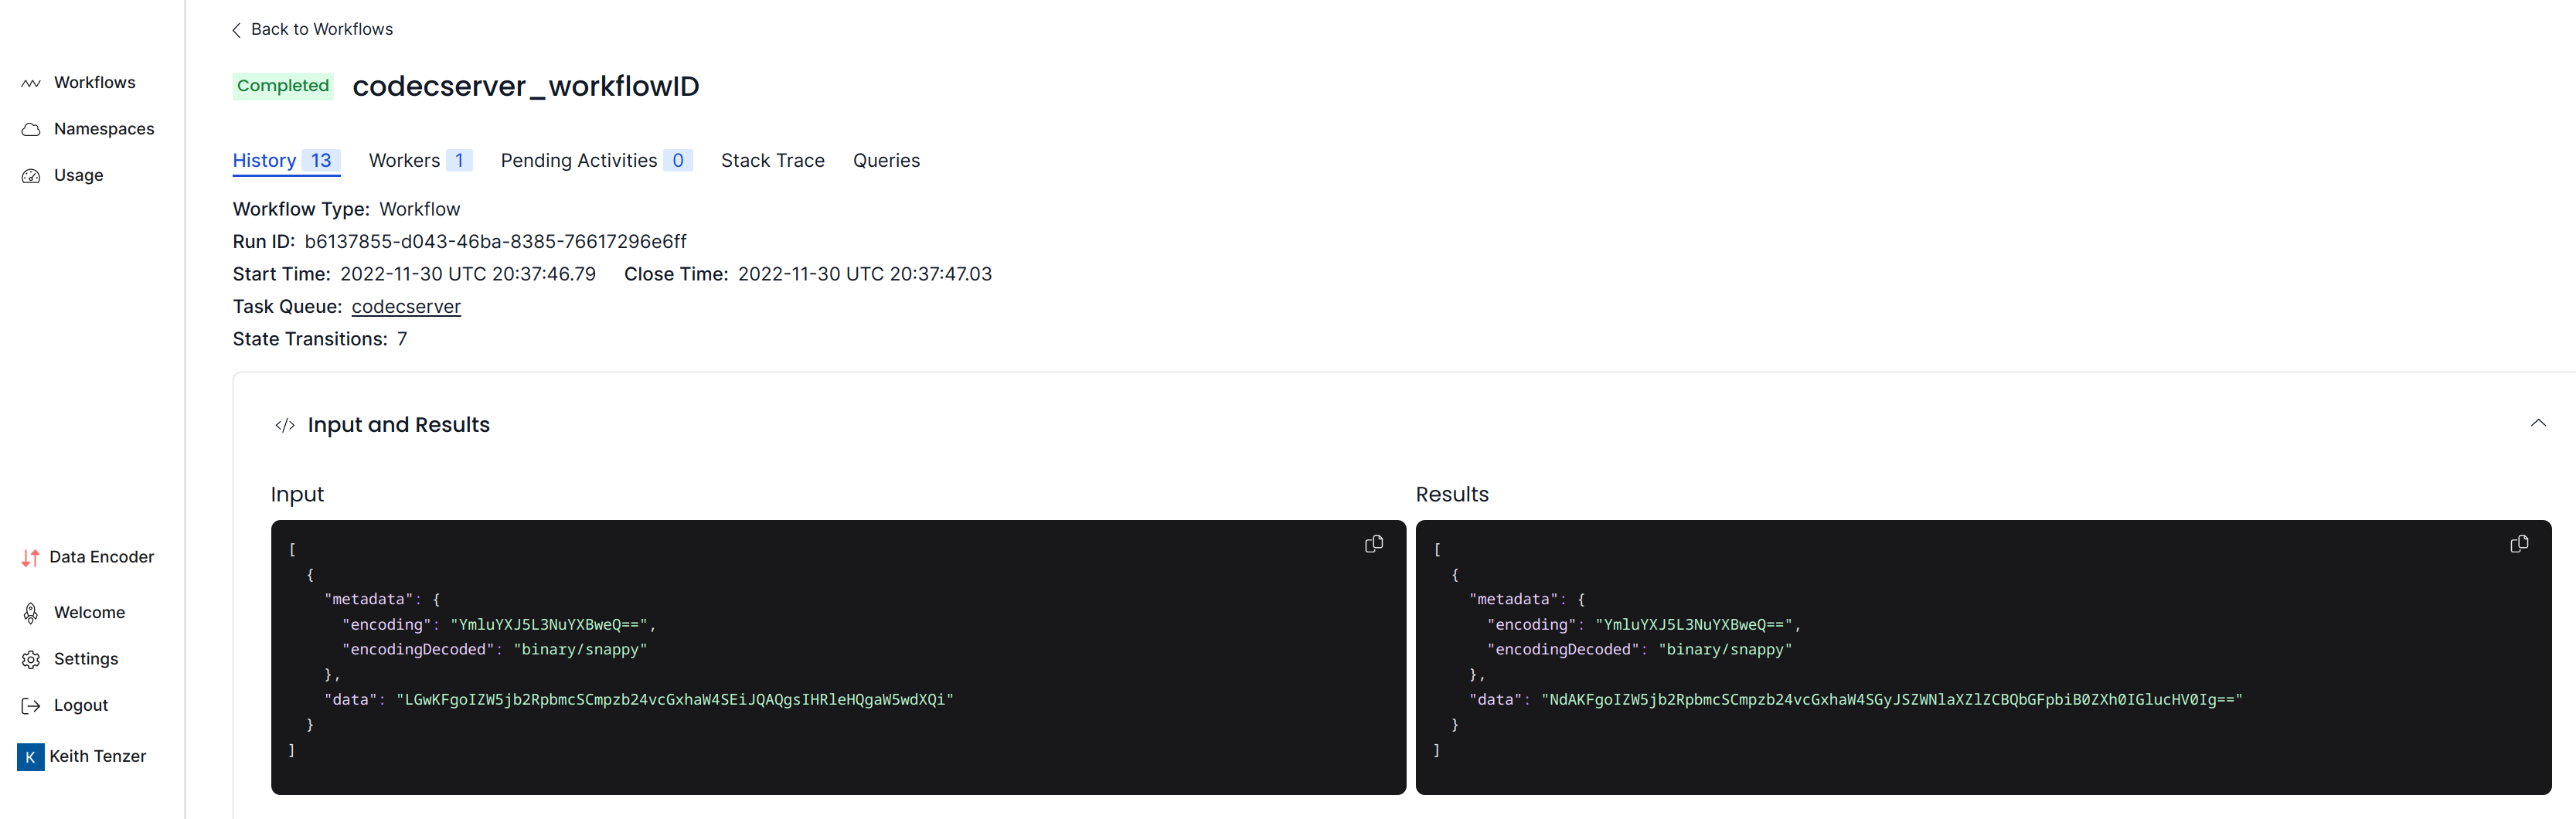
Open the workflow and you should see the input payload encoded.
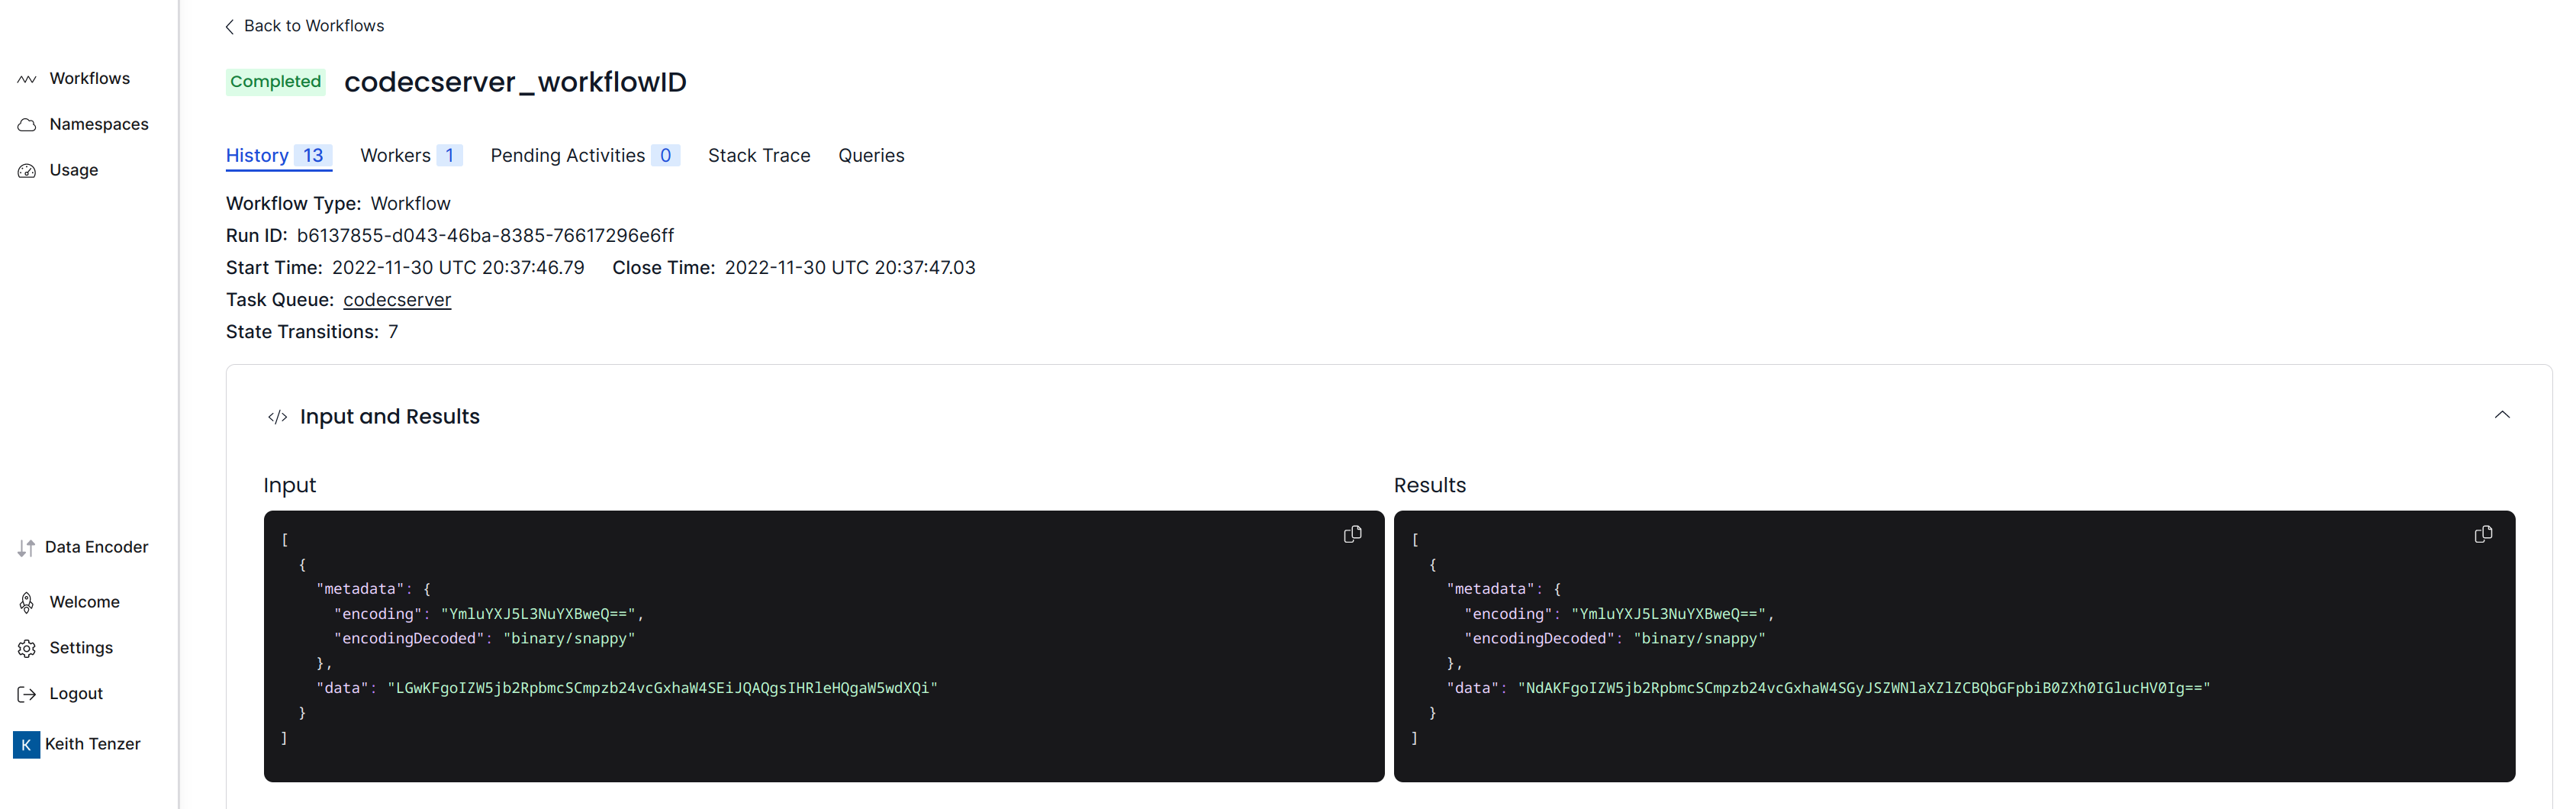
As you view workflow you will notice all inputs, outputs and results are encoded.
Start Codec Server
$ go run ./codec-server/
Handling namespace: [Namepace].[AccountId]
CORS enabled for Origin: https://cloud.temporal.io
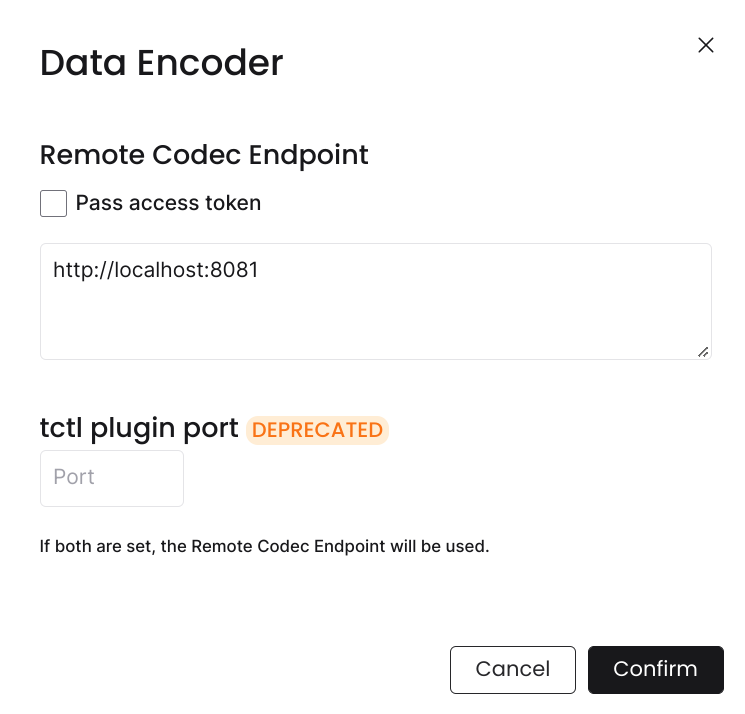
Configure Data Encoder
The Temporal Cloud UI allows each user to set their own Codec Server (data encoder). The encoder can also be set at namespace level. The user set encoder will override the namespace level.
Validate Workflow is Decoded
Now that we have configured the data encoder, open the workflow again and this time we should see everything decoded.
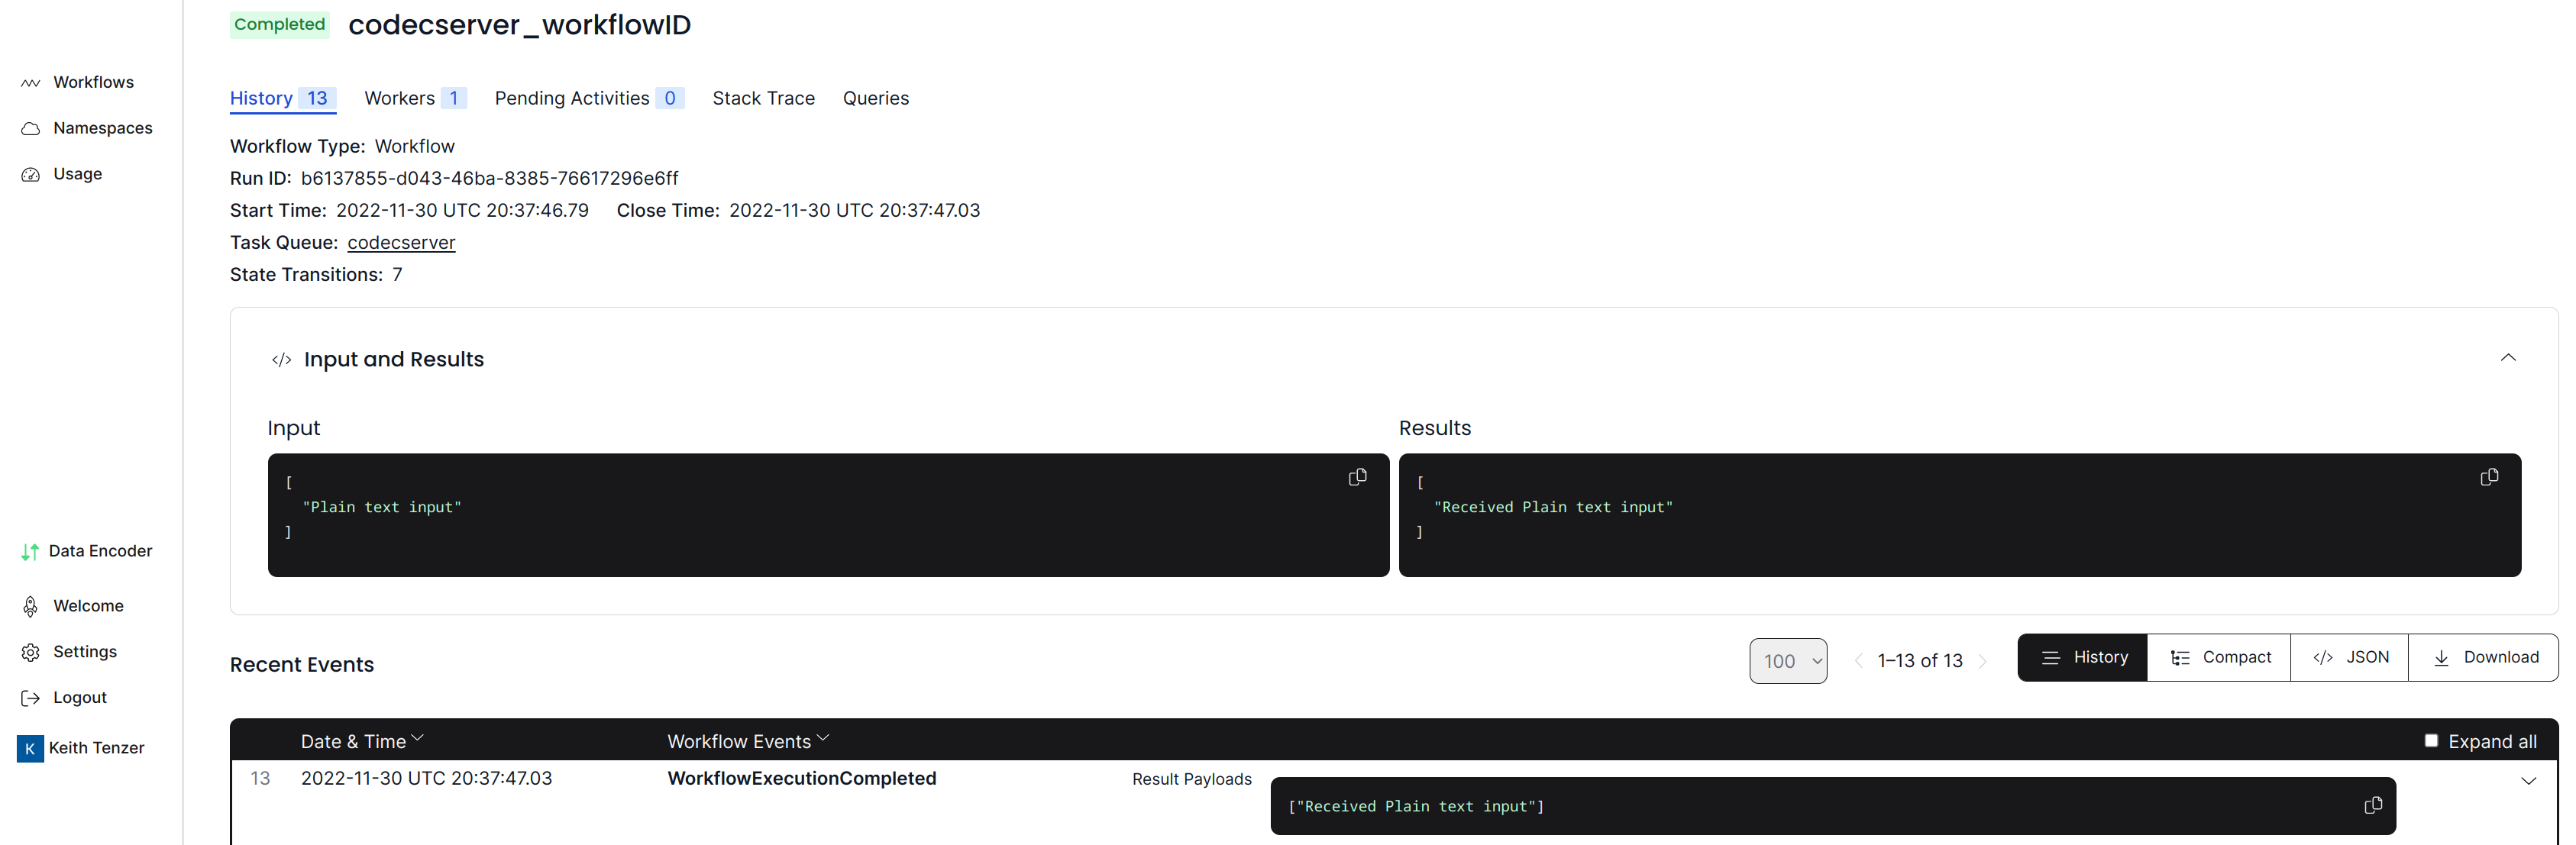 Additionally the CLI can also be used to view a workflow using the Codec Server endpoint.
$ tctl --codec_endpoint http://localhost:8081 wf show --workflow_id codecserver_workflowID
Troubleshooting
Once you open a workflow the Data Encoder icon will turn either red to indicate an error or green to indicate success.
In the example below we can see an error as the data is encoded and the data encoder icon shows as red.
To determine the exact error you will need to open your web browser in debug mode. In chrome, Ctrl-Shift-I. Click on console tab to view errors.
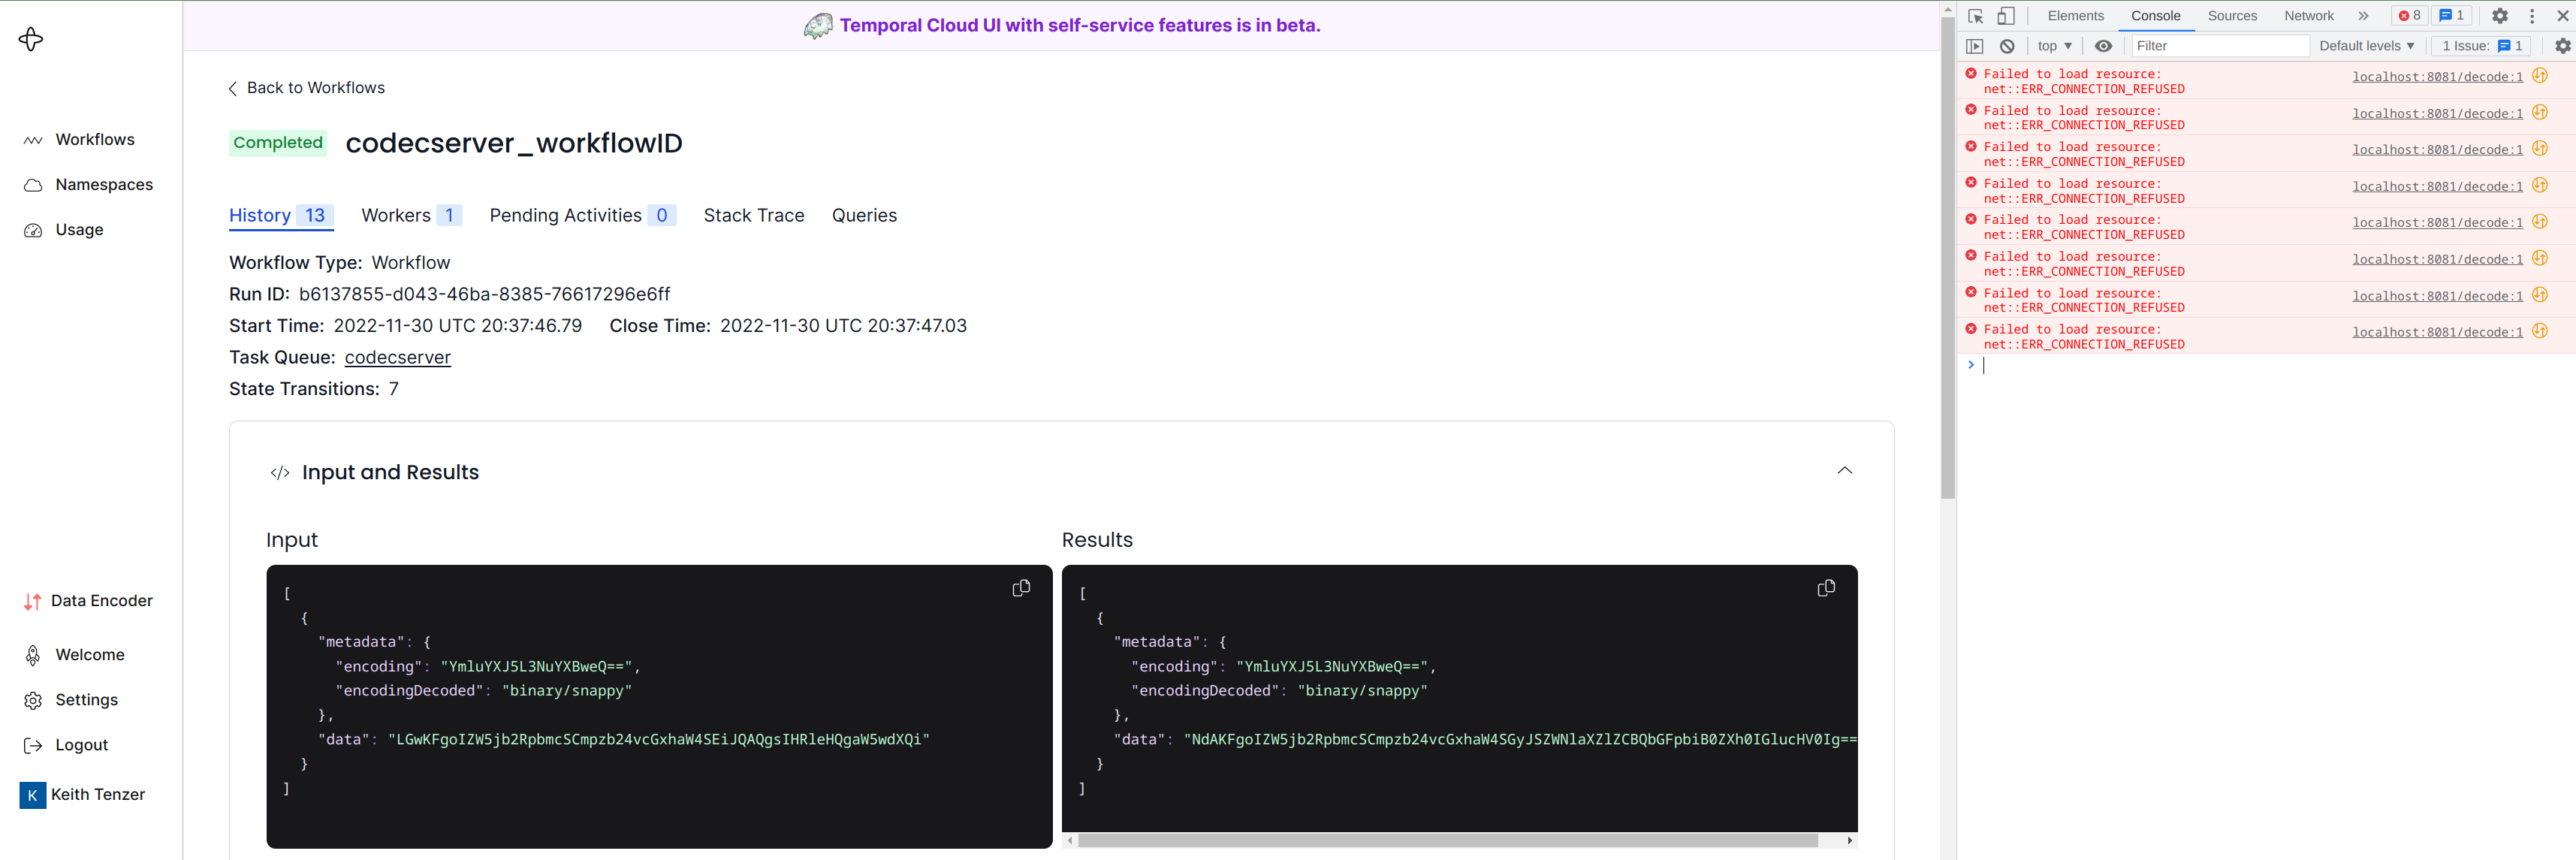
In this example the error is connection refused because we stopped the Codec Server.
If you aren’t sure of the issue and are not using chrome, try again with chrome as your browser.
Summary
In this article we learned about how the Temporal Data Converter and Codec Server provide a flexible solution for encryption at rest requirements. We walked through a step-by-step example using the Go SDK. Finally we saw how to troubleshoot issues with the Codec Server.
(c) 2022 Keith Tenzer