
Temporal Cloud 1-2-3
![]()
Overview
In this article we will walk through the easy steps to getting you started with the Temporal Cloud and well on your way to building durable, fault-tolerant applications.
Step 1 - Setup Temporal Cloud
Once you have been invited you can log into your Temporal cloud account Temporal Cloud. Setting up the Temporal account involves creating your namespaces and inviting other users as well as assigning permissions to those users.
Create mTLS certificate
Temporal cloud requires mTLS between the Temporal worker (your application) and the Temporal cloud namespace. The mTLS certificate is configured at the namespace level. Temporal has made it easy to create your own mTLS certificates using docker but if your organization has it’s own certificate management you will want to use that of course. More information and requirements for generating mTLS certificates can be found here.
Generate root CA
$ docker pull temporalio/client-certificate-generation:latest
$ docker run -v $PWD:/work -it temporalio/client-certificate-generation ca.sh
Create namespace
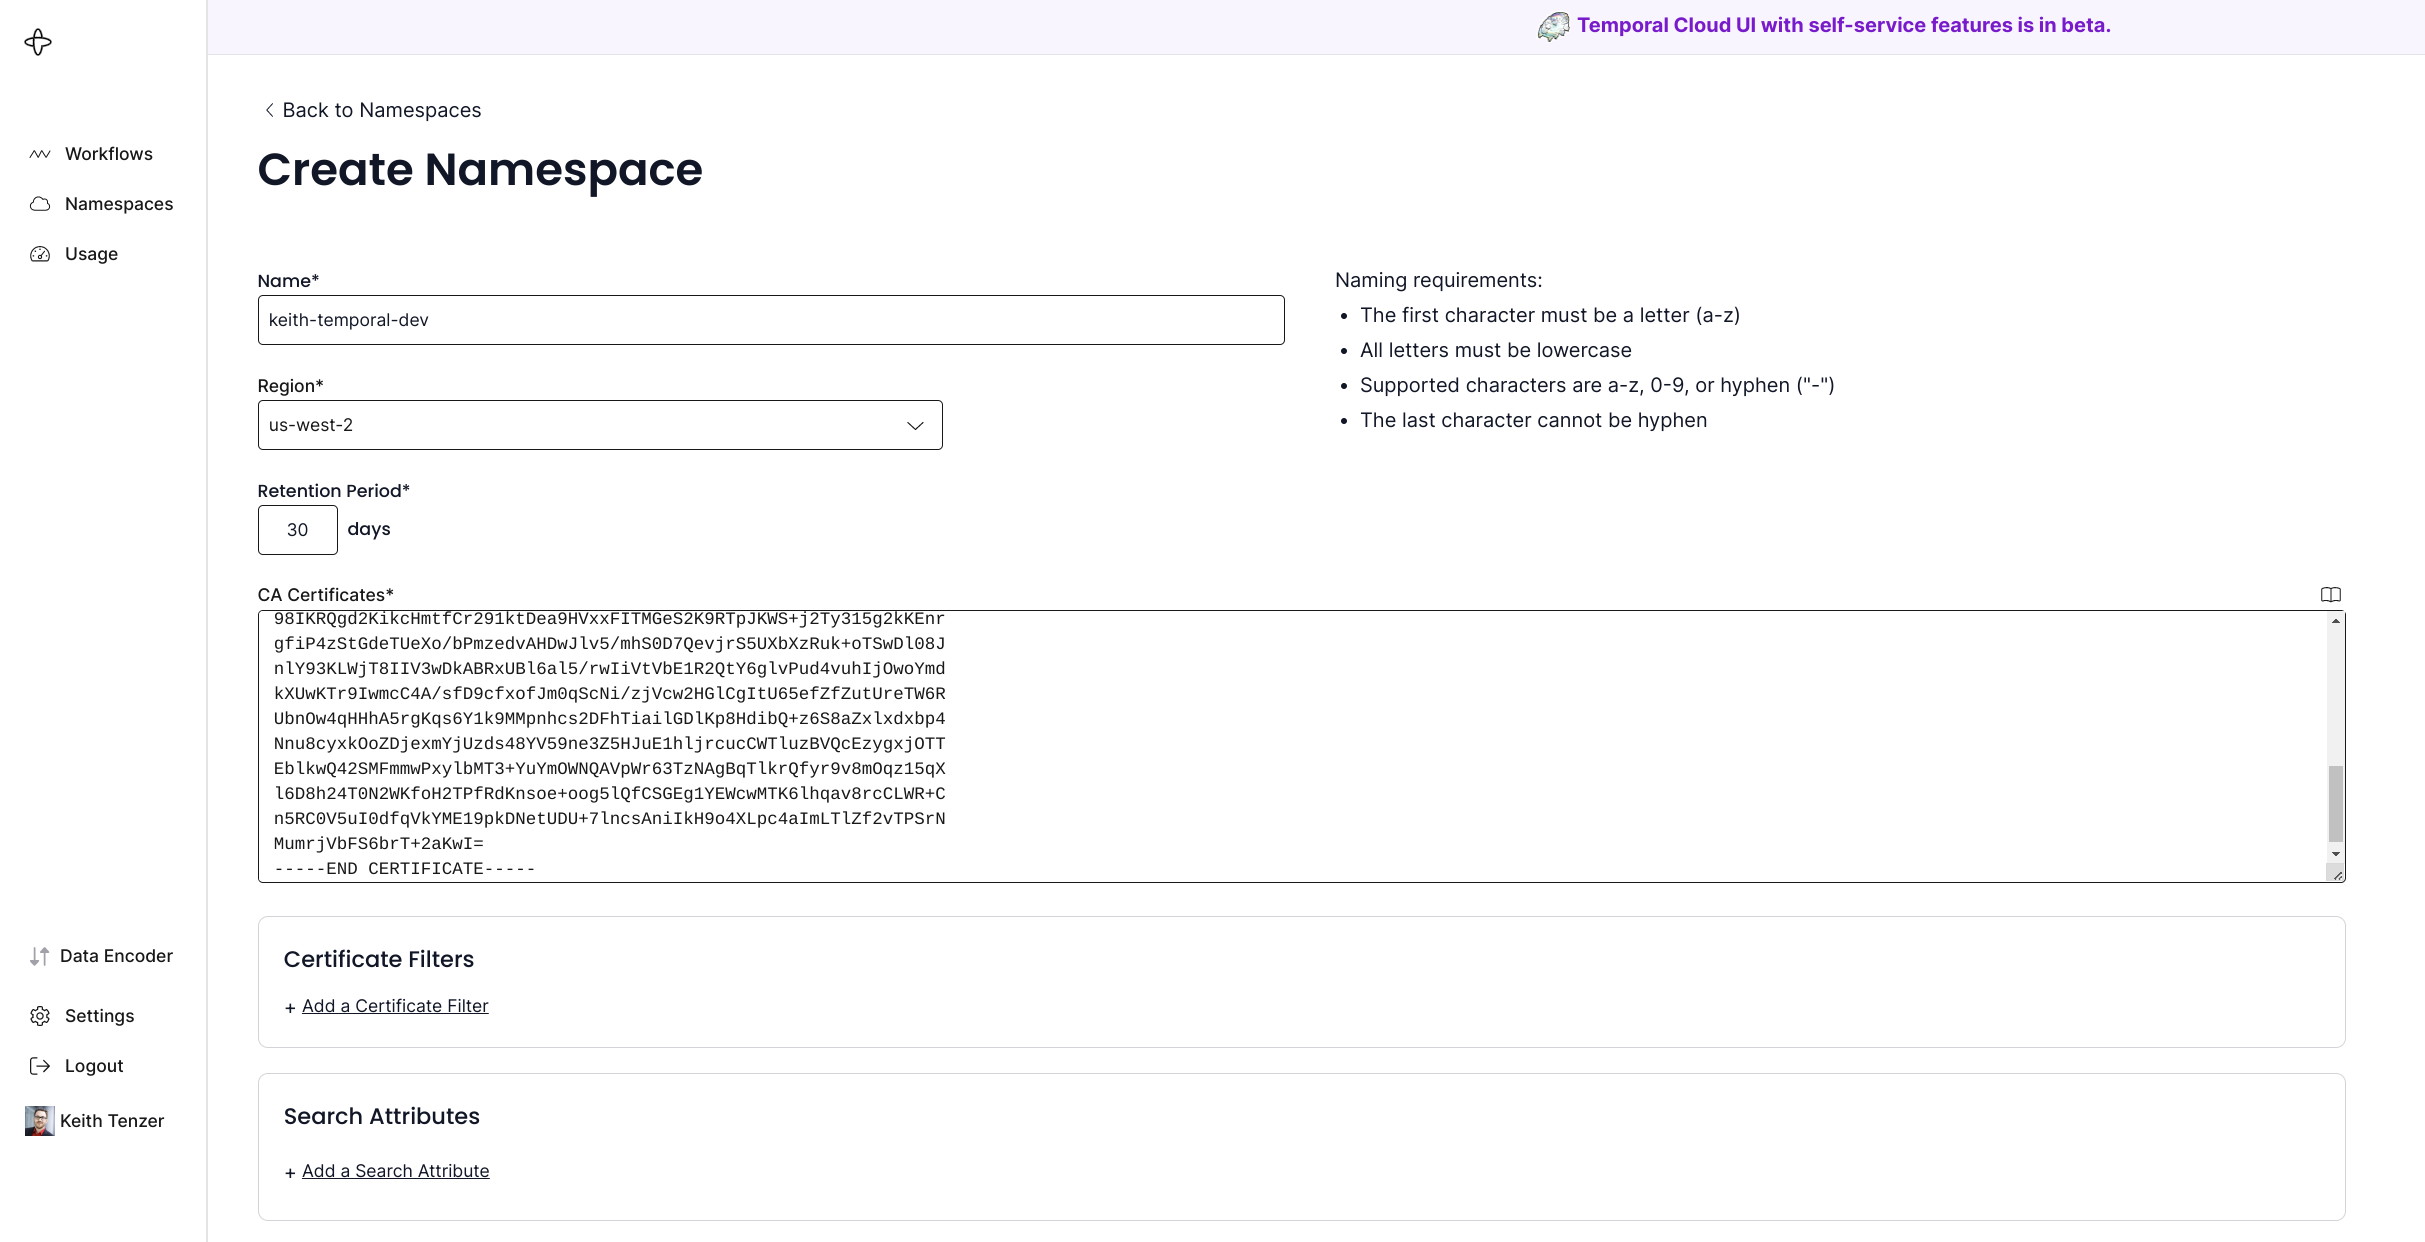
Now that we have a certificate we can create a namespace. In the Temporal Cloud UI simply click ‘create namespace’.
Enter a name for your namespace, select a region, retention period and copy your public pem for the certificate you generated.
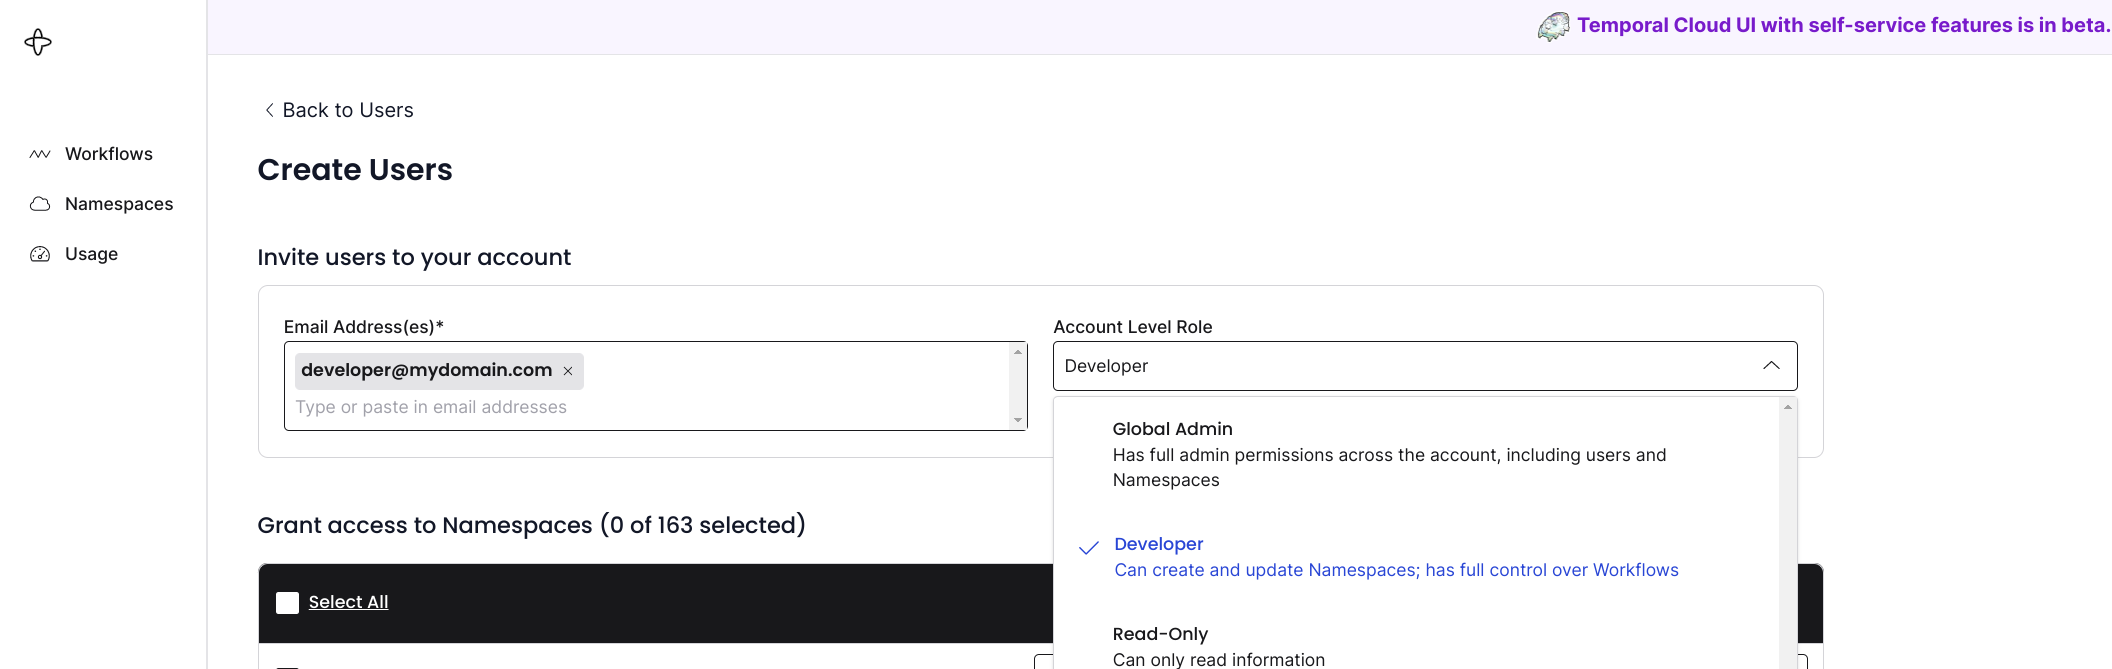
Invite team members
Go to settings and you can create users as well as assign them permissions. Permissions can be read-only, developer (read-write) or global admin.
Step 2 - Creating Worker Application
Now that we have created our namespace and setup some users it is time to create our worker application.
Setup SDK with Go (optional)
A temporal worker is built using the Temporal SDK. Java, Typescript, Python and Go are all provided. In this example I will use Go.
Configure Go (optional)
Create directory structure for Go in your home directory (optional)
$ mkdir -p ~/go/src/github.com
Install Go (optional)
$ sudo dnf install -y go
Update Profile with Go Environment (optional)
$ vi ~/.bash_profile
export GOBIN=/home/username
export GOPATH=/home/username/src
export EDITOR=vim
Build CLI (optional)
Temporal provides the tctl cli tool for controlling workflows. This can be very handy in addition to the UI.
Change directory to temporalio (optional)
$ mkdir -p ~/go/src/github.com/temporalio
$ cd ~/go/src/github.com/temporalio
Clone Temporal GitHub repository (optional)
$ git clone https://github.com/temporalio/temporal.git
Run tctl Makefile (optional)
$ make update-tctl
Copy tctl binary to bin directory (optional)
$ sudo cp ~/go/bin/tctl /usr/local/bin
Configure tctl environment variables
export TEMPORAL_CLI_ADDRESS="namespace.accountId.tmprl.cloud:7233"
export TEMPORAL_CLI_NAMESPACE="namespace.accountId"
export TEMPORAL_CLI_TLS_CERT="/path/to/ca.pem"
export TEMPORAL_CLI_TLS_KEY="/path/to/ca.key"
Create worker application
For our worker application, we will use the helloworld example from the Temporal samples-go repository. In order to connect to the Temporal cloud from our worker application we will need to load the mTLS certificate we generated. This will need to be done in the worker and wherever a workflows is being started/signaled/queried.
Clone samples-go repository.
$ git clone https://github.com/temporalio/samples-go.git
Update the helloworld/worker/main.go.
const clientCertPath string = "/path/to/ca.pem"
const clientKeyPath string = "/path/to/ca.key"

var c client.Client
var err error
var cert tls.Certificate

cert, err = tls.LoadX509KeyPair(clientCertPath, clientKeyPath)
if err != nil {
	log.Fatalln("Unable to load certs", err)
}

c, err = client.Dial(client.Options{
	HostPort:  "namespace.accountId.tmprl.cloud:7233",
	Namespace: "namespace.accountId",
	ConnectionOptions: client.ConnectionOptions{
		TLS: &tls.Config{Certificates: []tls.Certificate{cert}},
	},
})
Step 3 - Running Workflow
Now that our SDK of choice is setup and we have built tctl we are ready to run a workflow.
Start application worker
$ go run helloworld/worker/main.go
2022/10/01 11:37:08 INFO  No logger configured for temporal client. Created default one.
2022/10/01 11:37:09 INFO  Started Worker Namespace keith-temporal-dev.a2dd6 TaskQueue hello-world WorkerID 24469@fedora@
Start workflow
A workflow can be started from the CLI or using the SDK. In this example we will use the SDK starter provided by the helloworld sample.
$ go run helloworld/starter/main.go
2022/10/01 11:37:31 INFO  No logger configured for temporal client. Created default one.
2022/10/01 11:37:32 Started workflow WorkflowID hello_world_workflowID RunID cd7ee191-e812-4206-8dee-0e1cd420445b
2022/10/01 11:37:32 Workflow result: Hello Temporal!
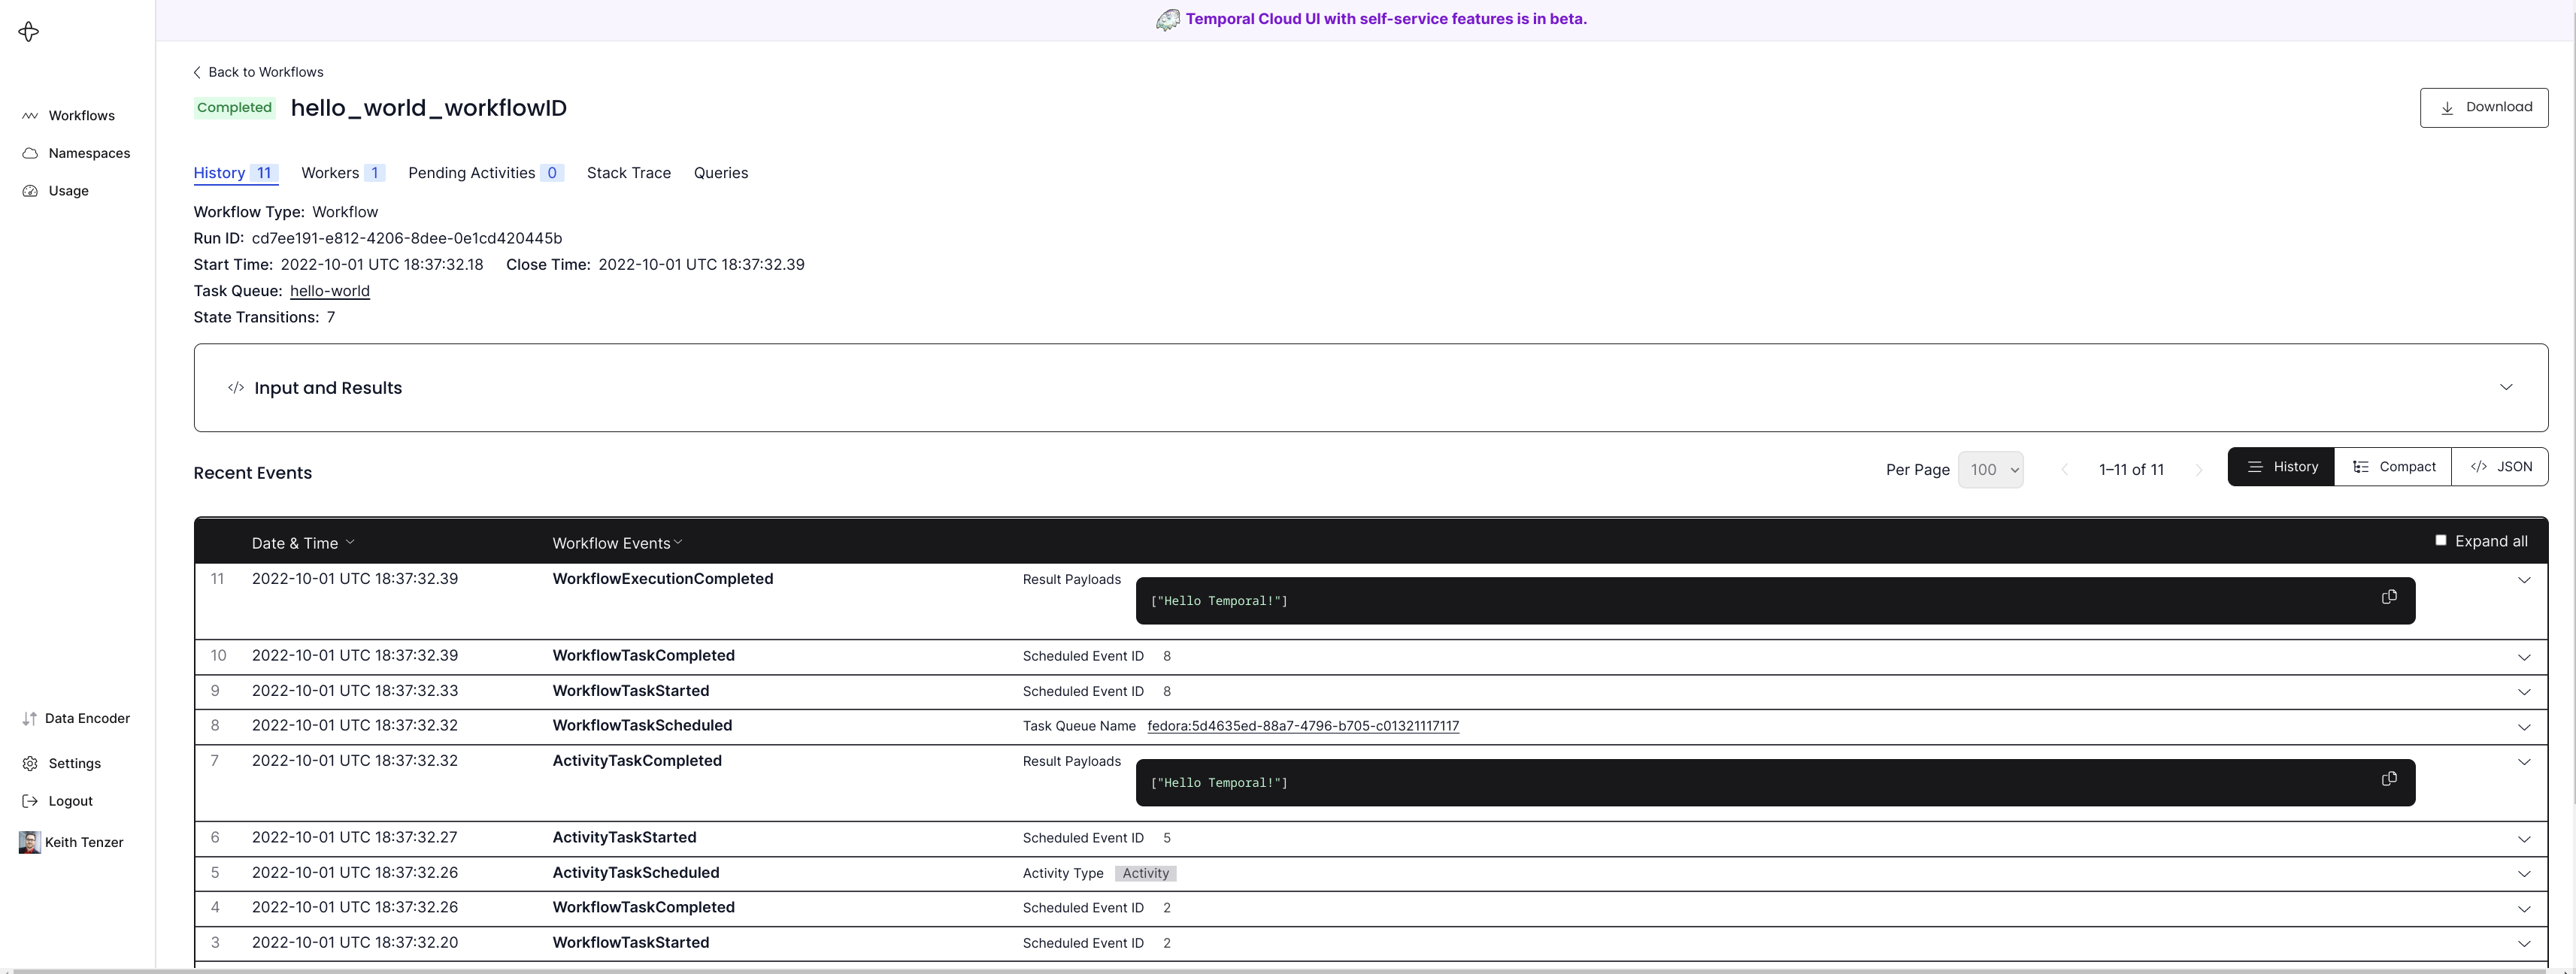
View workflow results
Once workflow executes we can view its results in the UI. Simply select workflows.
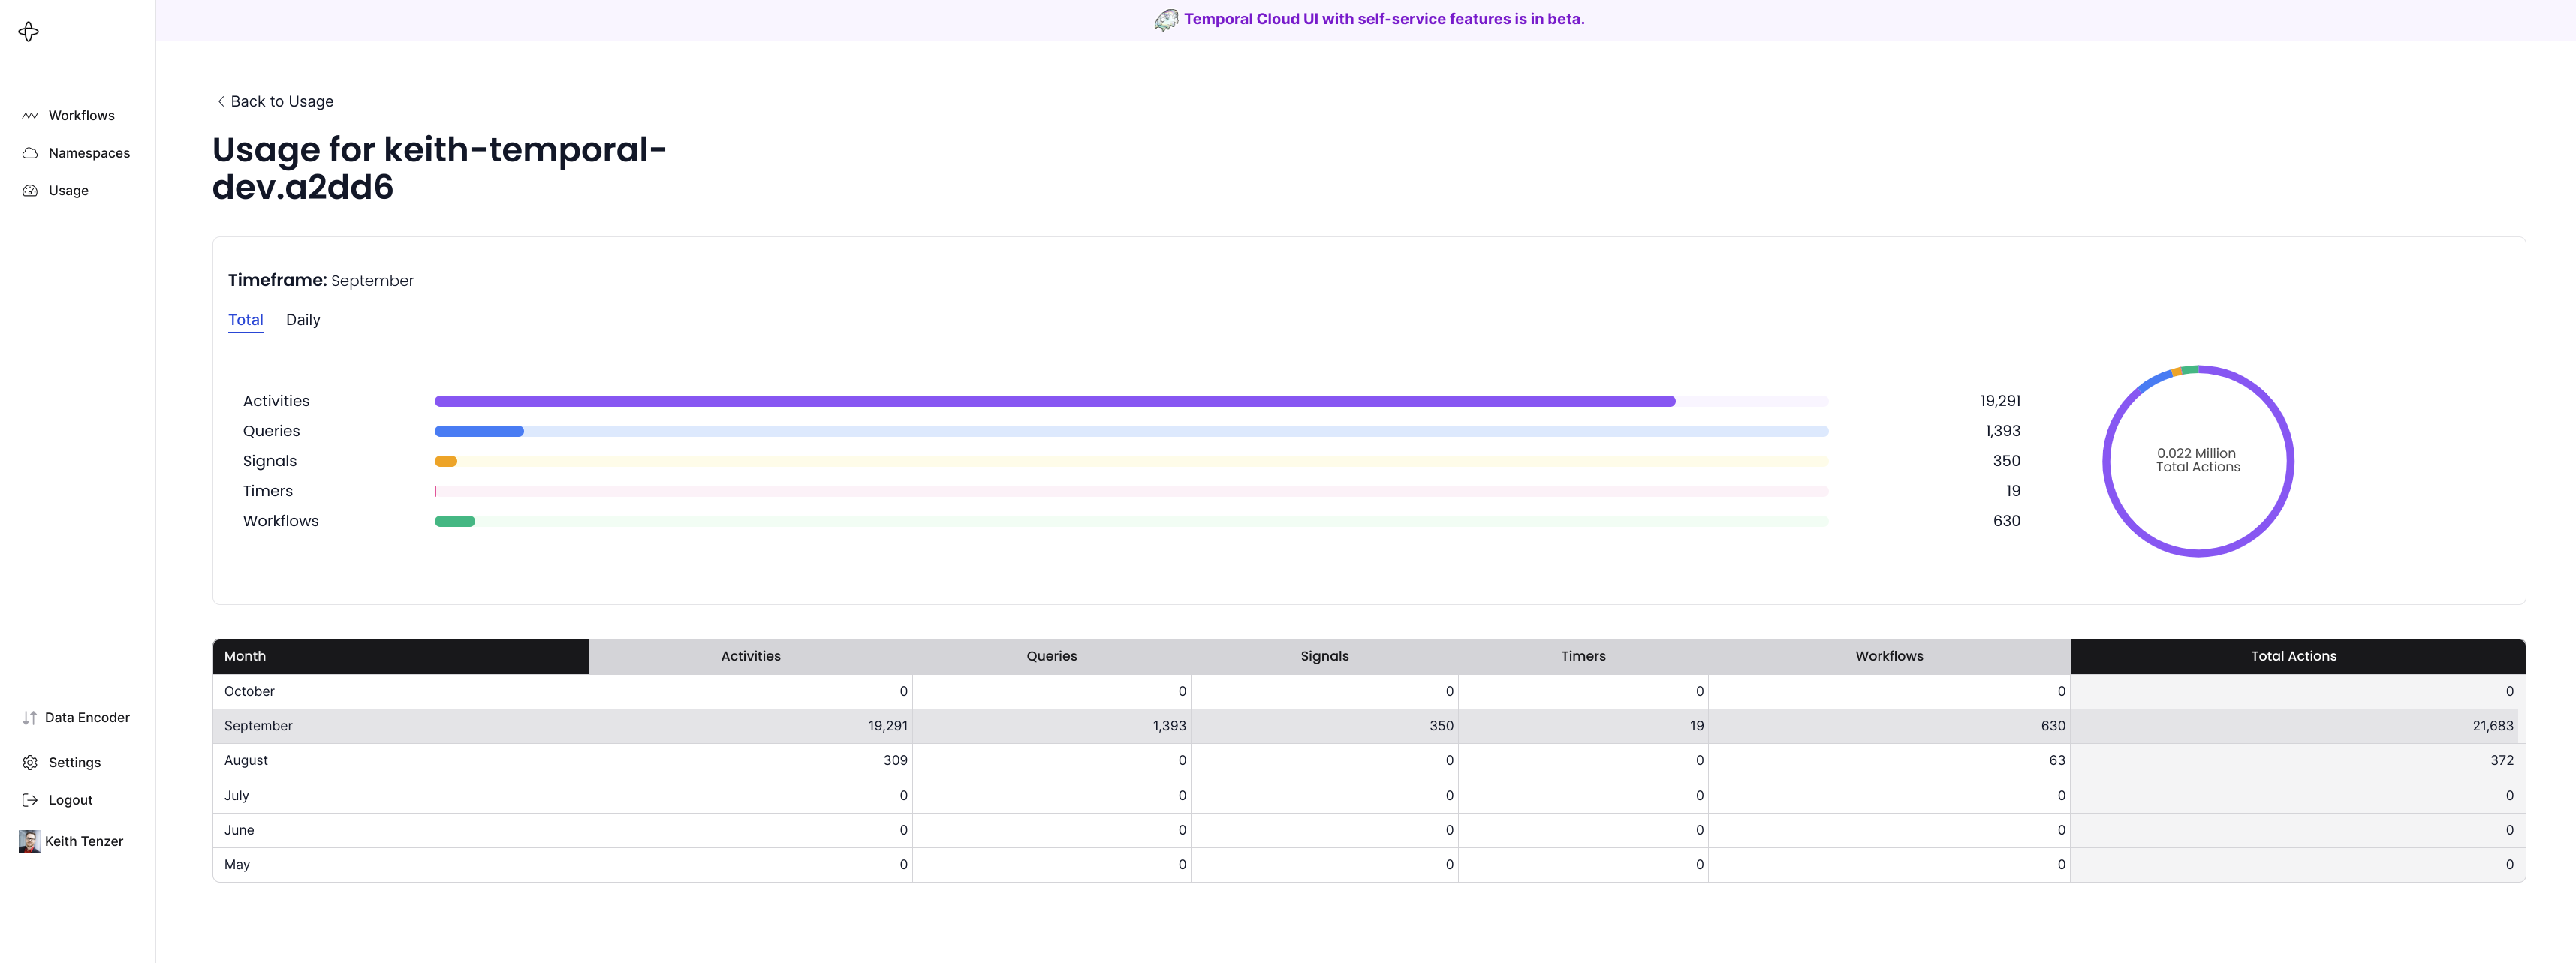
View namespace usage statistics
The Temporal Cloud UI makes it easy to view your usage by providing usage statistics. Simply select usage and you can view usage by your account or each individual namespace. You can view usage statistics for a given namespace or across multiple namespaces.
Summary
In this article we showed how to setup the Temporal cloud for use with your application worker. Using the Temporal cloud saves a lot of time that would otherwise be spent installing and operationalizing Temporal in self-hosted environment. Developers can point their workers at a Temporal cloud namespace and go. The Temporal cloud provides massive scale, allowing developers to easily ramp up their applications to the desired scale. The simplest most cost-effective way to get started with Temporal is through the Temporal cloud.
(c) 2022 Keith Tenzer