
OpenShift Enterprise 3.1 Lab Setup

Overview
OpenShift Enterprise is a PaaS platform that enables digital transformation. It lets you build and run traditional (mode 1) as well as cloud-native (mode 2) applications. OpenShift is built on two key technology components: Docker and Kubernetes. Docker provides a standard, consistent application packaging format. It enables OpenShift to easily move applications across the hybrid cloud. Kubernetes provides container orchestration and allows multiple container nodes running Docker to be clustered. Kubernetes provides scheduling for application containers.
OpenShift of course provides a lot on top of Docker and Kubernetes. This includes image registry, routing, SDN, developer experience, data persistence, enterprise-grade container runtime, build / deployment blueprints and much more.
OpenShift has two server roles: master and node. The master is the control plane and is responsible for Kubernetes, ETCD, Interfaces (API|GUI|CLI), build/deployments configs and the image registry. The node is where containers are instantiated and run. The node is running Kubernetes services, ETCD and of course Docker. In OpenShift you can use either Red Hat Enterprise Linux (RHEL) or RHEL Atomic as the operating system.
Prerequisites
One can of course install OpenShift enterprise on a single VM but even for a lab setup it is a good idea to separate the role of master and node. For this lab configuration we need two VMs both with Red Hat Enterprise Linux 7.2. One node will be the OpenShift master and the other OpenShift node. Ensure both have an additional 10GB disk, this will be used for Docker storage. On both nodes follow the below steps:
Ensure hostnames are configured in /etc/hosts.
#vi /etc/hosts
192.168.122.60 ose3-master.lab.com ose3-master
192.168.122.61 ose3-node1.lab.com ose3-node1
Register systems with subscription management and ensure appropriate repositories are configured.
#subscription-manager register
#subscription-manager list --available
#subscription-manager attach --pool=8a85f9814f2c669b01343948398938932
#subscription-manager repos --disable="*"
#subscription-manager repos --enable="rhel-7-server-rpms" --enable="rhel-7-server-extras-rpms" --enable="rhel-7-server-ose-3.1-rpms"
Disable Network Manager.
#systemctl disable NetworkManager
#systemctl stop NetworkManager
Install necessary software.
#yum install -y wget git net-tools bind-utils iptables-services bridge-utils bash-completion
#yum update -y
#yum install -y atomic-openshift-utils
Reboot.
#systemctl reboot
Install and configure Docker.
#yum install docker-1.8.2
#vi /etc/sysconfig/docker
OPTIONS='--insecure-registry=172.30.0.0/16 --selinux-enabled'
# cat <<EOF > /etc/sysconfig/docker-storage-setup
DEVS=/dev/vdb
VG=docker-vg
EOF
#docker-storage-setup
#systemctl enable docker
#systemctl start docker
Setup ssh keys, this is required by Ansible.
#ssh-keygen
#ssh-copy-id -i ~/.ssh/id_rsa.pub ose3-node1.lab.com
DNS is also a requirement. A colleague Ivan Mckinely was nice enough to create an ansible playbook for deploying a DNS server that supports OpenShift. To deploy DNS run following steps on a separate system running RHEL.
#yum install -y git
#wget http://dl.fedoraproject.org/pub/epel/7/x86_64/e/epel-release-7-5.noarch.rpm
#rpm -ivh epel-release-7-5.noarch.rpm
#yum install -y ansible
#git clone https://github.com/ivanthelad/ansible-aos-scripts/tree/master/playbooks/roles
#cd ansible-aos-scripts
Edit inventory file and set dns to IP of the system that should be providing DNS. Also ensure nodes and masters have correct IPs for your OpenShift servers. In our case 192.168.122.100 is dns, 192.168.122.60 master and 192.168.122.61 node.
#vi inventory
[dns]
192.168.122.100
[nodes]
192.168.122.61
[masters]
192.168.122.60
Configure ssh on DNS host
#ssh-keygen
#ssh-copy-id -i ~/.ssh/id_rsa.pub localhost
Run Ansible.
#ansible-playbook -i inventory playbooks/install_dnsmas.yml
Install OpenShift Enterprise 3.1
There are two different installations, the quick and advanced installation. The quick installation provides a interactive menu that guides you through a basic install. The advanced installation allows you to directly configure the install yaml files used by Ansible and perform an unattended install. Things like enabling the OVS Multi-tenant SDN would be done using advanced deployment. A template for deploying an advanced installation of OpenShift is available here.
For the purpose of our lab setup, the basic install is enough. In addition since OpenShift Enterprise uses Ansible you can easily change things later and re-run Ansible. Ansible rocks!
Start basic installer.
#atomic-openshift-installer install
Welcome to the OpenShift Enterprise 3 installation.
Please confirm that following prerequisites have been met:
* All systems where OpenShift will be installed are running Red Hat Enterprise
 Linux 7.
* All systems are properly subscribed to the required OpenShift Enterprise 3
 repositories.
* All systems have run docker-storage-setup (part of the Red Hat docker RPM).
* All systems have working DNS that resolves not only from the perspective of
 the installer but also from within the cluster.
When the process completes you will have a default configuration for Masters
and Nodes. For ongoing environment maintenance it's recommended that the
official Ansible playbooks be used.
For more information on installation prerequisites please see:
https://docs.openshift.com/enterprise/latest/admin_guide/install/prerequisites.html
Are you ready to continue? [y/N]:
Choose OpenShift version to isntall.
This installation process will involve connecting to remote hosts via ssh. Any
account may be used however if a non-root account is used it must have
passwordless sudo access.
User for ssh access [root]:
Which variant would you like to install?
(1) OpenShift Enterprise 3.1
(2) OpenShift Enterprise 3.0
(3) Atomic Enterprise Platform 3.1
Choose a variant from above: [1]:
Configure OpenShift master.
*** Host Configuration ***
You must now specify the hosts that will compose your OpenShift cluster.
Please enter an IP or hostname to connect to for each system in the cluster.
You will then be prompted to identify what role you would like this system to
serve in the cluster.
OpenShift Masters serve the API and web console and coordinate the jobs to run
across the environment. If desired you can specify multiple Master systems for
an HA deployment, in which case you will be prompted to identify a *separate*
system to act as the load balancer for your cluster after all Masters and Nodes
are defined.
If only one Master is specified, an etcd instance embedded within the OpenShift
Master service will be used as the datastore. This can be later replaced with a
separate etcd instance if desired. If multiple Masters are specified, a
separate etcd cluster will be configured with each Master serving as a member.
Any Masters configured as part of this installation process will also be
configured as Nodes. This is so that the Master will be able to proxy to Pods
from the API. By default this Node will be unschedulable but this can be changed
after installation with 'oadm manage-node'.
OpenShift Nodes provide the runtime environments for containers. They will
host the required services to be managed by the Master.
http://docs.openshift.com/enterprise/latest/architecture/infrastructure_components/kubernetes_infrastructure.html#master
http://docs.openshift.com/enterprise/latest/architecture/infrastructure_components/kubernetes_infrastructure.html#node

Enter hostname or IP address: ose3-master.lab.com
Will this host be an OpenShift Master? [y/N]: y
Will this host be RPM or Container based (rpm/container)? [rpm]:
Configure OpenShift node.
*** Installation Summary ***
Hosts:
- ose3-master.lab.com
 - OpenShift Master
 - OpenShift Node
 - Etcd (Embedded)
Total OpenShift Masters: 1
Total OpenShift Nodes: 1
NOTE: Add a total of 3 or more Masters to perform an HA installation.
Do you want to add additional hosts? [y/N]: y
Enter hostname or IP address: ose3-node1.lab.com
Will this host be an OpenShift Master? [y/N]: n
Will this host be RPM or Container based (rpm/container)? [rpm]:
Review installation summary.
*** Installation Summary ***
Hosts:
- ose3-master.lab.com
 - OpenShift Master
 - OpenShift Node (Unscheduled)
 - Etcd (Embedded)
- ose3-node1.lab.com
 - OpenShift Node (Dedicated)
Total OpenShift Masters: 1
Total OpenShift Nodes: 2
NOTE: Add a total of 3 or more Masters to perform an HA installation.
Do you want to add additional hosts? [y/N]: y
You might want to override the default subdomain uses for exposed routes. If you don't know what
this is, use the default value.
New default subdomain (ENTER for none) []: apps.lab.com
Check the installation details and proceed if everything looks right.
A list of the facts gathered from the provided hosts follows. Because it is
often the case that the hostname for a system inside the cluster is different
from the hostname that is resolveable from command line or web clients
these settings cannot be validated automatically.
For some cloud providers the installer is able to gather metadata exposed in
the instance so reasonable defaults will be provided.
Plese confirm that they are correct before moving forward.
ose3-master.lab.com,192.168.122.60,192.168.122.60,ose3-master.lab.com,ose3-master.lab.com
ose3-node1.lab.com,192.168.122.61,192.168.122.61,ose3-node1.lab.com,ose3-node1.lab.com
Format:
connect_to,IP,public IP,hostname,public hostname
Notes:
 * The installation host is the hostname from the installer's perspective.
 * The IP of the host should be the internal IP of the instance.
 * The public IP should be the externally accessible IP associated with the instance
 * The hostname should resolve to the internal IP from the instances
 themselves.
 * The public hostname should resolve to the external ip from hosts outside of
 the cloud.
Do the above facts look correct? [y/N]: y
Configure OpenShift
One of the advantages of using the advanced install is you can configure everything at install time. Since we went with basic install there are a few things that need to be done after installation is complete.
Authentication
By default authentication is set to deny all. There are various identity providers but for a lab setup it is easiest to use HTpassword.
#yum install -y httpd-tools
#vi /etc/origin/master/master-config.yaml
identityProviders:
 - name: my_htpasswd_provider
 challenge: true
 login: true
 mappingMethod: claim
 provider:
 apiVersion: v1
 kind: HTPasswdPasswordIdentityProvider
 file: /root/users.htpasswd
#htpasswd -c /root/users.htpasswd admin
Give the new admin user role cluster-admin in OpenShift
#oadm policy add-cluster-role-to-user cluster-admin admin
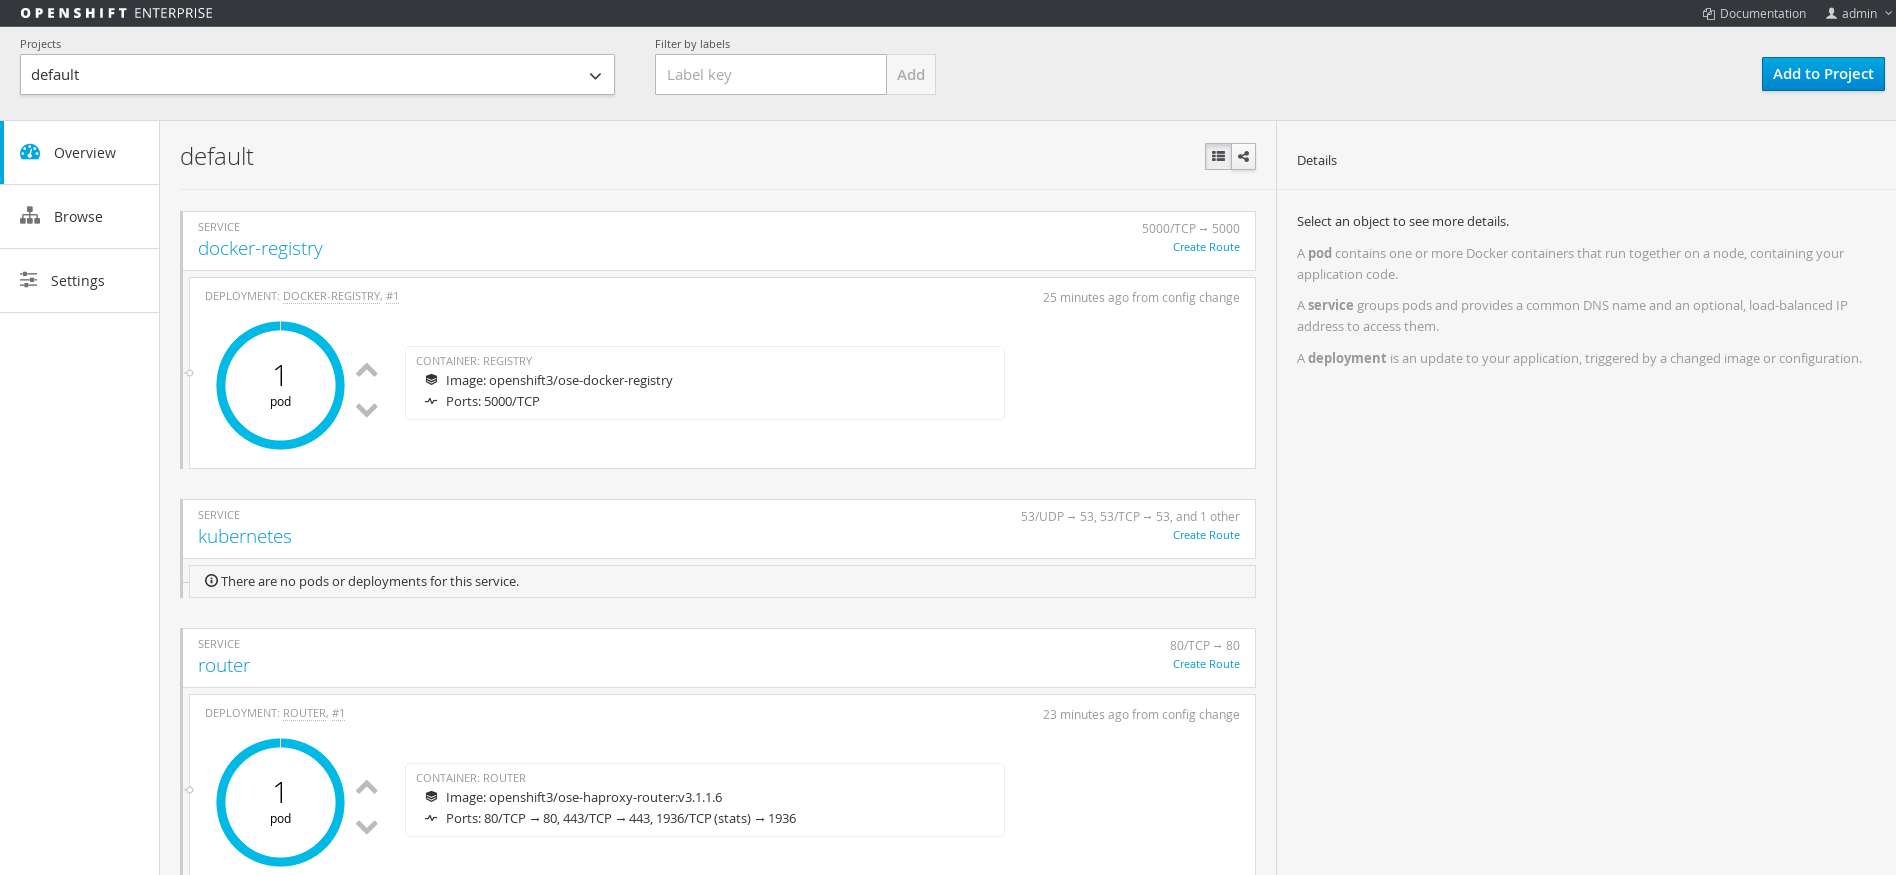
Deploy Registry
The registry stores docker images that are used for OpenShift builds and deployments. For lab environment it is appropriate to use local disk but for production make sure you are using production grade storage and the --mount-host option.
#oadm registry --service-account=registry \
    --config=/etc/origin/master/admin.kubeconfig \
    --credentials=/etc/origin/master/openshift-registry.kubeconfig \
    --images='registry.access.redhat.com/openshift3/ose-${component}:${version}'
Deploy Router
The router in OpenShift is responsible for connecting external services to the correct pod running containers for given service. External service has a DNS record and the router maps this to the pod/container IP which of course is very dynamic.
oadm router router --replicas=1 \
--credentials='/etc/origin/master/openshift-router.kubeconfig' \
--service-account=router
Once both the registry and router are running you are ready to rock with Op
enShift Enterprise!
Aggregate Logging
OpenShift Enterprise supports Kibana and the ELK Stack for log aggregation. Any pod and container that log to STDOUT will have all their log messages aggregated. This provides centralized logging for all application components. Logging is completely integrated within OpenShift and the ELK Stack runs of course containerized within OpenShift.
#oc new-project logging
#oc secrets new logging-deployer nothing=/dev/null
#oc create -f - <<API
apiVersion: v1
kind: ServiceAccount
metadata:
  name: logging-deployer
secrets:
  -name: logging
-deployer
API
#oc policy add-role-to-user edit --serviceaccount logging-deployer

#oadm policy add-scc-to-user  \
    privileged system:serviceaccount:logging:aggregated-logging-fluentd

#oadm policy add-cluster-role-to-user cluster-reader \
    system:serviceaccount:logging:aggregated-logging-fluentd

#oc process logging-deployer-template -n openshift -v KIBANA_OPS_HOSTNAME=kibana-ops.lab.com,KIBANA_HOSTNAME=kibana.lab.com,ES_CLUSTER_SIZE=1,PUBLIC_MASTER_URL=https://ose3-master.lab.com:8443 | oc create -f -
# oc get pods
NAME READY STATUS RESTARTS AGE
logging-deployer-9lqkt 0/1 Completed 0 15m
When deployer is complete than create deployment templates
#oc process logging-support-template | oc create -f -

# oc get pods
NAME READY STATUS RESTARTS AGE
logging-deployer-9lqkt 0/1 Completed 0 15m
logging-es-pm7uamdy-2-rdflo 1/1 Running 0 8m
logging-kibana-1-e13r3 2/2 Running 0 13m
Once ELK Stack is running update deployment so that persistent storage is used
#vi pvc.json

{
    "apiVersion": "v1",
    "kind": "PersistentVolumeClaim",
    "metadata": {
         "name": "logging-es-1"
    },
    "spec": {
        "accessModes": [ "ReadWriteOnce" ],
            "resources": {
                "requests": {
                    "storage": "10Gi"
                }
            }
     }
}
#oc create -f pvc.json
# oc get dc
NAME TRIGGERS LATEST
logging-es-pm7uamdy ConfigChange, ImageChange 2
#oc volume dc/logging-es-pm7uamdy --add --overwrite --name=elasticsearch-storage --type=persistentVolumeClaim --claim-name=logging-es-1
Enable Multi-tenant network
OpenShift Enterprise supports an OVS multi-tenant network configuration. By default OpenShift will configure ovs-subnet plugin. In subnet mode all pods and as such containers can access all other pods and containers within the Kubernetes cluster. In order to support isolation between projects the ovs-multitenant plugin is required. This steps are for switching from ovs-subnet to ovs-multitenant plugins.
Delete Registry and Router (if exist)
#oc project default
#oc delete dc/docker-registry svc/docker-registry
#oc delete dc/router svc/router
On Master
Change network plugin to ovs-multitenant.
#vi /etc/origin/master/master-config.yaml
networkConfig:
 clusterNetworkCIDR: 10.1.0.0/16
 hostSubnetLength: 8
# networkPluginName: redhat/openshift-ovs-subnet
 networkPluginName: redhat/openshift-ovs-multitenant
On Node
Change network plugin to ovs-multitenant. Note: Only change second iteration of networkPluginName.
#vi /etc/origin/node/node-config.yaml
networkConfig:
 mtu: 1450
# networkPluginName: redhat/openshift-ovs-subnet
 networkPluginName: redhat/openshift-ovs-multitenant
On All Nodes
#systemctl reboot
After reboot you will need to recreate the registry and router in the default project using the above steps. The default project has VNID 0 so all pods and containers can reach registry and router. You can also enable network access between projects if desired.
Testing
In order to test multi-tenant network create two projects, you should not be able to access pods across projects.
#oc new-project project1

#oc new-app centos/ruby-22-centos7~https://github.com/openshift/ruby-hello-world.git

#oc new-project project2

#oc new-app centos/ruby-22-centos7~https://github.com/openshift/ruby-hello-world.git
Get the pod id.
# oc get pods
NAME READY STATUS RESTARTS AGE
ruby-hello-world-1-build 0/1 Completed 0 33m
ruby-hello-world-2-xde1a 1/1 Running 0 27m
Get ip of pod.
# oc describe pod ruby-hello-world-2-xde1a
Name: ruby-hello-world-2-xde1a
Namespace: sandbox
Image(s): 172.30.186.116:5000/sandbox/ruby-hello-world@sha256:c8339364954812a20061d3a97403af30837deacaa134cc611c5cc12279df6685
Node: ose3-node1.lab.com/192.168.122.61
Start Time: Wed, 13 Apr 2016 20:42:44 +0200
Labels: app=ruby-hello-world,deployment=ruby-hello-world-2,deploymentconfig=ruby-hello-world
Status: Running
Reason:
Message:
IP: 10.1.0.11
Switch to other project
#oc project project1
Try and use curl to access the ruby application in project 1 from project 2
#oc exec ruby-hello-world-2-xde1a -i -t bash

bash-4.2$ curl http://10.1.0.11:8080
Conclusion
In this article we deployed on an OpenShift Enterprise 3.1 environment for lab purpose. This is a perfect way to get your feet wet and start experimenting with your applications running on OpenShift. Unlike other PaaS solutions OpenShift supports running not only cloud-native (mode 2) applications but also traditional (mode 1) applications. Let's face it we aren't going to re-write 20+ years of application architecture overnight.
Another added bonus, anything that runs as a docker container can run within OpenShift. You don't need to inject code or change your application in order to make it work on OpenShift and that is why it can support already existing mode 1 traditional applications so well. It is time to see how container technology can be leveraged to improve the way we build and run all applications. OpenShift is the way!
Happy Openshifting!
(c) 2016 Keith Tenzer