
Overview
In this article we will focus on installing and configuring OpenStack Stein using RDO and the packstack installer. RDO is a community platform around Red Hat’s Enterprise OpenStack Distribution. It allows you to test the latest OpenStack capabilities on a stable platform such as Red Hat Enterprise Linux (RHEL) or CentOS. This guide will take you through setting up Hetzner root server, preparing environment for OpenStack, installing the OpenStack Stein release, adding a floating ip subnet through OVS, configuring networking, security groups, flavors, images and are other OpenStack related services. The outcome is a working OpenStack environment based on the Stein release that you can use as a baseline for testing your applications using OpenStack capabilities. The installation will create an all-in-one deployment however you can use this guide to create a multi-node deployment as well.
Root Server Specs
CPU: Intel(R) Xeon(R) CPU E5-1650 v3 @ 3.50GHz (12 Cores)
Memory: 128GB RAM
Disk: 2 x 480GB SSD
Network: 1Gbit
IPV4 Adresses: 1 x IPV4 + /29 Subnet (6 IPs)
Hetzner is a hosting providing and auctions off used hardware for very competitive prices on a per/month basis (https://www.hetzner.de/sb). Hetzner provides one IP for each root server that is accessible via internet. It is a /32 so if you want additional IPs, like you would for OpenStack to use as floating ips you need to order additional subnet. You can order an additional subnet as I have done. Hetzner will route that subnet through the host IP of the /32. This requires creating an additional OVS bridge in OpenStack and this guide will go through that configuration.
Configure Root Server
As mentioned, Hetzner will give you access to your root server via IP and provide ability to manage the root server. Basic things like put root server in rescue mode or reboot. You can provide public ssh key or use password to access system. Please don’t use password, this is the internet, bad things can and will happen.
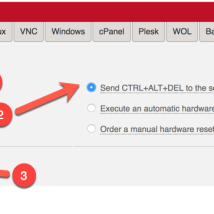
Enter Rescue Mode
In order to install OS or repair it you need to get into rescue mode.

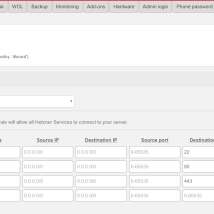
Configure Hetzner Firewall.
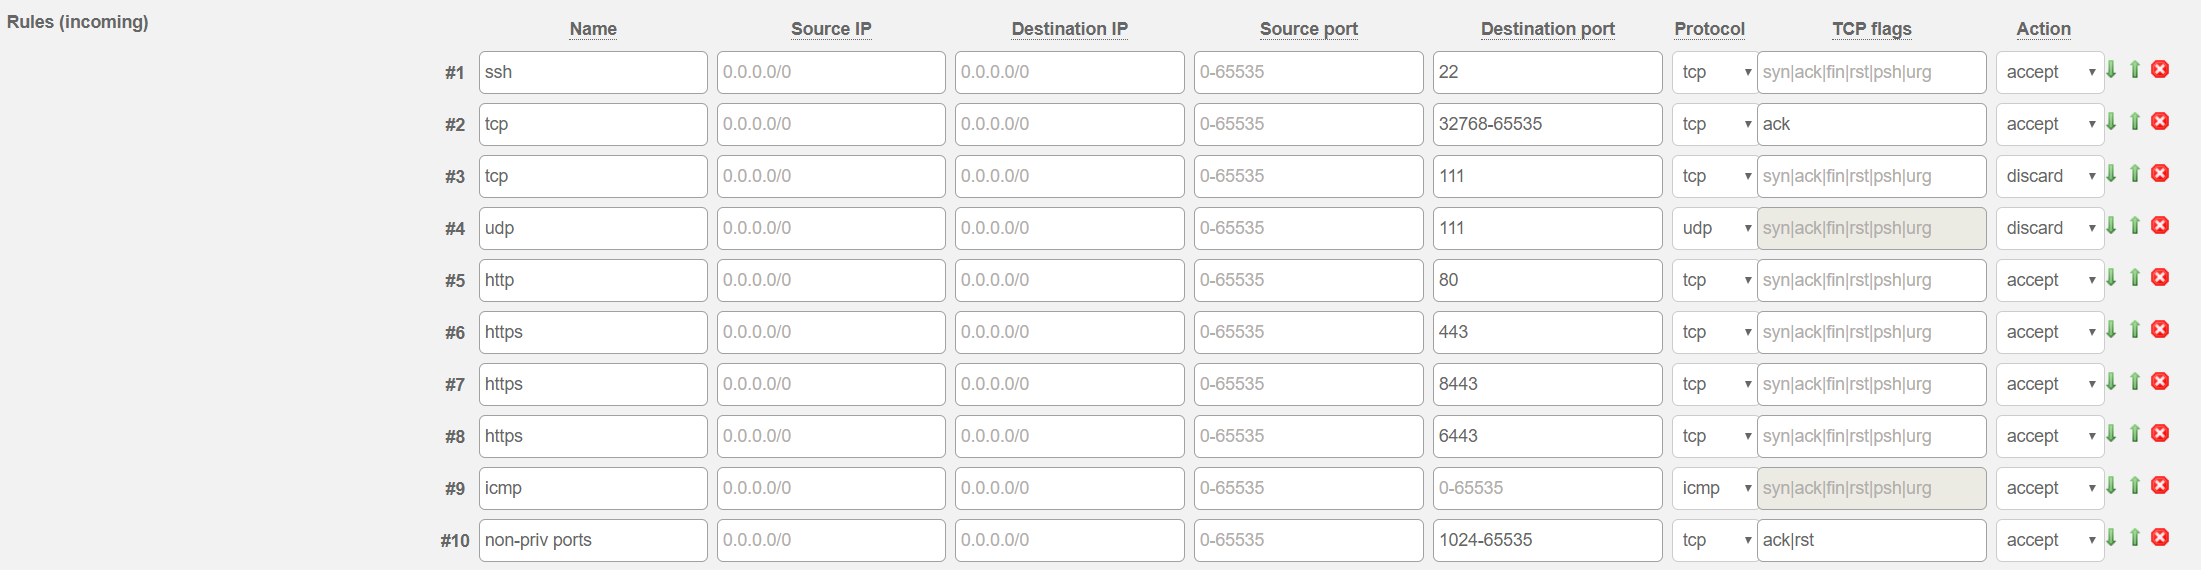
While server is rebootting you can modify your servers firewall rules for incoming traffic. By default firewall allows port 22 for SSH and nothing else. Firewall settings can be modified under your server’s settings in Hetzner’s web UI https://robot.your-server.de/server. For OpenStack I would recommend 80, 443, 22 and ICMP.
If you plan on running OpenShift on OpenStack you need to add some additional rules.
Connect to root server via ssh and private key.
# ssh -i .ssh/id_rsa.pub
Create Root Server Configuration.
The root server in this case has two disks. They are being configured in non-redundant RAID 1 (stripping) configuration. OpenStack requires decent disk performance, I found when using mirroring it was not enough. If you want redundant configuration or decent performance, you need to pay extra for SSDs. Since we will setup LVM partitions, creating one for Cinder (cinder-volumes) is a good idea. You don’t want to use loop back driver for Cinder. Finally you can provide your own image (if you want to use RHEL, you must do so).
My colleague Andy Neeb also automated deployment using Hetzner API. If you are interested in automated deployment here is his Github repository: https://github.com/andyneeb/ansible-hetzner.
[CENTOS]
# vi config.txt

DRIVE1 /dev/sda
DRIVE2 /dev/sdb
SWRAID 1
SWRAIDLEVEL 0
BOOTLOADER grub
HOSTNAME myrootserver.lab
PART /boot ext3 512M
PART lvm vg0 150G

LV vg0 root / ext4 50G
LV vg0 swap swap swap 8G
LV vg0 var /var ext4 10G
LV vg0 tmp /tmp ext4 30G

IMAGE /root/.oldroot/nfs/install/../images/CentOS-75-64-minimal.tar.gz
[RHEL]
Note: You need to provide your own RHEL image. I have documented in a separate post how to do that. Once you have image you can upload it to the root server /root directory. Since Hetzner does not understand RHEL you will need to ensure the image name is CentOS-75-64-minimal.tar.gz.
# vi config.txt

DRIVE1 /dev/sda
DRIVE2 /dev/sdb
SWRAID 1
SWRAIDLEVEL 0
BOOTLOADER grub
HOSTNAME myrootserver.lab
PART /boot ext3 512M
PART lvm vg0 150G

LV vg0 root / ext4 50G
LV vg0 swap swap swap 8G
LV vg0 var /var ext4 10G
LV vg0 tmp /tmp ext4 30G

IMAGE /root/CentOS-75-64-minimal.tar.gz
Install image and create partitions.
# installimage -a -c config.txt
Note: you may see error with RHEL image if you renamed it to CentOS because Hetzner expects CentOS but it is safe to ignore.
Hetzner Online GmbH - installimage

Your server will be installed now, this will take some minutes
You can abort at any time with CTRL+C ...

: Reading configuration done
: Loading image file variables done
: Loading centos specific functions done
1/18 : Deleting partitions done
2/18 : Test partition size done
3/18 : Creating partitions and /etc/fstab done
4/18 : Creating software RAID level 0 done
5/18 : Creating LVM volumes done
6/18 : Formatting partitions
: formatting /dev/md/0 with ext3 done
: formatting /dev/vg0/root with ext4 done
: formatting /dev/vg0/swap with swap done
: formatting /dev/vg0/var with ext4 done
: formatting /dev/vg0/tmp with ext4 done
: formatting /dev/vg0/home with ext4 done
7/18 : Mounting partitions done
8/18 : Sync time via ntp done
9/18 : Downloading image (http) done
: Importing public key for image validation done
10/18 : Validating image before starting extraction warn
: No detached signature file found!
11/18 : Extracting image (http) done
12/18 : Setting up network config done
13/18 : Executing additional commands
: Setting hostname done
: Generating new SSH keys done
: Generating mdadm config done
: Generating ramdisk done
: Generating ntp config done
14/18 : Setting up miscellaneous files done
15/18 : Configuring authentication
: Fetching SSH keys done
: Disabling root password done
: Disabling SSH root login without password done
: Copying SSH keys done
16/18 : Installing bootloader grub done
17/18 : Running some centos specific functions failed

An error occured while installing the new system!
See the debug file /root/debug.txt for details.
Disable password authentication.
Remember this system is accessible from the internet. Unless you want people to constantly try and login, disable password authentication.
# vi /etc/ssh/sshd_config
PasswordAuthentication no
Restart sshd.
# systemctl restart sshd
Create Cinder Volumes LVM Pool
Create third partition on both disks using the remaing space available. Choose type FD (Linux Raid Autodetect). You can use fdisk or cfdisk.
# cfdisk /dev/sda
# cfdisk /dev/sdb
Detect new disks
# partprobe
Create a raid 0 (stripe) using the newly created partitions
# mdadm --create --verbose /dev/md2 --level=0 --raid-devices=2 \
/dev/sda3 /dev/sdb3
Create Physical Volume, Volume Group and Thin Pool
# pvcreate /dev/md2
# vgcreate cinder-volumes /dev/md2
# lvcreate -L 300G -T cinder-volumes/cinder-volumes-pool
Verify LVM Volume Groups
Make sure a volume group cinder-volumes exists. This will be used for OpenStack storage as mentioned.
# vgs
  VG             #PV #LV #SN Attr   VSize    VFree
  cinder-volumes   1   1   0 wz--n- <743.01g <442.86g
  vg0              1   4   0 wz--n-  149.87g   51.87g
# lvs
LV VG Attr LSize Pool Origin Data% Meta% Move Log Cpy%Sync Convert
cinder-volumes-pool cinder-volumes twi-a-tz-- 300.00g 0.00 0.24
root vg0 -wi-ao---- 50.00g
swap vg0 -wi-ao---- 8.00g
tmp vg0 -wi-ao---- 30.00g
var vg0 -wi-ao---- 10.00g
Remove Linux Raid Device (Only if you want to re-create cinder-volumes)
In case something went wrong and you need to re-create the linux raid device. It can be tricky to remove since it writes raid information to the disk partition.
Remove LVM Volume
# vgremove cinder-volumes
Stop raid device
# mdadm --stop /dev/md2
Zero raid disks
# mdadm --zero-superblock /dev/sda3
# mdadm --zero-superblock /dev/sdb3
Install OpenStack
Ensure local name resolution is working.
# vi /etc/hosts
144.76.52.111 myrootserver.lab
Set hostname.
# hostnamectl set-hostname myrootserver.lab
Enable RPMs.
[RHEL]
# subscription-manager register
# subscription-manager list --available
# subscription-manager attach --pool=
# subscription-manager repos --disable=*
# subscription-manager repos --enable=rhel-8-for-x86_64-baseos-rpms \
--enable=rhel-8-for-x86_64-appstream-rpms \
--enable=rhel-8-for-x86_64-highavailability-rpms \
--enable=fast-datapath-for-rhel-8-x86_64-rpms \
--enable=advanced-virt-for-rhel-8-x86_64-rpms \
--enable=openstack-15-for-rhel-8-x86_64-rpms \
--enable=openstack-15-tools-for-rhel-8-x86_64-rpms \
--enable=openstack-15-devtools-for-rhel-8-x86_64-rpms
Install packstack packages.
[CentOS]
# dnf install -y centos-release-openstack-stein
[Both]
# dnf install -y openstack-packstack
[RHEL]
Disable firewalld, OpenStack uses iptables.
# systemctl disable firewalld
# systemctl stop firewalld
Disable Network Manager
[Both]
In RHEL 8 NetworkManager is default and this causes issues with packstack. As such we will disable NetworkManager and enable the network-scripts stack.
# dnf install -y network-scripts
# readlink $(readlink $(which ifup))
/etc/sysconfig/network-scripts/ifup
# touch /etc/sysconfig/disable-deprecation-warnings
# systemctl stop NetworkManager
# systemctl disable NetworkManager
#systemctl enable network #systemctl start network
Switch to Advanced Virt Modules
# dnf -y module disable virt:rhel
# dnf -y module enable virt:8.0.0
Install yum-utils and update the system.
# dnf install -y dnf-utils
# dnf update -y
Configure Intel Virtualization for Directed I/O.
# vi /etc/default/grub
---
GRUB_CMDLINE_LINUX="biosdevname=0 crashkernel=auto nomodeset rd.auto=1 consoleblank=0 intel_iommu=on"
---
# grub2-mkconfig -o /boot/grub2/grub.cfg
Set SELinux to Permissive
Unfortunately SELinux is not working with this latest packstack.
# setenforce 0
# vi /etc/selinux/config
---
SELINUX=permissive
---
Reboot.
# reboot now
Create packstack answers file for customizing the installer.
# packstack --os-neutron-ml2-tenant-network-types=vxlan \
--os-neutron-ml2-mechanism-drivers=openvswitch \
--os-neutron-ml2-type-drivers=vxlan,flat \
--os-neutron-l2-agent=openvswitch \
--keystone-admin-passwd=<admin password> \
--nova-libvirt-virt-type=kvm \
--cinder-volumes-create=n \
--provision-demo=n \
--os-heat-install=y \
--os-neutron-lbaas-install=y \
--os-swift-storage-size=75G \
--gen-answer-file /root/answers.txt
Install OpenStack using packstack.
# packstack --answer-file /root/answers.txt --timeout=1500

**** Installation completed successfully ******

Additional information:
* Parameter CONFIG_NEUTRON_L2_AGENT: You have choosen OVN neutron backend. Note that this backend does not support LBaaS, VPNaaS or FWaaS services. Geneve will be used as encapsulation method for tenant networks
* Time synchronization installation was skipped. Please note that unsynchronized time on server instances might be problem for some OpenStack components.
* File /root/keystonerc_admin has been created on OpenStack client host 136.243.43.239. To use the command line tools you need to source the file.
* To access the OpenStack Dashboard browse to http://136.243.43.239/dashboard .
Please, find your login credentials stored in the keystonerc_admin in your home directory.
* The installation log file is available at: /var/tmp/packstack/20191025-135509-j6dbbfha/openstack-setup.log
* The generated manifests are available at: /var/tmp/packstack/20191025-135509-j6dbbfha/manifests
Fix issue with Horizon dashboard
# chmod 644 /usr/share/openstack-dashboard/openstack_dashboard/local/enabled/_1481_project_ng_loadbalancersv2_panel.py
Configure Physical Network
Source the keystone admin profile.
# . /root/keystonerc_admin
Backup the ifcfg-etho script.
# cp /etc/sysconfig/network-scripts/ifcfg-eno1 /root/
Configure external bridge br-ex.
# vi /etc/sysconfig/network-scripts/ifcfg-eno1
DEVICE=eno1
ONBOOT=yes
TYPE=OVSPort
DEVICETYPE=ovs
OVS_BRIDGE=br-ex
# vi /etc/sysconfig/network-scripts/ifcfg-br-ex
DEVICE=br-ex
BOOTPROTO=none
ONBOOT=yes
TYPE=OVSBridge
DEVICETYPE=ovs
USERCTL=yes
PEERDNS=yes
IPV6INIT=no
IPADDR=
NETMASK=255.255.255.255
SCOPE="peer <gateway address>"
Switch static route to br-ex.
Note: this is specific to Hetzner environment as the physical host will get a /32.
# mv /etc/sysconfig/network-scripts/route-eno1 /etc/sysconfig/network-scripts/route-br-ex
Add the eno1 physical interface to the br-ex bridge in openVswitch.
Note: this is point of no return!!! Double check your config, ensure network interface is correct, if there is typo you will need to got to rescue mode.
# ovs-vsctl add-port br-ex eno1; systemctl restart network.service
Configure Additional Floating IP Subnet
Since hetzner root server only has one ip (/32), another subnet is needed to add additional floating ips. In this case hetzner will route traffic from additional subnet through to /32 ip of root server. Here we need to create a new OVS bridge (br-ex2) for additional subnet and patch it to existing bridge (br-ex).
Create Openvswitch Bridge.
# ovs-vsctl add-br br-ex2
Patch bridge br-ex2 to br-ex.
# ovs-vsctl add-port br-ex2 patch2-0
Note: ignore error about missing interface, that is expected since we creating patch and haven’t created interface yet.
# ovs-vsctl set interface patch2-0 type=patch
# ovs-vsctl set interface patch2-0 options:peer="patch0-2"
# ovs-vsctl add-port br-ex patch0-2
Note: ignore error about missing interface, that is expected since we creating patch and haven’t created interface yet.
# ovs-vsctl set interface patch0-2 type=patch
# ovs-vsctl set interface patch0-2 options:peer="patch2-0"
Update neutron bridge mappings.
We are adding a second subnet, as such a mapping is required to physical interface.
# vi /etc/neutron/plugins/ml2/openvswitch_agent.ini
bridge_mappings=extnet:br-ex,extnet2:br-ex2
Configure ifcfg script for br-ex2.
# vi /etc/sysconfig/network-scripts/ifcfg-br-ex2
DEVICE=br-ex2
BOOTPROTO=none
ONBOOT=yes
TYPE=OVSBridge
DEVICETYPE=ovs
USERCTL=yes
PEERDNS=yes
IPADDR=
NETMASK=255.255.255.248
SCOPE="peer <subnet gateway address>"
IPV6INIT=no
Comment out default iptables REJECT rules.
By default iptables won’t allow traffic from br-ex2 to br-ex.
# vi /etc/sysconfig/iptables
---
#-A INPUT -j REJECT --reject-with icmp-host-prohibited
#-A FORWARD -j REJECT --reject-with icmp-host-prohibited
---
Restart iptables and networking.
# systemctl restart iptables; systemctl restart network
Configure OpenStack Environment
Neutron Configuration
Set the default dns servers to be used when creating a subnet.
vi /etc/neutron/dhcp_agent.ini
---
debug=False
dnsmasq_dns_servers=213.133.98.98,213.133.99.99
---
Restart Neutron DHCP Agent
# systemctl restart neutron-dhcp-agent
Nova Configuration
Nova uses filtering rules to find appropriate host when scheduling instances. In order for nova to recognize lvm storage the images type needs to be lvm and the volume group needs to be correct lvm volume. In addition, unless you want to wait really long when deleting nova volumes, set volume_clear to none.
# vi /etc/nova/nova.conf

[libvirt]
---
images_type = lvm
volume_clear = none
images_volume_group = cinder-volumes
---
Restart Nova services.
# systemctl restart openstack-nova-compute
# systemctl restart openstack-nova-api
# systemctl restart openstack-nova-scheduler
Cinder Configuration
By default the openstack install will configure an lvm volume group using loop. This is not ideal and why we created a volume group vg1. We will use the same setting volume_clear to none to ensure cinder volumes are deleted quickly.
Update cinder configuration.
# vi /etc/cinder/cinder.conf
---
enabled_backends=lvm
volume_clear = none

[lvm]
volume_backend_name=lvm
volume_driver=cinder.volume.drivers.lvm.LVMVolumeDriver
iscsi_ip_address=144.76.52.111
iscsi_helper=lioadm
volume_group=cinder-volumes
volumes_dir=/var/lib/cinder/volumes
---
Restart cinder services.
# systemctl restart openstack-cinder-volume
# systemctl restart openstack-cinder-api
Ceilometer Configuration
Aodh is the database for alarms that are triggered based on things such as autoscaling policies. The database needs to be initialized after installing OpenStack.
# aodh-dbsync
Neutron Configuration
Create private network.
# openstack network create admin
# openstack subnet create --network admin --allocation-pool \
start=10.10.1.100,end=10.10.1.200 --dns-nameserver 213.133.98.98 \
--subnet-range 10.10.1.0/24 admin_subnet
Create public network.
Note: these steps assume the physical network connected to br-ex2 is 144.76.132.224/29.
# openstack network create --provider-network-type flat \
--provider-physical-network extnet2 --external public
# openstack subnet create --network public --allocation-pool \
start=144.76.132.226,end=144.76.132.230 --no-dhcp \
--subnet-range 144.76.132.224/29 public_subnet
Add a new router and configure router interfaces.
# openstack router create admin_router
# openstack router set --external-gateway public admin_router
# openstack router add subnet admin_router admin_subnet
Check to ensure network connectivity is working.
This is done by checking the network namespace of the qrouter (openstack router).
# ip netns show
qrouter-88dde0ef-22a2-44b1-baa9-304273653bb1
qdhcp-f1582f71-b531-43af-99c1-299b603232fc
# ip netns exec qrouter-88dde0ef-22a2-44b1-baa9-304273653bb1 ping www.redhat.com
Glance Configuration
Upload a glance image.
In this case we will use a Cirros image because it is small and thus good for testing OpenStack.
# curl -O http://download.cirros-cloud.net/0.3.4/cirros-0.3.4-x86_64-disk.img
# openstack image create --disk-format qcow2 \
--container-format bare --public \
--file /root/cirros-0.3.4-x86_64-disk.img "Cirros 0.3.4"
Create a new m1.nano flavor for running Cirros image.
# openstack flavor create --ram 64 --disk 0 --ephemeral 0 --vcpus 1 --public m1.nano
Configure Security Groups
Create Security Group for all access.
# openstack security group create all \
--description "Allow all ports"
# openstack security group rule create --protocol TCP \
--dst-port 1:65535 --remote-ip 0.0.0.0/0 all
# openstack security group rule create --protocol ICMP \
--remote-ip 0.0.0.0/0 all
Create Security Group for base access.
# openstack security group create base \
--description "Allow base ports"
# openstack security group rule create --protocol TCP \
--dst-port 22 --remote-ip 0.0.0.0/0 base
# openstack security group rule create --protocol TCP \
--dst-port 80 --remote-ip 0.0.0.0/0 base
# openstack security group rule create --protocol TCP \
--dst-port 443 --remote-ip 0.0.0.0/0 base
# openstack security group rule create --protocol ICMP \
--remote-ip 0.0.0.0/0 base
Create Private Key.
# openstack keypair create admin
Save Private Key to file.
# vi /root/admin.pem
-----BEGIN RSA PRIVATE KEY-----
MIIEowIBAAKCAQEAwTrb+xdbpgY8hVOmftBIShqYUgXXDC/1gggakq8bkEdNnSku
IaNGeJykzksjdksjd9383iejkjsu92wiwsajFLuE2lkh5dvk9s6hpfE/3UvSGk6m
HWIMCf3nJUv8gGCM/XElgwNXS02c8pHWUywBiaQZpOsvjCqFLGW0cNZLAQ+yzrh1
dIWddx/E1Ppto394ejfksjdksjdksdhgu4t39393eodNlVQxWzmK4vrLWNrfioOK
uRxjxY6jnE3q/956ie69BXbbvrZYcs75YeSY7GjwyC5yjWw9qkiBcV1+P1Uqs1jG
1yV0Zvl5xlI1M4b97qw0bgpjTETL5+iuidFPVwIDAQABAoIBAF7rC95m1fVTQO15
buMCa1BDiilYhw+Mi3wJgQwnClIwRHb8IJYTf22F/QptrrBd0LZk/UHJhekINXot
z0jJ+WvtxVAA0038jskdjskdjksjksjkiH9Mh39tAtt2XR2uz/M7XmLiBEKQaJVb
gD2w8zxqqNIz3438783787387s8s787s8sIAkP3ZMAra1k7+rY1HfCYsRDWxhqTx
R5FFwYueMIldlfPdGxwd8hLrqJnDY7SO85iFWv5Kf1ykyi3PRA6r2Vr/0PMkVsKV
XfxhYPkAOb2hNKRDhkvZPmmxXu5wy8WkGeq+uTWRY3DoyciuC4xMS0NMd6Y20pfp
x50AhJkCgYEA8M2OfUan1ghV3V8WsQ94vguHqe8jzLcV+1PV2iTwWFBZDZEQPokY
JkMCAtHFvUlcJ49yAjrRH6O+EGT+niW8xIhZBiu6whOd4H0xDoQvaAAZyIFoSmbX
2WpS74Ms5YSzVip70hbcXb4goDhdW9YxvTVqJlFrsGNCEa3L4kr2qFMCgYEAzWy0
5cSHkCWaygeYhFc79xoTnPxKZH+QI32dAeud7oyZtZeZDRyjnm2fEtDCEn6RtFTH
NlI3W6xFkXcp1u0wbmYJJVZdn1u9aRsLzVmfGwEWGHYEfZ+ZtQH+H9XHXsi1nPpr
Uy7Msd,sl,.swdko393j495u4efdjkfjdkjfhflCgYEA7VO6Xo/XdKPMdJx2EdXM
y4kzkPFHGElN2eE7gskjdksjdksjkasnw33a23433434wk0P8VCksQlBlojjRVyu
GgjDrMhGjWamEA1y3vq6eka3Ip0f+0w26mnXCYYAJslNstu2I04yrBVptF846/1E
ElXlo5RVjYeWIzRmIEZ/qU8CgYB91kOSJKuuX3rMm46QMyfmnLC7D8k6evH+66nM
238493ijsfkjalsdjcws9fheoihg80eWDSAFDOASDF=OIA=FSLoiidsiisiisNDo
ACh40FeKsHDby3LK8OeM9NXmeCjYeoZYNGimHForiCCT+rIniiu2vy0Z/q+/t3cM
BgmAmQKBgCwCTX5kbLEUcX5IE6Nzh+1n/lkvIqlblOG7v0Y9sxKVxx4R9uXi3dNK
6pbclskdksdjdk22k2jkj2kalksx2koUeLzwHuRUpMavRhoTLP0YsdbQrjgHIA+p
kDNrgFz+JYKF2K08oe72x1083RtiEr8n71kjSA+5Ua1eNwGI6AVl
-----END RSA PRIVATE KEY-----
# chmod 400 /root/admin.pem
Start an Instance
Get Private Network Id.
# openstack network list
+--------------------------------------+---------+--------------------------------------+
| ID | Name | Subnets |
+--------------------------------------+---------+--------------------------------------+
| 72494c88-6d93-4eb7-929f-383cbedfa3e7 | public | a57856be-a22b-4a48-b3c3-75be46a4c477 |
| 781e062d-5ab6-4ae8-a54e-8e72291df37e | private | b00316a1-812f-423a-8aca-bd6547692ad3 |
+--------------------------------------+---------+--------------------------------------+
Create a mycirros Instance.
# openstack server create --flavor m1.nano --image "Cirros 0.3.4" \
--nic net-id=781e062d-5ab6-4ae8-a54e-8e72291df37e --key-name admin \
--security-group all mycirros
# # openstack server list
+--------------------------------------+----------+--------+---------------------+--------------+---------+
| ID | Name | Status | Networks | Image | Flavor |
+--------------------------------------+----------+--------+---------------------+--------------+---------+
| 6f2719bb-f393-49ab-a409-1c4a0f992b2d | mycirros | ACTIVE | private=10.10.1.105 | Cirros 0.3.4 | m1.nano |
+--------------------------------------+----------+--------+---------------------+--------------+---------+
Create Floating IP.
# openstack floating ip create public
+---------------------+--------------------------------------+
| Field | Value |
+---------------------+--------------------------------------+
| created_at | 2018-01-12T09:52:40Z |
| description | |
| fixed_ip_address | None |
| floating_ip_address | 144.76.132.230 |
| floating_network_id | 72494c88-6d93-4eb7-929f-383cbedfa3e7 |
| id | 7a7ac84f-57ee-4982-b2f5-35ebb9656b34 |
| name | 144.76.132.230 |
| port_id | None |
| project_id | 92d3bc57ca504eaab4c29d3509064004 |
| revision_number | 0 |
| router_id | None |
| status | DOWN |
| updated_at | 2018-01-12T09:52:40Z |
+---------------------+--------------------------------------+
Get Port Id of Instance.
# openstack port list
+--------------------------------------+------+-------------------+-------------------------------------------------------------------------------+--------+
| ID | Name | MAC Address | Fixed IP Addresses | Status |
+--------------------------------------+------+-------------------+-------------------------------------------------------------------------------+--------+
| 60407eee-c9b2-4e9c-81a6-5c38bb536c9b | | fa:16:3e:37:ac:2f | ip_address='144.76.132.227', subnet_id='a57856be-a22b-4a48-b3c3-75be46a4c477' | ACTIVE |
| 717660b6-b9b0-4f76-8c63-f9fae5c9bd9b | | fa:16:3e:0c:14:30 | ip_address='10.10.1.105', subnet_id='b00316a1-812f-423a-8aca-bd6547692ad3' | ACTIVE |
| 878ee68a-1b88-48d1-9bf7-057f59b833bb | | fa:16:3e:2a:1f:50 | ip_address='144.76.132.230', subnet_id='a57856be-a22b-4a48-b3c3-75be46a4c477' | N/A |
| 8a7b6b21-1eb2-4750-b854-707462d8b38f | | fa:16:3e:53:c9:ef | ip_address='10.10.1.1', subnet_id='b00316a1-812f-423a-8aca-bd6547692ad3' | ACTIVE |
| b40af80e-2794-4ca5-8141-9d8ad4e9c9f2 | | fa:16:3e:51:d9:cb | ip_address='10.10.1.100', subnet_id='b00316a1-812f-423a-8aca-bd6547692ad3' | ACTIVE |
+--------------------------------------+------+-------------------+-------------------------------------------------------------------------------+--------+
Assign Floating IP to Instance Port.
# openstack floating ip set --port 717660b6-b9b0-4f76-8c63-f9fae5c9bd9b 144.76.132.230
Verify Floating IP in OpenStack Router.
# ip netns show
qdhcp-dcfbabbd-c5d2-444c-ab60-546216550118
router-0f00050f-6590-42df-9136-32d22fea4ece
# ip netns exec qrouter-0f00050f-6590-42df-9136-32d22fea4ece ip a
---
9: qg-60407eee-c9: <BROADCAST,MULTICAST,UP,LOWER_UP> mtu 1500 qdisc noqueue state UNKNOWN qlen 1000
 link/ether fa:16:3e:37:ac:2f brd ff:ff:ff:ff:ff:ff
 inet 144.76.132.227/29 brd 144.76.132.231 scope global qg-60407eee-c9
 valid_lft forever preferred_lft forever
 inet 144.76.132.230/32 brd 144.76.132.230 scope global qg-60407eee-c9
 valid_lft forever preferred_lft forever
 inet6 fe80::f816:3eff:fe37:ac2f/64 scope link
 valid_lft forever preferred_lft forever
---
Test Instance.
Connect to mycirros instance using the private ssh key stored in the admin.pem file.
# ssh -i admin.pem cirros@144.76.132.230
$ ping www.redhat.com
PING www.redhat.com (172.217.21.14): 56 data bytes
64 bytes from 172.217.21.14: seq=0 ttl=54 time=37.692 ms
64 bytes from 172.217.21.14: seq=1 ttl=54 time=27.758 ms
64 bytes from 172.217.21.14: seq=2 ttl=54 time=25.640 ms
Install OpenStack Client
To administer OpenStack remotely the CLI tools are important. Below are steps to install OpenStack CLI tools for Stein.
[RHEL]
# subscription-manager repos --enable=rhel-7-server-openstack-14-tools-rpms
# yum install -y python-openstackclient
# yum install -y python-heatclient
# yum install -y python-octavia
[CentOs]
# yum install -y https://rdoproject.org/repos/openstack-stein/rdo-release-stein-1.noarch.rpm
# yum upgrade -y
# yum install -y python-openstackclient
# yum install -y python-heatclient
# yum install -y python-octavia
Summary
This article was intended as a hands on guide for standing up an OpenStack Rocky lab environment using RDO. In this guide we also tailored the environment to the Hetzner root server. Things can of course vary depending on your hardware platform and provider. Certainly the aim of this guide was to provide a more realistic deployment scenario for OpenStack. As mentioned RDO is a stable community platform built around Red Hat’s OpenStack Platform. It provides the ability to test the latest OpenStack features against either an enterprise platform (RHEL) or community platform (CentOS). Hopefully you found the information in this article useful. If you have anything to add or feedback, feel free to leave your comments.
Happy OpenStacking!
(c) 2018 Keith Tenzer
