
OpenStack Heat and Ansible - Automation Born in the Cloud

Overview
In this article we will look at how Ansible can be leveraged within OpenStack to provide enhanced capabilities around software deployment. Before we get into the details lets understand the challenge. There are typically two layers of automation: provisioning and deployment. Provisioning is all about the underlying infrastructure a particular application might require. Deployment is about installing and configuring the application after the infrastructure exists. OpenStack Heat is the obvious choice for automating provisioning. Heat integrates with other OpenStack services and provides the brains, that bring OpenStack powered cloud to life. While Heat is great for provisioning infrastructure, software deployment is not one of its strengths and trying to orchestrate complex software deployments can be rather clunky. That is where Ansible comes into play and as you will see in this article, they fit together perfectly.
Ansible has two components: Ansible core and Ansible Tower. Ansible core provides the ansible runtime and allows execution of playbooks (YAML definitions of what is being orchestrated). What is missing in Ansible core is the management layer, that enhances team collaboration, extensibility, scalability and visibility. Beyond management, Ansible Tower provides the ability to drive Ansible dynamically through APIs. This is a key requirement for OpenStack and dynamic infrastructure.
Through callbacks we can trigger Ansible playbook runs from within OpenStack Heat. Ansible Tower dynamically discovers instances running on OpenStack as Heat provisions them. Ansible Tower is then able to run playbooks against newly provisioned instances dynamically. The result is an end-to-end automation process, that deploys an entire application including its infrastructure stack. Roles can and ideally should be separated, between infrastructure provisioning and software deployment. Heat templates control provisioning created often by OpenStack administrators. Ansible playbook controls software deployment managed by devops teams. In this article we will see how all that fits together. We will not only deploy Ansible Tower on OpenStack, but also walk through a deployment of an all-in-one WordPress application. In this scenario OpenStack Heat is used to deploy a CentOS image with a private and floating ip. Ansible Tower is then triggered directly from Heat using an API callback, the instance is discovered within Ansible Tower and the appropriate playbook for deploying the WordPress application is executed.
OpenStack Installation and Configuration
Installing OpenStack is not covered in this article, however to stand-up an OpenStack lab environment based on Liberty follow this guide. If you are using your own environment ensure you follow the configuration steps in the above guide after OpenStack is deployed or pass the correct parameters into Heat templates that are representative of your environment.
[OpenStack]
- Add CentOS Cloud Image to Glance.
# curl -O http://cloud.centos.org/centos/7/images/CentOS-7-x86_64-GenericCloud.qcow2
# glance image-create --name "CentOS_7" --disk-format qcow2 --container-format bare --visibility public --file CentOS-7-x86_64-GenericCloud.qcow2
Note: if your CentOS image is named differently, you need to update Heat templates below.
- Create Flavor for Ansible Tower
# nova flavor-create m2.small 50 4096 20 4
- Create Flavor for WordPress Applicaiton
# nova flavor-create m2.tiny 51 1024 10 1
Note: if your flavors are named differently, you need to update Heat templates below.
Setup Ansible Tower on OpenStack
As mentioned, Ansible Tower provides management, reporting and most important API callbacks. It makes Ansible core even more powerful. In this case Tower is used primarily for API callback and dynamic inventory. This allows us to make an API call from Heat upon completion of infrastructure provision that 1) dynamically updates Ansible inventory with newly created instance IPs 2) run playbook on newly created instance through ssh using private key from OpenStack.
There are two options for deploying Ansible Tower in OpenStack: using Heat template I have provided or deploying an instance and manually configuring tower. Both options are documented in this article. Here we are of course using CentOS, however RHEL will work as well assuming you have subscriptions.
[OpenStack]
Option 1: Deploy Ansible Tower from Heat Template
# vi /root/centos-tower.yaml
heat_template_version: 2013-05-23
description: CentOS Ansible Tower
parameters:
  server_name:
    type: string
    description: Name of server
    default: tower
  image:
    type: string
    description: Image used for servers
    default: CentOS_7
  key_name:
    type: string
    description: SSH key to connect to the servers
    default: admin
  flavor:
    type: string
    description: flavor used by the web servers
    default: m2.small
  private_net_id:
    type: string
    default: 431aa0f5-2790-403b-84e0-7cb88b836782
    description: Id of the private network for the compute server
  private_subnet_id:
    type: string
    default: d7b6fb94-f083-4347-a75a-8025c06b5a31
    description: Id of the private sub network for the compute server
  public_net_id:
    type: string
    default: c55f71f6-5b6c-4c1a-a56e-8420a8652f50
    description: Id of the public network for the compute server

resources:
  webserver:
    type: OS::Nova::Server
    properties:
      name: { get_param: server_name }
      image: { get_param: image }
      flavor: { get_param: flavor }
      key_name: { get_param: key_name }
      networks:
        - port: { get_resource: server_port }
      user_data: |
        #!/bin/bash -v
        curl -O http://dl.fedoraproject.org/pub/epel/7/x86_64/e/epel-release-7-6.noarch.rpm
        rpm -ivh epel-release-7-6.noarch.rpm
        yum install -y ansible
        cd /root
        curl -O http://releases.ansible.com/ansible-tower/setup/ansible-tower-setup-2.4.5.tar.gz
        tar xvzf ansible-tower-setup-latest.tar.gz
        cd ansible-tower-setup-2*
        cat << EOF > tower_setup_conf.yml
        admin_password: redhat01
        database: internal
        munin_password: redhat01
        pg_password: redhat01
        primary_machine: localhost
        redis_password: redhat01
        EOF
        sed -i 's/Defaults    requiretty/Defaults    !requiretty/g' /etc/sudoers
        ./configure -o tower_setup_conf.yml
        ./setup.sh

  server_port:
    type: OS::Neutron::Port
    properties:
      network_id: { get_param: private_net_id }
      fixed_ips:
        - subnet_id: { get_param: private_subnet_id }
      security_groups:
        - all

  server_floating_ip:
    type: OS::Neutron::FloatingIP
    properties:
      floating_network_id: { get_param: public_net_id }
      port_id: { get_resource: server_port }

outputs:
  server_private_ip:
    description: IP address of server on private network
    value: { get_attr: [ webserver, first_address ] }
  server_public_ip:
    description: Floating IP address of server on public network
    value: { get_attr: [ server_floating_ip, floating_ip_address ] }
Note: Ansible Heat templates are also available on Github.
# heat stack-create infrastructure -f centos-tower.yaml -P "server_name=infra"
- To monitor the progress of cloud-init you can connect to instance floating ip via ssh and tail the cloud-init log.
# ssh -i admin.pem centos@<Floating IP>
$ sudo -i
# tail -f /var/log/cloud-init.log
Option 2: Deploy Ansible Tower Manually
[OpenStack]
- Start Nova instance using CentOS image.
# nova boot --flavor m2.small --image "CentOS_7" --nic net-id=92d82f53-6e0b-4eef-b8b9-cae32cf40457 --key-name admin --security-groups all infra
- Create Floating IP.
# nova floating-ip-create
- Associate Floating IP with instance.
# nova floating-ip-associate infra <FLOATING IP>
- Connect to Ansible Tower.
# ssh -i admin.pem centos@<Floating IP>
$sudo -i
[Ansible Tower]
The installation has changed slightly between Tower 2 and 3. Below are the steps for installing Tower 3.
- Configure EPEL Repository.
# curl -O http://dl.fedoraproject.org/pub/epel/7/x86_64/e/epel-release-7-6.noarch.rpm
# rpm -ivh epel-release-7-6.noarch.rpm
- Install Ansible.
# yum install -y ansible
- Install Ansible Tower.
# tar xvzf ansible-tower-setup-latest.tar.gz
# cd ansible-tower-setup-<VERSION>
- Configure Ansible Tower.
[root@tower ansible-tower-setup-3.0.2]# vi inventory
[primary]
localhost ansible_connection=local

[secondary]

[database]

[all:vars]
admin_password='redhat01'
redis_password='redhat01'

pg_host=''
pg_port=''

pg_database='awx'
pg_username='awx'
pg_password='redhat01'
- Setup Ansible Tower.
# ./setup.sh
Configure Ansible Tower
Now that Anisble Tower is up and running we need to configure connection to OpenStack and in addition add a playbook for WordPress.
[Ansible Tower]
- Open web browser and goto https://<floating ip>
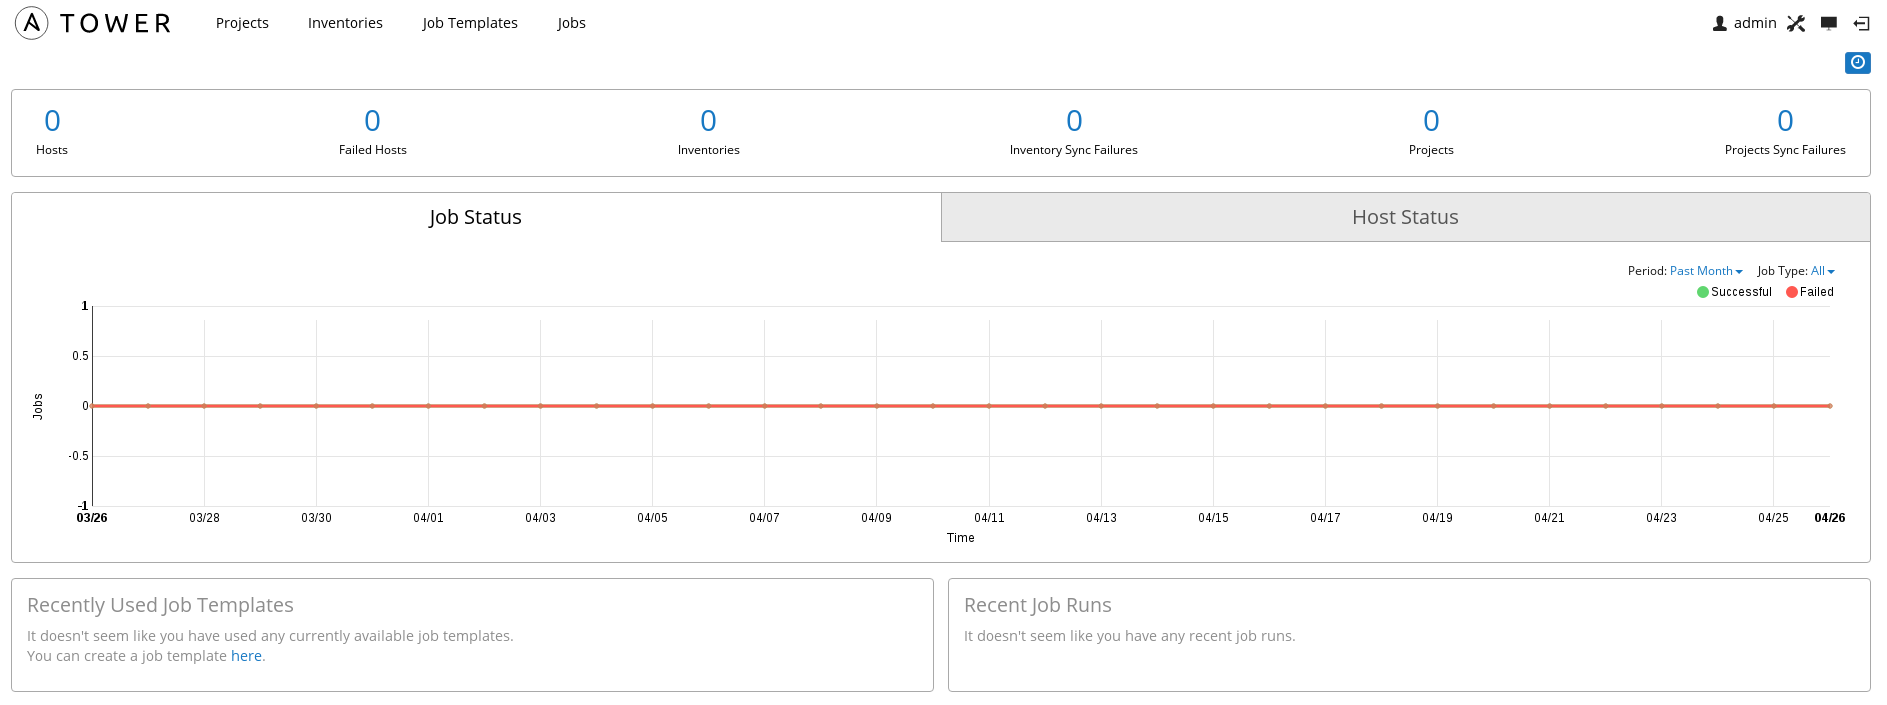
- Add license for Tower (settings->license). If you dont have one you can get an eval here.

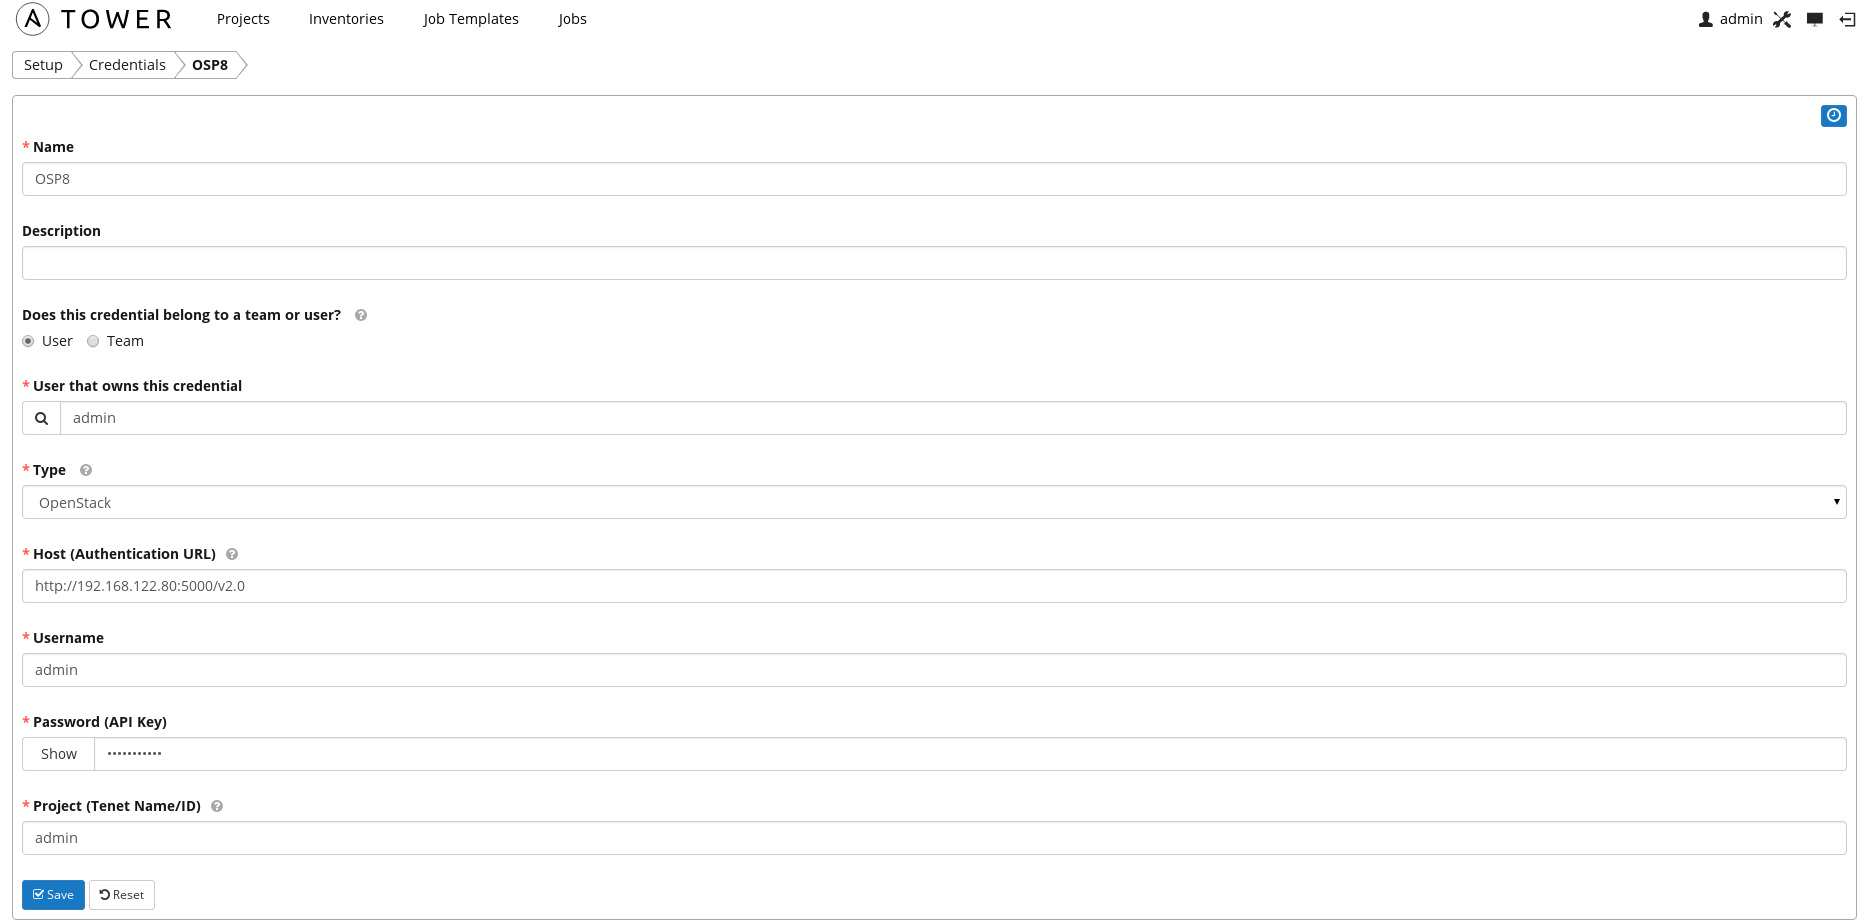
- Add Credentials for OpenStack environment (settings->credentials).
Ansible Tower needs to be able to query OpenStack tenant over API to find out what instances exists, IPs, etc.
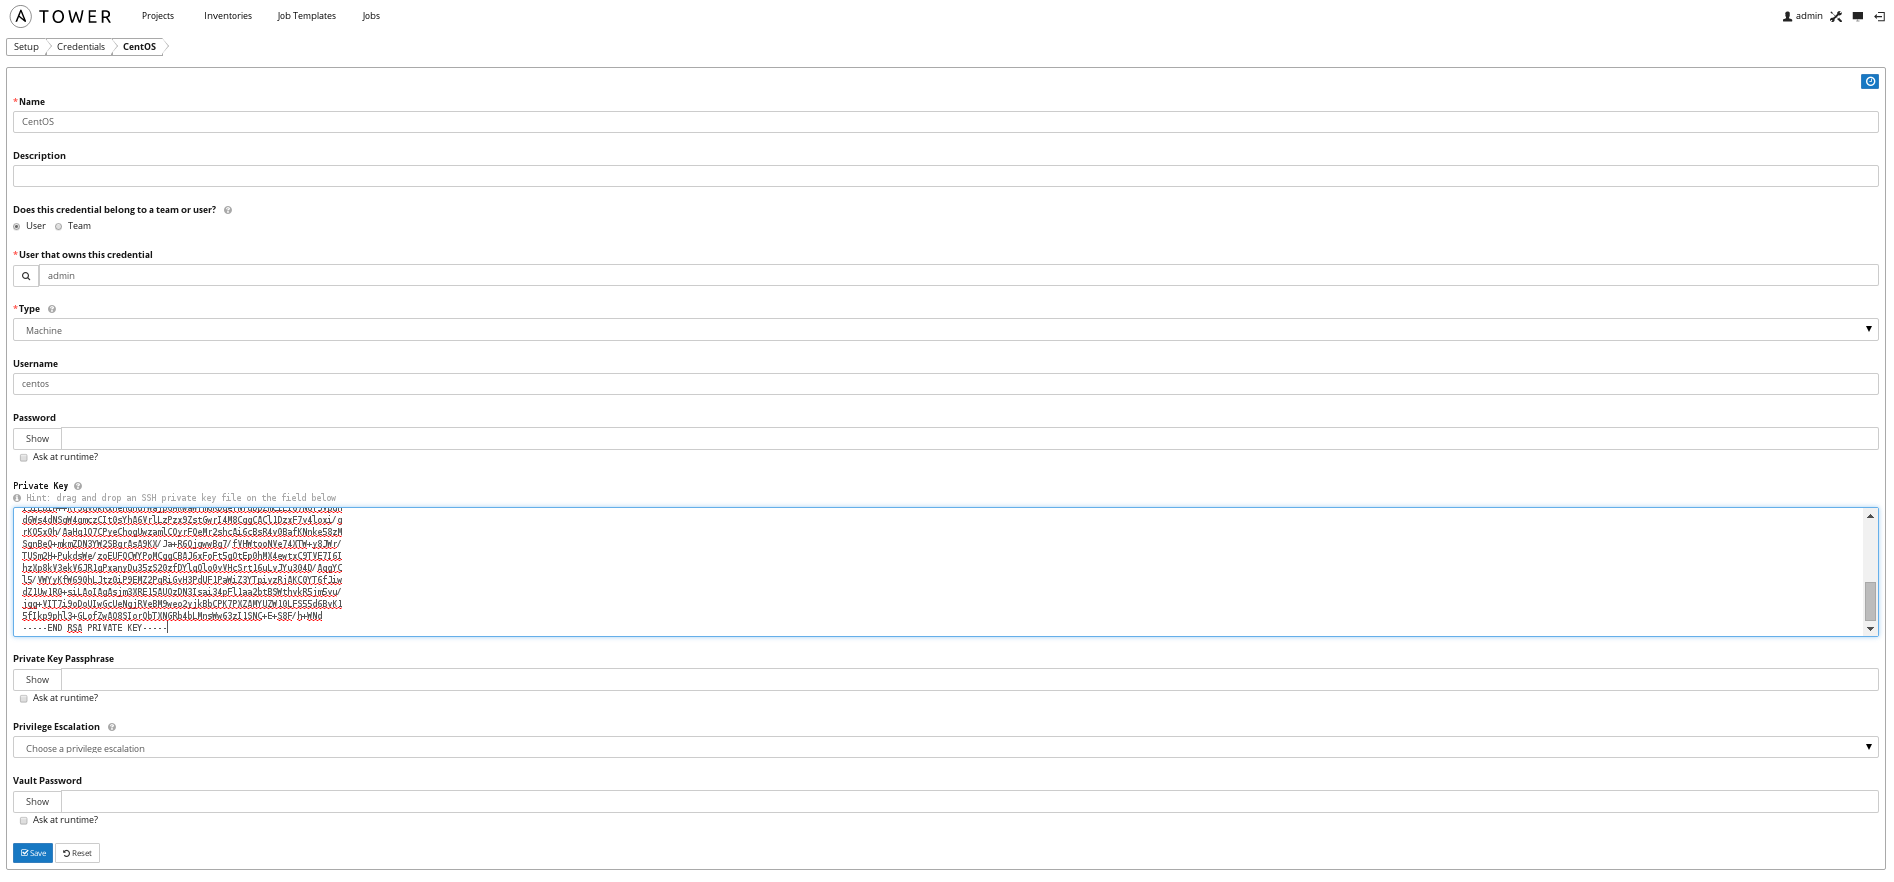
- Optional: Add Credentials for OpenStack key and OS user, in this case centos.
OpenStack uses ssh keys to access instances for a specific user. In this case we are using the CentOS cloud image and it has a built-in user account named centos. When deploying an instance we need to choose a key. In the OpenStack lab configuration we created this key. Your environment will have a different key of course if you didn't follow that guide.
Ansible Tower implements a hierarchy, to decide what remote user should run tasks within a playbook, on a given target instance. A default remote user can be specified in the ansible.cfg. This is however overwritten by any credentials stored within Tower and credentials are overwritten by what is in the playbook.
- Create inventory for OpenStack (inventories).
Inventories are basically a collection of host groups. Hosts are grouped together based on a common inventory. In OpenStack this is done at the tenant level so a host group is a group of hosts belonging to a tenant.
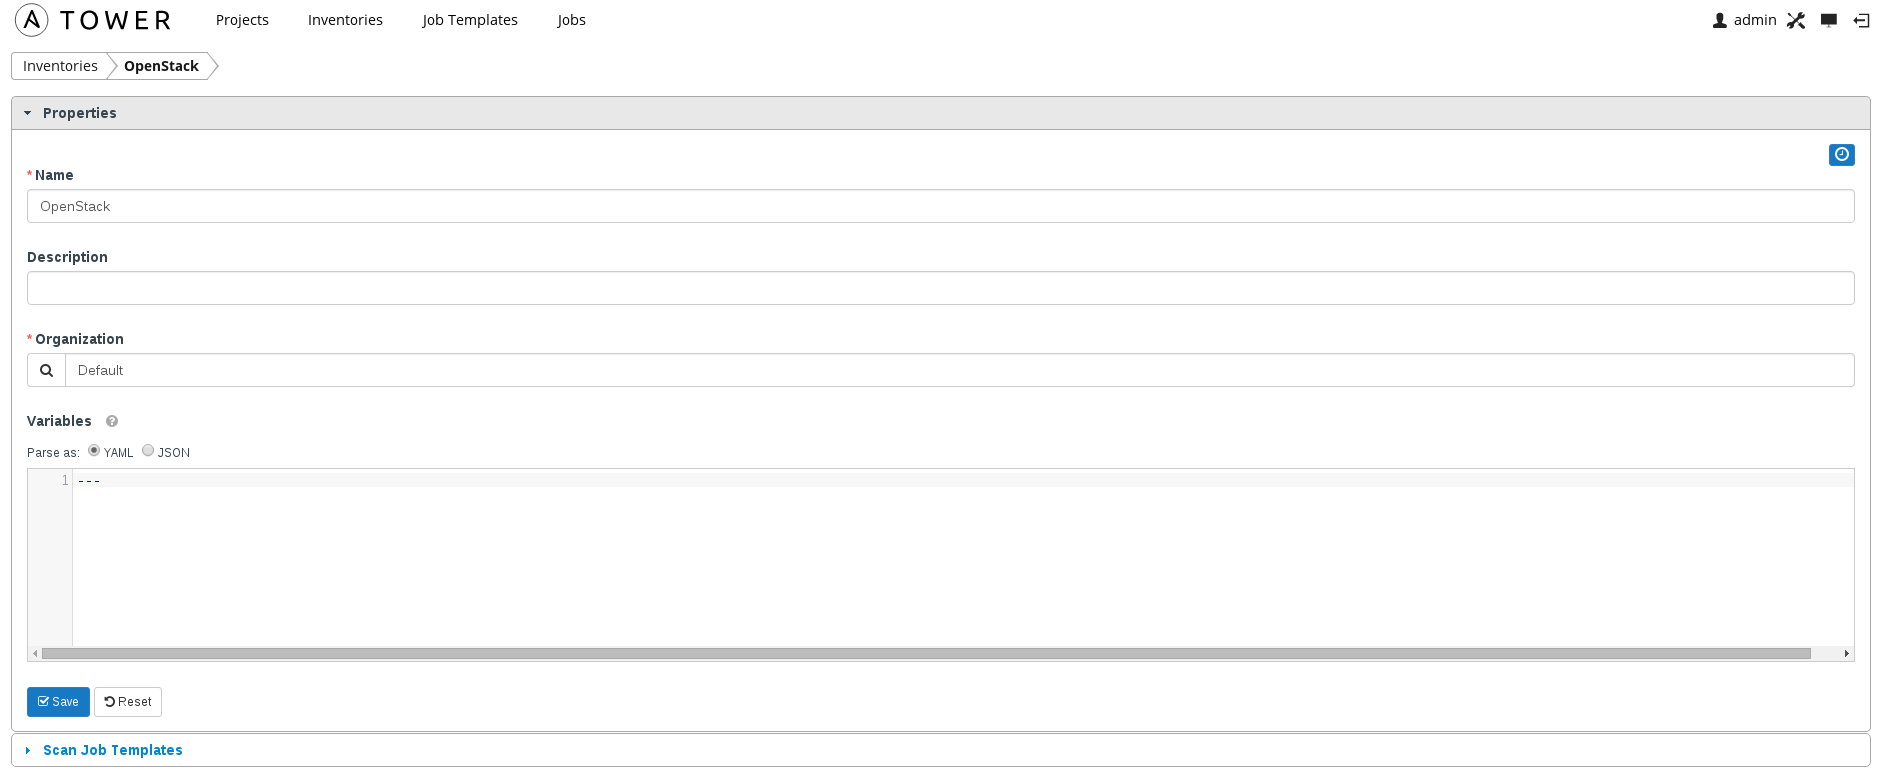
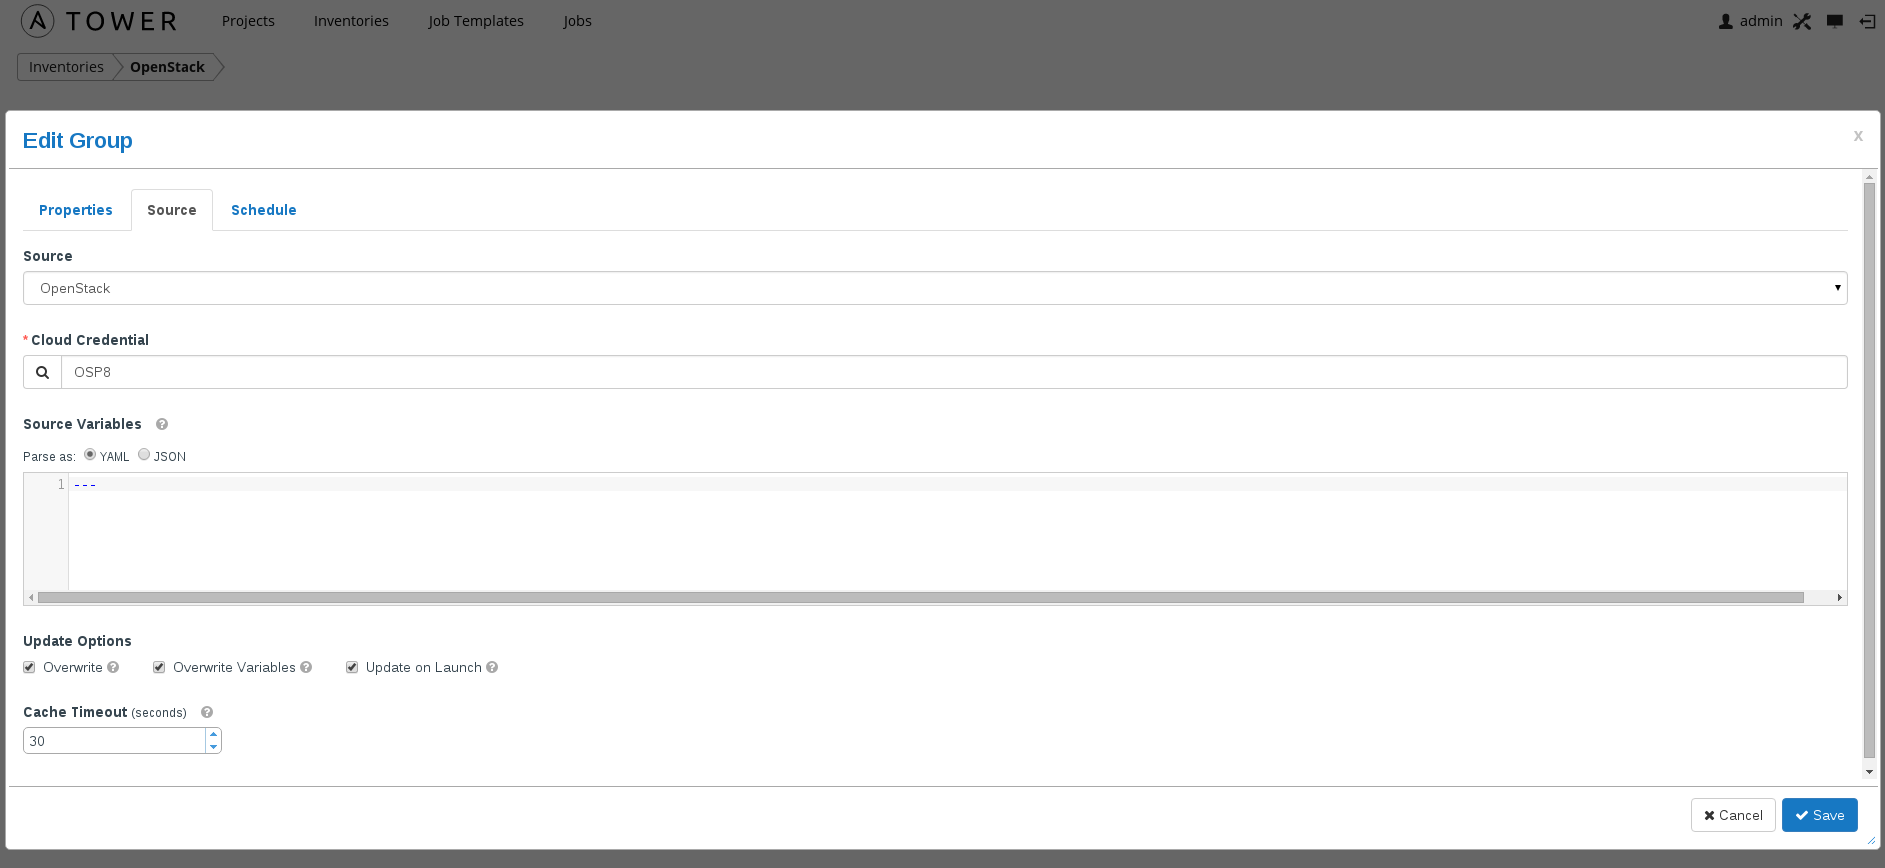
- Add a inventory group for OSP8 and ensure you enable overwrite and update on launch (inventories->OpenStack).
These parameters ensure that inventory is updated prior to execution of playbook. Again this is important because in OpenStack you can't statically configure instance IPs and as such dynamic discovery is required prior to running playbooks.
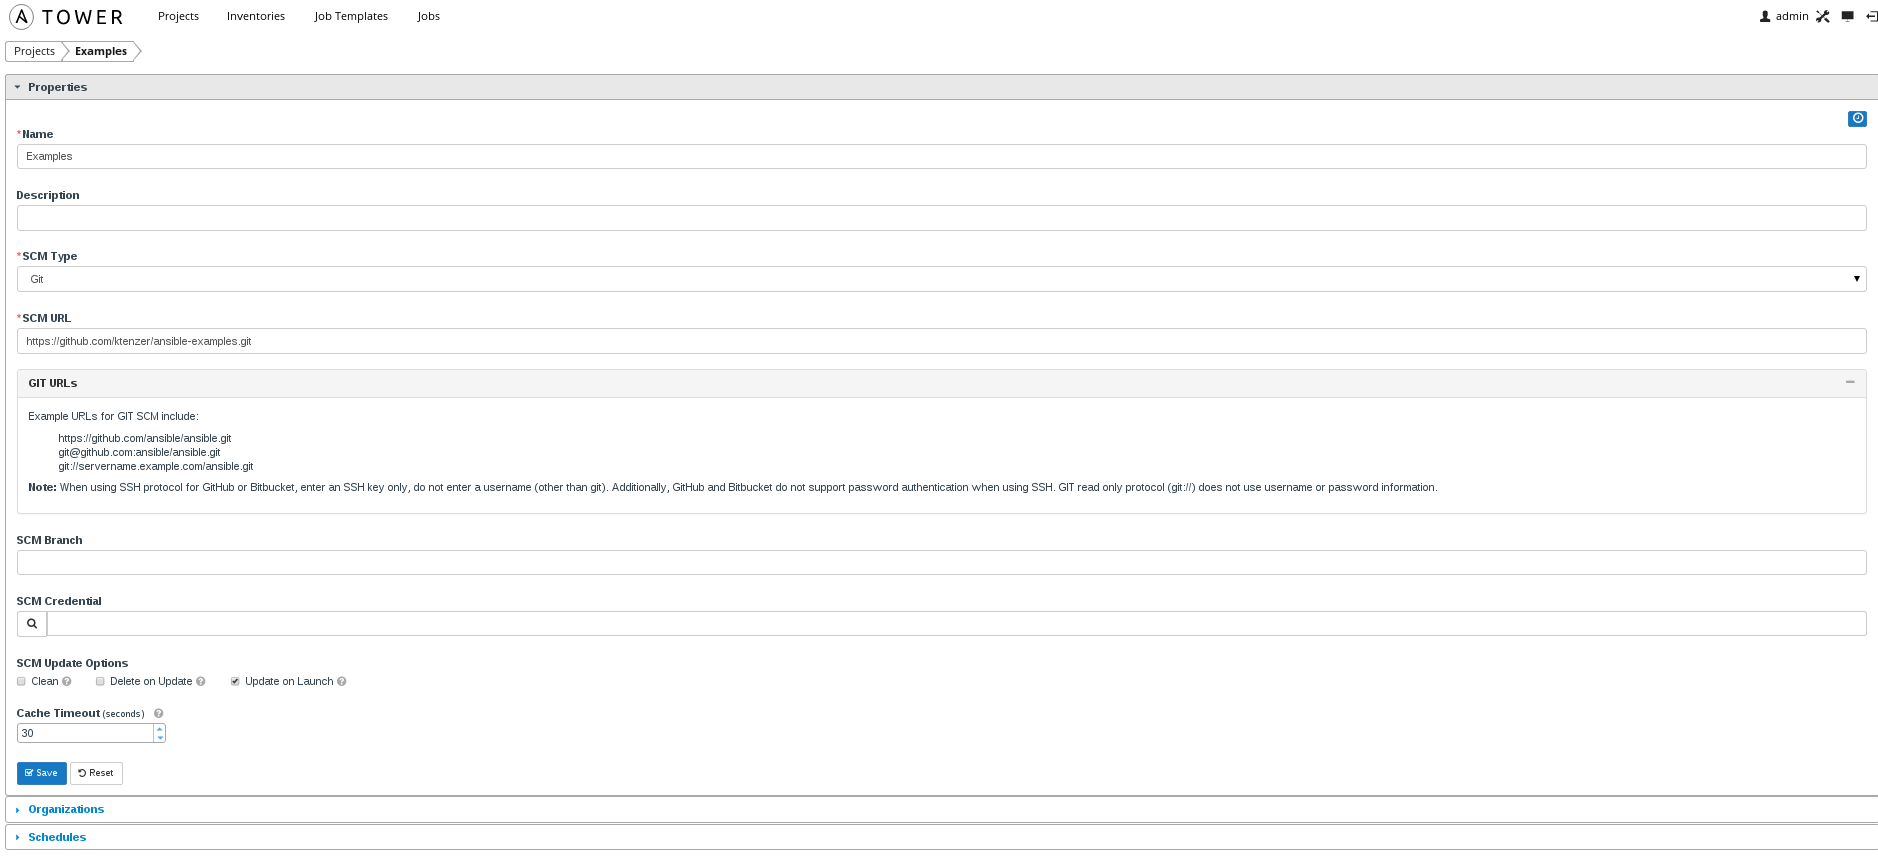
- Create a new project (Projects).
In this case we create a project called Examples where the playbooks are stored in Git. The following git URL contains the WordPress playbook in addition to other examples: https://github.com/ktenzer/ansible-examples.
Note: I have not tested the other examples but likely you would need to replace the remote_user with centos and allow user to become root.
- Create job template (Job Templates).
Job templates bring everything together. You specify what credentials to use, what inventory to run against and of course choose a playbook. In this case we choose the already created inventory (OpenStack), credentials (OSP8) and project (Examples). From the Examples project we will select the wordpress-ngix_rhel7/site.yml playbook.
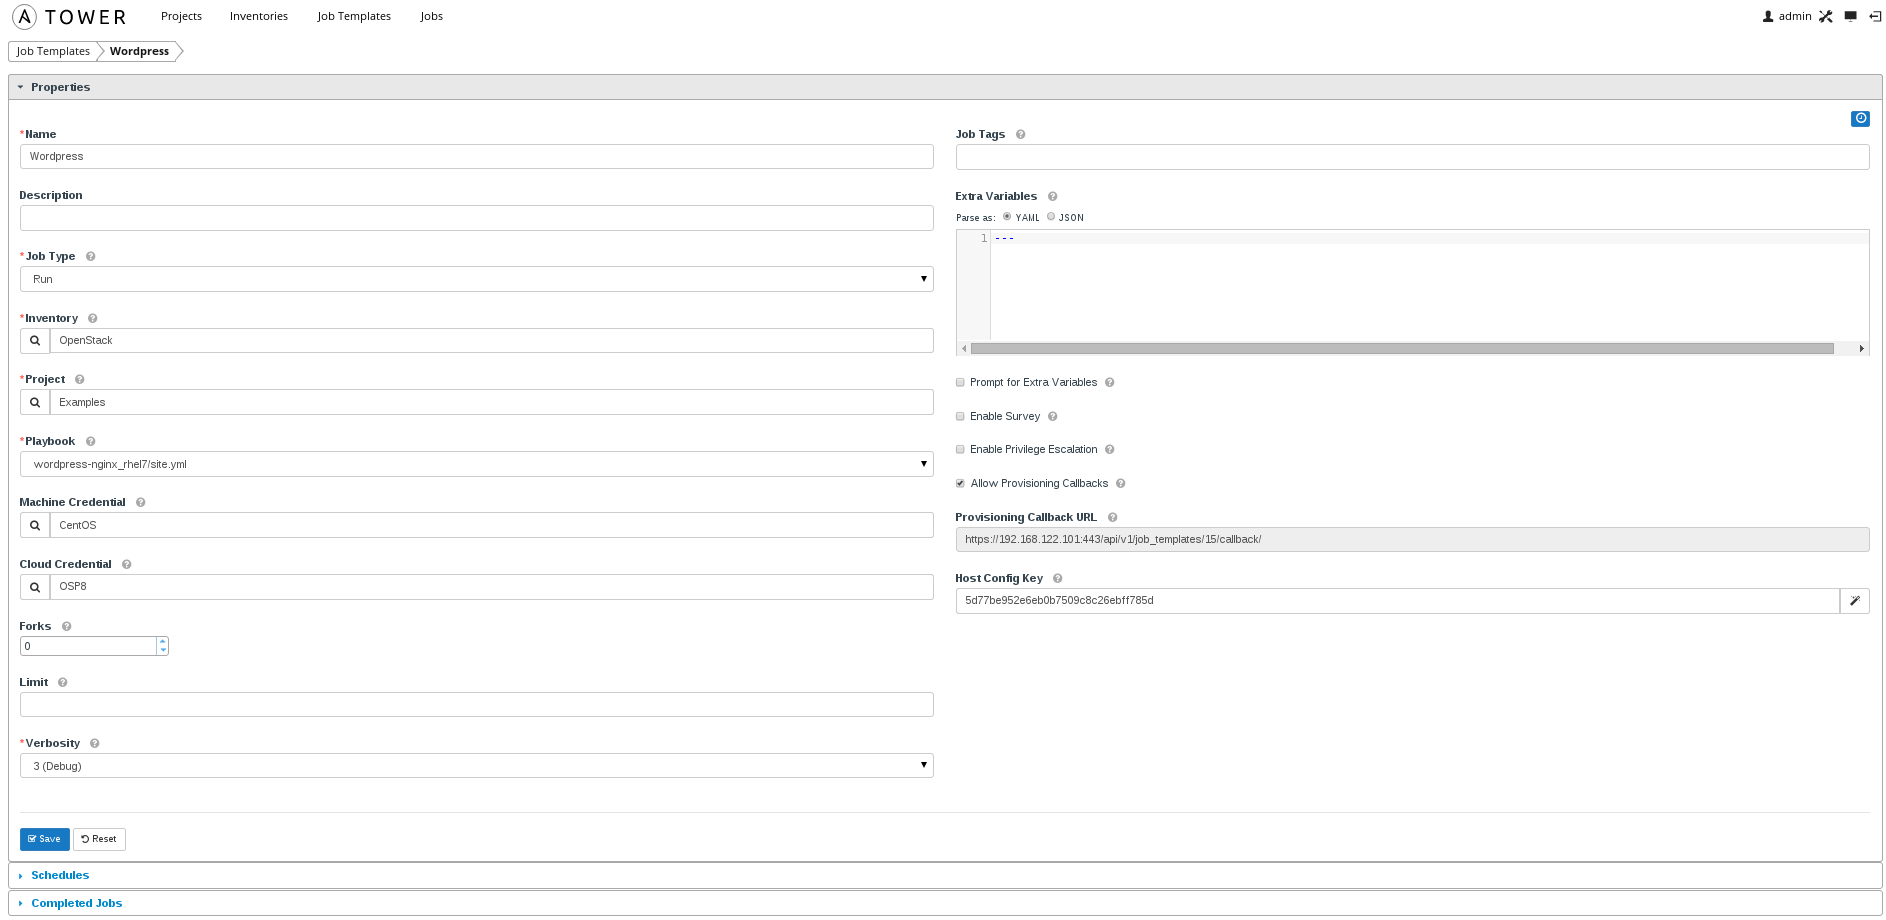
Note: Copy the callback URL and the host config key for authorizing the callback, this is required later.
Deploy WordPress Application using Heat and Ansible
Now it is time to see everything work together and watch the magic happen. We will create a Heat template to deploy an all-in-one WordPress application. Using curl, we will make a callback to Ansible Tower in order to deploy WordPress application once the infrastructure is provisioned. Notice the wonderful simplicity? Just a one-liner from Heat to deploy anything from the simplest to most complex application imaginable.
[OpenStack]
# vi /root/centos-wordpress.yaml
heat_template_version: 2013-05-23
description: CentOS WordPress All-In-One deployed using Ansible Tower
parameters:
  server_name:
    type: string
    description: Name of server
  image:
    type: string
    description: Image used for servers
    default: CentOS_7
  key_name:
    type: string
    description: SSH key to connect to the servers
    default: admin
  flavor:
    type: string
    description: flavor used by the web servers
    default: m2.tiny
  private_net_id:
    type: string
    default: 431aa0f5-2790-403b-84e0-7cb88b836782
    description: Id of the private network for the compute server
  private_subnet_id:
    type: string
    default: d7b6fb94-f083-4347-a75a-8025c06b5a31
    description: Id of the private sub network for the compute server
  public_net_id:
    type: string
    default: c55f71f6-5b6c-4c1a-a56e-8420a8652f50
    description: Id of the public network for the compute server
  tower_private_ip:
    type: string
    default: 10.10.1.108
    description: Ansible Tower Private IP

resources:
  webserver:
    type: OS::Nova::Server
    properties:
      name: { get_param: server_name }
      image: { get_param: image }
      flavor: { get_param: flavor }
      key_name: { get_param: key_name }
      networks:
        - port: { get_resource: server_port }
      user_data_format: RAW
      user_data:
        str_replace:
          template: |
            #!/bin/bash -v
            curl -k --data "host_config_key=5d77be952e6eb0b7509c8c26ebff785d" https://tower_ip:443/api/v1/job_templates/15/callback/
          params:
            tower_ip: { get_param: tower_private_ip }

  server_port:
    type: OS::Neutron::Port
    properties:
      network_id: { get_param: private_net_id }
      fixed_ips:
        - subnet_id: { get_param: private_subnet_id }
      security_groups:
        - all

  server_floating_ip:
    type: OS::Neutron::FloatingIP
    properties:
      floating_network_id: { get_param: public_net_id }
      port_id: { get_resource: server_port }

outputs:
  server_private_ip:
    description: IP address of server on private network
    value: { get_attr: [ webserver, first_address ] }
Note: you need to replace the curl command with the callback URL and host config key from your environment.
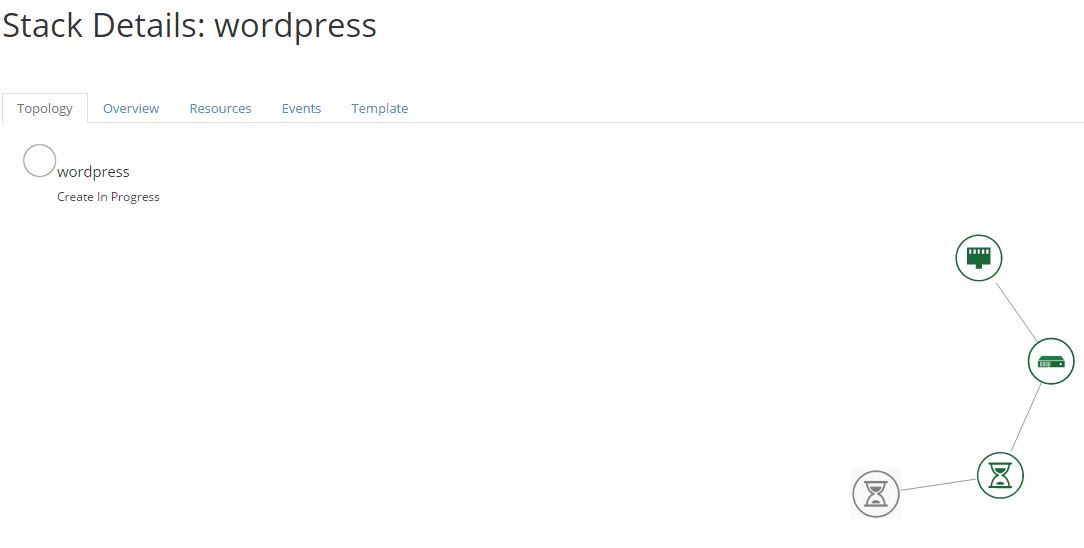
- Deploy WordPress application by running Heat template.
The Heat template will deploy instance and required infrastructure, install firewalld and call Ansible Tower via API callback. You will need to provide at minimum server_name and tower_private_ip as input parameters. Feel free to parameterize things to your heats content.
# heat stack-create wordpress -f centos-wordpress.yaml -P "server_name=wordpress"-P "tower_private_ip=10.10.1.108"
Note: you need to get private IP for the Ansible Tower host.
Adding Heat WaitCondition
At this point we have separated infrastructure from application blueprints and yet still have the capability to perform end-to-end deployment through Heat. One thing that is missing however, is a way to notify Heat that Ansible Tower completed with either a success or failure. Heat provides a resource type called WaitCondition for this exact purpose. The WaitCondition resource will cause the Heat stack to wait until further notified or timeout. A status of success or failure can also be sent back using JSON format.
'{"status": "SUCCESS|FAILURE"}'
The WaitCondition resource type generates an endpoint URL and authorization token as output. Below the original Heat template has been modified to add the WaitCondition resource type and send required parameters to Ansible Tower.
[OpenStack]
# vi /root/centos-wordpress-heat.yaml
heat_template_version: 2013-05-23
description: CentOS WordPress All-In-One deployed using Ansible Tower
parameters:
  server_name:
    type: string
    description: Name of server
  image:
    type: string
    description: Image used for servers
    default: CentOS_7
  key_name:
    type: string
    description: SSH key to connect to the servers
    default: admin
  flavor:
    type: string
    description: flavor used by the web servers
    default: m2.tiny
  private_net_id:
    type: string
    default: 431aa0f5-2790-403b-84e0-7cb88b836782
    description: Id of the private network for the compute server
  private_subnet_id:
    type: string
    default: d7b6fb94-f083-4347-a75a-8025c06b5a31
    description: Id of the private sub network for the compute server
  public_net_id:
    type: string
    default: c55f71f6-5b6c-4c1a-a56e-8420a8652f50
    description: Id of the public network for the compute server
  tower_private_ip:
    type: string
    default: 10.10.1.108
    description: Ansible Tower Private IP

resources:
  wait_condition:
    type: OS::Heat::WaitCondition
    properties:
      handle: { get_resource: wait_handle }
      count: 1
      timeout: 1200

  wait_handle:
    type: OS::Heat::WaitConditionHandle

  webserver:
    type: OS::Nova::Server
    properties:
      name: { get_param: server_name }
      image: { get_param: image }
      flavor: { get_param: flavor }
      key_name: { get_param: key_name }
      networks:
        - port: { get_resource: server_port }
      user_data_format: RAW
      user_data:
        str_replace:
          template: |
            #!/bin/bash -v
            curl -f -k -H 'Content-Type: application/json' -XPOST -d '{"host_config_key": "8217c0a711b3af173be033aab12534f0", "extra_vars": {"HEAT_ENDPOINT": "wait_endpoint","HEAT_TOKEN": "wait_token"}}' https://tower_ip:443/api/v1/job_templates/7/callback/
          params:
            tower_ip: { get_param: tower_private_ip }
            wc_notify: { get_attr: ['wait_handle', 'curl_cli'] }
            wait_endpoint: { get_attr: [ wait_handle, endpoint ] }
            wait_token: { get_attr: [ wait_handle, token ] }

  server_port:
    type: OS::Neutron::Port
    properties:
      network_id: { get_param: private_net_id }
      fixed_ips:
        - subnet_id: { get_param: private_subnet_id }
      security_groups:
        - all

  server_floating_ip:
    type: OS::Neutron::FloatingIP
    properties:
      floating_network_id: { get_param: public_net_id }
      port_id: { get_resource: server_port }

outputs:
  server_private_ip:
    description: IP address of server on private network
    value: { get_attr: [ webserver, first_address ] }
  curl_cli:
    value: { get_attr: ['wait_handle', 'curl_cli'] }
  wait_endpoint:
    value: { get_attr: ['wait_handle', 'endpoint'] }
  wait_token:
    value: { get_attr: ['wait_handle', 'token'] }
  wc_data:
    value: { get_attr: ['wait_condition', 'data'] }
In order to notify Heat when Ansible playbook has completed two things are required. First handle the incoming parameters and second, using a role, send notification to Heat.
There are several ways to handle parameters in Ansible, for this example I chose to set them globally by adding following to playbook:
vars:heat_endpoint: "" heat_token: ""
Using roles in Ansible allows for greater re-usability, roles can be re-used in many playbooks. Below is the new role to support sending notification to Heat.
---
- block:
  - name: curl post to Heat
     uri:
       url: ""
       method: POST
       HEADER_X-Auth-Token: ""
       HEADER_Content-Type: "application/json"
       HEADER_Accept: "application/json"
       body: '{"status": "SUCCESS"}'
       force_basic_auth: yes
       status_code: 200
       body_format: json
  rescue:
  - name: curl post to Heat to notify of failure
     uri:
       url: ""
       method: POST
       HEADER_X-Auth-Token: ""
       HEADER_Content-Type: "application/json"
       HEADER_Accept: "application/json"
       body: '{"status": "FAILURE"}'
       force_basic_auth: yes
       status_code: 200
       body_format: json
In order to take action upon failures within playbook I chose to use blocks. These are basically like try/catch statements. This is critical so that if any tasks within the playbook fail, Heat is notified immediately and shows stack as being failed. In block statement we define what is supposed to happen normally. In rescue statement we define what should happen in case of failure.
Looking at the MariaDB role we see how the rescue block is used to send Heat a message if anything fails. This is implemented in all roles where tasks are executed.
---
# This playbook will install MariaDB and create db user and give permissions.

- block:
  - name: Install MariaDB package
    yum: name= state=installed
    with_items:
      - mariadb-server
      - MySQL-python
      - libselinux-python
      - libsemanage-python

  - name: Install firewalld
    yum: name= state=installed
    with_items:
      - firewalld

  - name: Enable firewalld
    service: name=firewalld state=started enabled=yes

  - name: Configure SELinux to start mysql on any port
    seboolean: name=mysql_connect_any state=true persistent=yes

  - name: Create Mysql configuration file
    template: src=my.cnf.j2 dest=/etc/my.cnf
    notify:
    - restart mariadb

  - name: Create MariaDB log file
    file: path=/var/log/mysqld.log state=touch owner=mysql group=mysql mode=0775

  - name: Start MariaDB Service
    service: name=mariadb state=started enabled=yes

  - name: insert firewalld rule
    firewalld: port=/tcp permanent=true state=enabled immediate=yes
  rescue:
  - name: curl post to Heat to notify of failure
    uri:
      url: ""
      method: POST
      HEADER_X-Auth-Token: ""
      HEADER_Content-Type: "application/json"
      HEADER_Accept: "application/json"
      body: '{"status": "FAILURE"}'
      force_basic_auth: yes
      status_code: 200
      body_format: json
In order to use the Ansible playbook that supports Heat WaitCondition simply change the wordpress job template you created above to use "wordpress-nginx_rhel7_heat" from ansible-examples.

The following behavior should be observed when executing the centos-wordpress-heat.yaml stack.
# heat stack-create wordpress -f centos-wordpress-heat.yaml -P "server_name=wordpress"-P "tower_private_ip=10.10.1.108"
Heat will not complete after the instance is launched but rather wait, for input from Ansible Tower.
Once playbook is started the heat endpoint and authorization token will show up as extra variables.
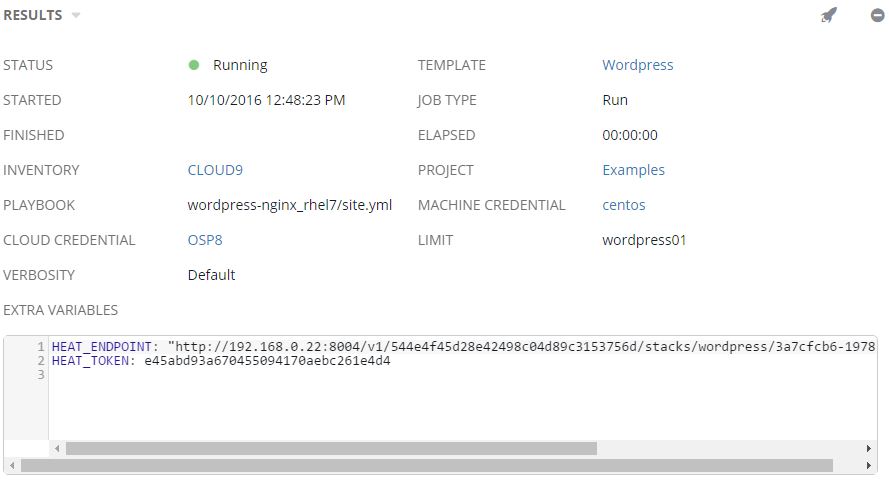
After the playbook completes Heat will be notified. In this case things completed successfully

Summary
In this article we have discussed how OpenStack Heat and Ansible provide a powerful combination for cloud orchestration. We have also discussed some of the advantages Ansible Tower provides, allowing not only central API integration through callbacks but needed orchestration extensibility, security, management, visibility and role separation. Both OpenStack and Ansible were born in the cloud. Together they provide end-to-end cloud automation and orchestration for traditional as well as cloud-native applications. I am really interested in your feedback and thoughts on this topic so please share? Hopefully you found this article useful.
Happy orchestrating everything with Ansible Tower in the OpenStack cloud!
(c) 2016 Keith Tenzer