
RHV 4.1 Lab Installation and Configuration Guide

Overview
In this article we will setup a Red Hat Enterprise Virtualization (RHV) environment. RHV is based on upstream opensource projects KVM and Ovirt. RHV is composed of Red Hat Enterprise Linux (RHEL which includes KVM) and Red Hat Enterprise Virtualization Management (RHV-M), based on Ovirt. As of this article the latest version is RHV 4.1.
RHV has of late become very interesting to customers looking for alternatives to VMware. Below are a few reasons why you should be interested in RHV:
- 100% opensource no proprietary code and no proprietary licencing.
- Best Hypervisor for running Red Hat Enterprise Linux (RHEL).
- Integrated and built with RHEL, uses SELinux to secure Hypervisor.
- RHV leads VMware in SPECvirt performance and price per performance (last results 2013).
- RHV scales vertically and performs extremely well on 4 or even 8 socket servers.
- All features are included in RHV subscription, no licensing for extra capabilities.
- KVM is future proof and is the defacto standard for OpenStack and modern virtualizations platforms.
Preparation
In this configuration I am using two physical servers. Each has a dual-core CPU and 16GB RAM. Specifically I am using two Intel NUCs which make a great, portable lab environments. In my environment I named the Hypervisor hosts rhevh01.lab and rhevh02.lab.
[RHEVH01 and RHEVH02]
Install RHEL 7.3 on both nodes.
Enable subscription and configure repositories.
# subscription-manager register
# subscription-manager list --available
# subscription-manager attach --pool=
# subscription-manager repos --disable=*
# subscription-manager repos --enable=rhel-7-server-rpms \
--enable=rhel-7-server-rhv-4.1-mgmt-agent-rpms
Disable firewalld and NetworkManager
# systemctl stop firewalld
# systemctl disable firewalld
# systemctl stop NetworkManager
#systemctl disable NetworkManager
Update.
#yum update -y
#systemctl reboot
Configure NFS.
RHV requires shared storage in order to cluster Hypervisors. In this case we will expose the local storage of both nodes as NFS shares.
# yum install nfs-utils rpcbind
# systemctl enable rpcbind
# systemctl enable nfs-server
# systemctl start rpcbind
# systemctl start nfs-server
Configure and export NFS share.
# mkdir /usr/share/rhev
# chown -R 36:36 /usr/share/rhev
# chmod -R 0755 /usr/share/rhev
# vi /etc/exports
/usr/share/rhev 192.168.2.0/24(rw)
# exportfs -a
RHV Installation
There are two different installations approaches for the hypervisor and management. RHV as mentioned earlier consists of the Hypervisor host(s) (RHEL + KVM) and a system running the management software (RHV-M).
Hypervisor Options
- Use RHEL
- Use RHEV-H (Based on RHEL but designed to run as a Hypervisor, only software required for running Hypervisor installed)
RHV-M Options
- Install RHV-M on separate VM or physical server.
- Use Hosted-engine which deploys RHV-M on the actual RHV cluster. In this example we will choose hosted-engine and this is my personal preference because RHV-M automatically gets all the capabilities and benefits of running on RHV, such as HA.
Install hosted engine
[RHEVH01]
Install hosted-engine software and dependencies.
[root@rhevh01 ~]# yum install -y ovirt-hosted-engine-setup
[root@rhevh01 ~]# yum install -y rhevm-appliance
Install screen for using with setup.
# yum -y install screen
Start screen session.
This is used in event you have network connection issue during setup.
# screen
Deploy hosted-engine on hypervisor host.
# hosted-engine --deploy
Select nfs3 for storage and configure OVF using cloud-init
[ INFO ] Stage: Setup validation
--== CONFIGURATION PREVIEW ==--
Bridge interface : eno1
Engine FQDN : rhevm.lab
Bridge name : ovirtmgmt
Host address : rhevh01.lab
SSH daemon port : 22
Firewall manager : iptables
Gateway address : 192.168.0.1
Host name for web application : hosted_engine_1
Storage Domain type : nfs3
Host ID : 1
Image size GB : 50
Storage connection : 192.168.0.21:/usr/share/rhev
Console type : vnc
Memory size MB : 4096
MAC address : 00:16:3e:3c:79:9b
Boot type : disk
Number of CPUs : 2
OVF archive (for disk boot) : /usr/share/ovirt-engine-appliance/rhevm-appliance-4.0.20170307.0-1.el7ev.ova
Appliance version : 4.0.20170307.0-1.el7ev
Restart engine VM after engine-setup: True
CPU Type : model_Haswell-noTSX
Please confirm installation settings (Yes, No)[Yes]:
Note: If deployment fails it may be because of conflict in version of ebtables.
Check if you have ebtables version > 2.0.10-13 (optional).
qpm -qa | grep ebtables
# yum downgrade ebtables-2.0.10-13.el7.x86_64
Configure RHV cluster in RHV-M
Once we have installed the hosted-engine we can complete the setup and configure both nodes in a RHV cluster.
[RHV-M Console]
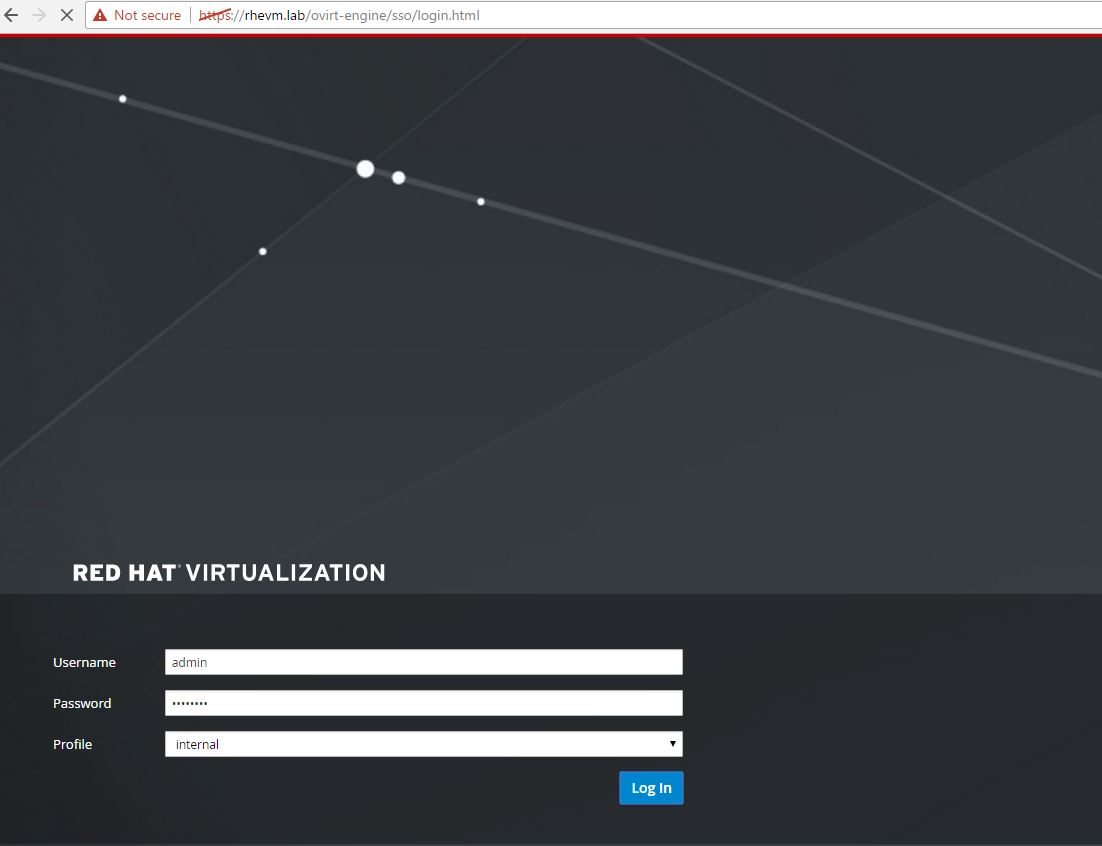
Connect to RHV-M management console.
Note: The hostname of RHV-M not IP needs to be used to access the management console.
http://rhevm.lab/ovirt-engine
Select Datacenter->Hosts->New.
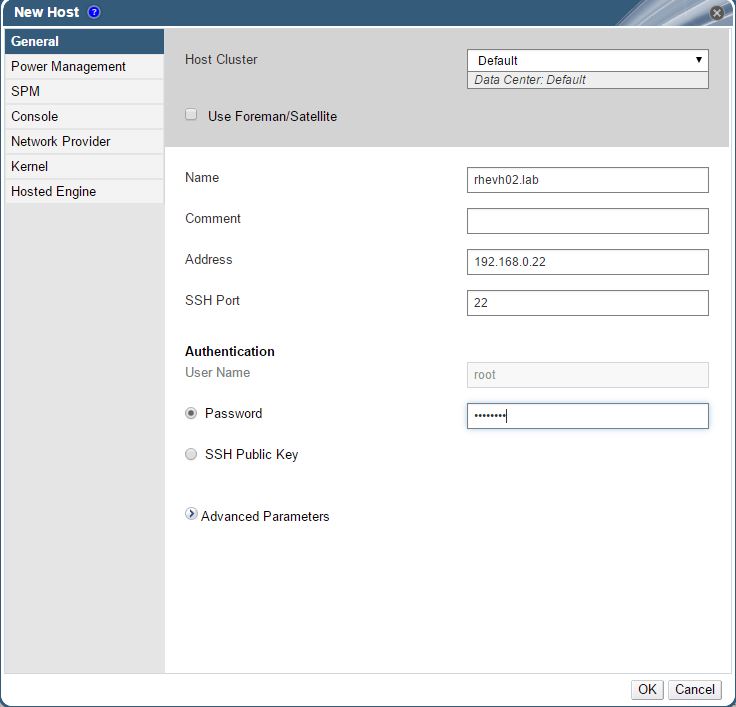
RHV-M will configure the second node and bring it into the cluster.

Add iptables rules to allow NFS.
This is specific to this setup as we are cheap and lazy. We are using local disks on Hypervisor hosts for storage.
[RHEVH01 and RHEVH02]
# vi /etc/sysconcfig/iptables

#NFS
 -A INPUT -p tcp -m tcp --dport 2049 -j ACCEPT
 -A INPUT -p tcp -m tcp --dport 32803 -j ACCEPT
 -A INPUT -p tcp -m tcp --dport 32769 -j ACCEPT
 -A INPUT -p tcp -m tcp --dport 892 -j ACCEPT
 -A INPUT -p udp -m udp --dport 892 -j ACCEPT
 -A INPUT -p tcp -m tcp --dport 875 -j ACCEPT
 -A INPUT -p udp -m udp --dport 875 -j ACCEPT
 -A INPUT -p udp -m udp --dport 662 -j ACCEPT
 -A INPUT -p udp -m udp --dport 662 -j ACCEPT
Restart iptables.
# systemctl restart iptables
Configure Storage Domains
RHV has three types of storage domains: Data, ISO and Export.
- Data are for VM disks.
- ISOs are what they say, for storing ISO images.
- Export is for OVA or virtual machine templates.
Storage domain's also play key roll in clustering and are used as quorum. One data storage domain will be the master.
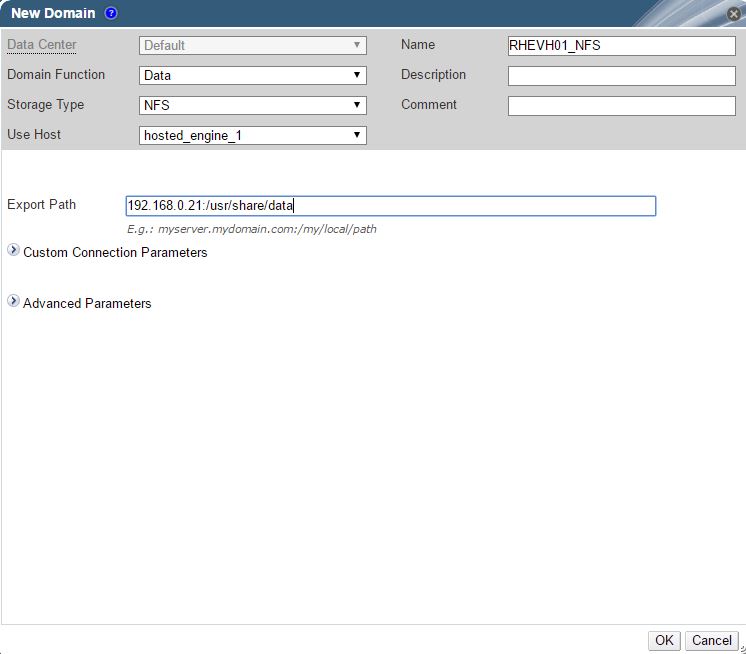
Add Data Storage Domain from RHEVH01.
Select Datacenter->Storage->New


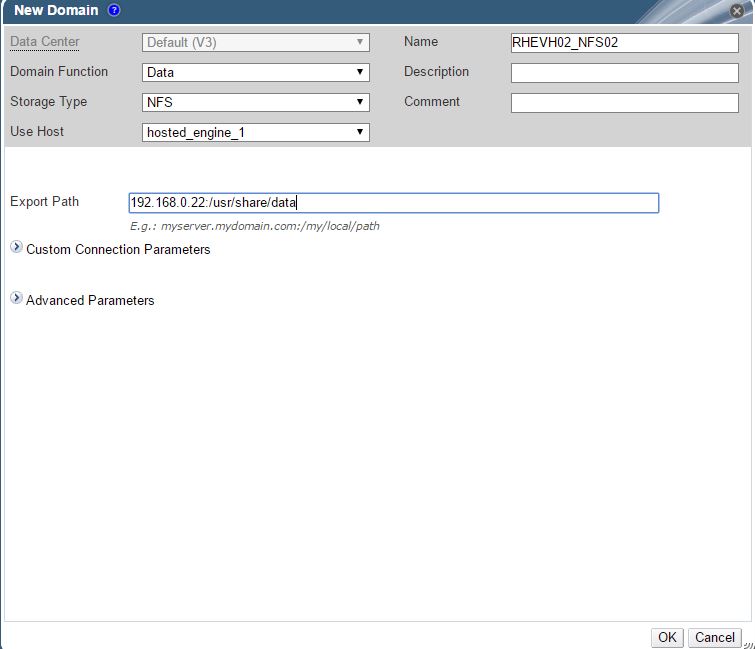
Add Data Storage Domain from RHEVH02.
Select Datacenter->Storage->New
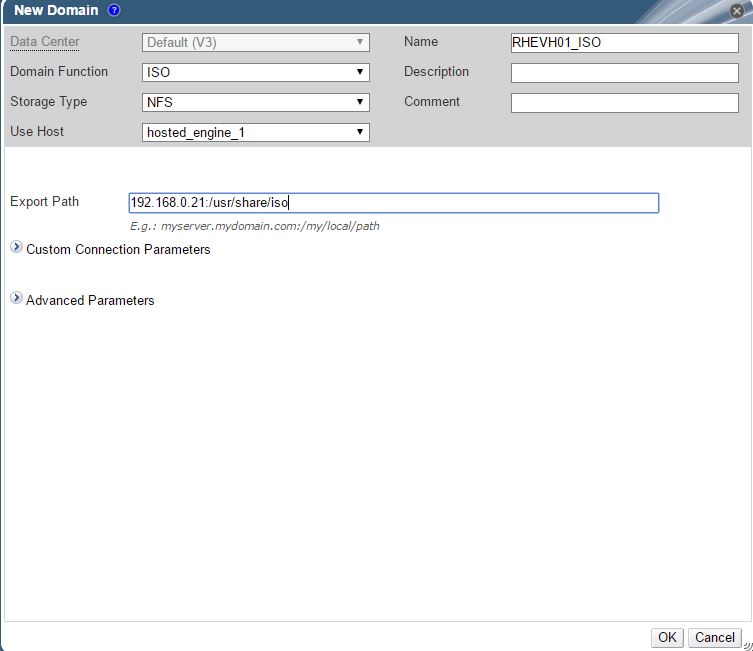
Add ISO Storage Domain from RHEVH01.
Select Datacenter->Storage->New
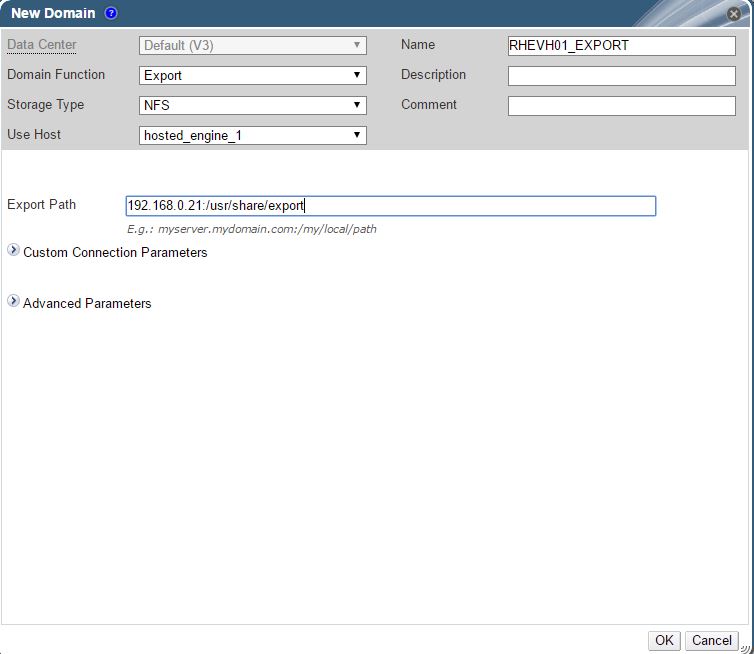
Add Export Storage Domain from RHEVH01.
Select Datacenter->Storage->New
If everything worked you should see all the storage domains available.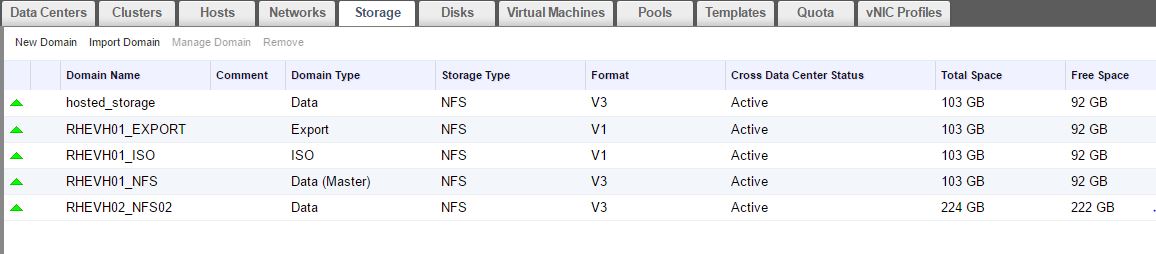
Troubleshooting
You should never do any of this on a production system! Always work with RH Support. Ok now that we cleared that up lets get into the bowels of RHV.
RHV-M stores state in it's database. It is possible and sometimes needed to access database to cleanup state, especially if you are like me and do something stupid, in this case destroy filesystems housing your RHV storage domains.
As such I have documented how to handle cleaning up any stale storage connections and even how to delete storage domains themselves manually from within database.
[RHV-M Host]
Connect to RHV-M Database.
# source /etc/ovirt-engine/engine.conf.d/10-setup-database.conf
# export PGPASSWORD=${ENGINE_DB_PASSWORD}
# psql -h localhost -U $ENGINE_DB_USER
Show list of storage connections.
engine=> select id, connection from storage_server_connections;
 id | connection
 --------------------------------------+------------------------------
 02953919-feb8-49a5-812f-5d6459984ba3 | 192.168.0.21:/usr/share/data
 59037cc9-e0d0-446c-b38c-7e74ed2081cc | 192.168.0.21:/usr/share/rhev
 ee0d0921-338b-4ada-9bc9-28dc8978299d | 192.168.0.22:/usr/share/data
 (3 rows)
Delete a storage connection.
engine=> DELETE from storage_server_connections where id='ee0d0921-338b-4ada-9bc9-28dc8978299d';
 DELETE 1
Cleaning up storage domains.
Storage domains all have a connection listed in the storage_server_connections table. In addition they also exist in storage_domain_static and storage_domain_dynamic tables.
List storage connections.
engine=> select id, connection from storage_server_connections;
 id | connection
 --------------------------------------+--------------------------------
 02953919-feb8-49a5-812f-5d6459984ba3 | 192.168.0.21:/usr/share/data
 59037cc9-e0d0-446c-b38c-7e74ed2081cc | 192.168.0.21:/usr/share/rhev
 4e1f2603-66cf-4b68-b7db-7aadd74d50e7 | 192.168.0.22:/usr/share/data
 e38d9d3b-26c2-4c5e-96c6-6ee06a2fb4a6 | 192.168.0.21:/usr/share/iso
 6ad3e7ca-305d-44ab-9765-b5c72162def3 | 192.168.0.21:/usr/share/export
 (5 rows)
Show storage domain ids.
engine=> select id, storage from storage_domain_static;
 id | storage
 --------------------------------------+--------------------------------------
 a4ba370b-4f28-414e-9620-960bff62fce5 | 02953919-feb8-49a5-812f-5d6459984ba3
 0e142f0b-e934-4b3c-b6ad-8c53b574e303 | 59037cc9-e0d0-446c-b38c-7e74ed2081cc
 d5ed7709-896a-4c33-b758-09ca957844b4 | ee0d0921-338b-4ada-9bc9-28dc8978299d
 788f3e56-a11d-4665-b851-50c95ebee5c5 | b7f4fee9-1bb9-414c-8cfa-3b9cbd95578b
 c3e101f0-ada3-465d-9411-c04e13d7749f | cc5d9f30-5eba-4a24-9212-11c8dff6248b
 7887943f-8860-4079-9679-4530bd525948 | 4e1f2603-66cf-4b68-b7db-7aadd74d50e7
 231d4b20-bc8a-41c7-9e58-226ce4aa26fa | e38d9d3b-26c2-4c5e-96c6-6ee06a2fb4a6
 30621071-3dba-401d-9605-02a914b4069a | 6ad3e7ca-305d-44ab-9765-b5c72162def3
 (8 rows)
Delete Storage Domains from dynamic table using id.
engine=> delete from storage_domain_dynamic where id = 'd5ed7709-896a-4c33-b758-09ca957844b4';
DELETE 1
engine=> delete from storage_domain_dynamic where id = '788f3e56-a11d-4665-b851-50c95ebee5c5';
DELETE 1
engine=> delete from storage_domain_dynamic where id = 'c3e101f0-ada3-465d-9411-c04e13d7749f';
DELETE 1
engine=> delete from storage_domain_dynamic where id = '7887943f-8860-4079-9679-4530bd525948';
DELETE 1
Delete Storage Domains from statictable using id.
engine=> delete from storage_domain_static where id = 'd5ed7709-896a-4c33-b758-09ca957844b4';
 DELETE 1
 engine=> delete from storage_domain_static where id = '788f3e56-a11d-4665-b851-50c95ebee5c5';
 DELETE 1
 engine=> delete from storage_domain_static where id = 'c3e101f0-ada3-465d-9411-c04e13d7749f';
 DELETE 1
 engine=> delete from storage_domain_static where id = '7887943f-8860-4079-9679-4530bd525948';
 DELETE 1
Show storage domains.
engine=> select id, storage from storage_domain_static;
 id | storage
 --------------------------------------+--------------------------------------
 a4ba370b-4f28-414e-9620-960bff62fce5 | 02953919-feb8-49a5-812f-5d6459984ba3
 0e142f0b-e934-4b3c-b6ad-8c53b574e303 | 59037cc9-e0d0-446c-b38c-7e74ed2081cc
 231d4b20-bc8a-41c7-9e58-226ce4aa26fa | e38d9d3b-26c2-4c5e-96c6-6ee06a2fb4a6
 30621071-3dba-401d-9605-02a914b4069a | 6ad3e7ca-305d-44ab-9765-b5c72162def3
 (4 rows)
Summary
In this article we discussed some of the advantages of Red Hat Enterprise Virtualization (RHV). We went through steps to build a basic lab environment. Showed how to configure RHV cluster and add storage domains. Finally we looked at some troubleshooting steps using RHV database. Hopefully you found this article informative. Feedback always appreciated!
Happy RHVing!
(c) 2017 Keith Tenzer